


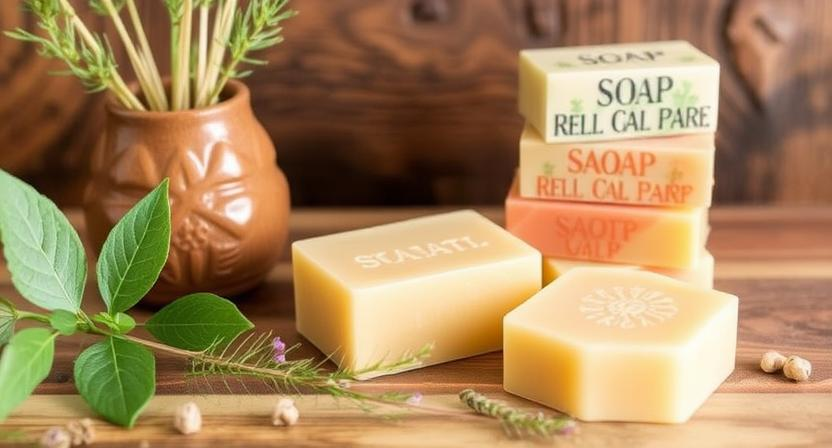
Making Your Own Natural Soaps: Recipes and Tips
Ingredients Needed for Making Natural Soaps
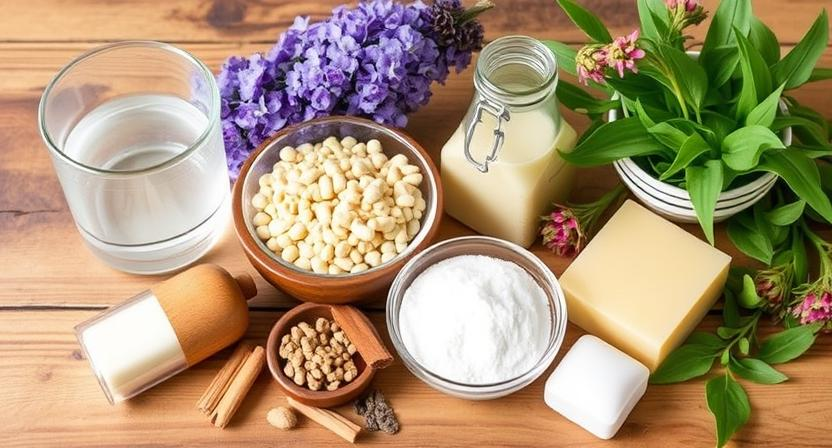
One of the key aspects of making natural soaps is choosing the right ingredients that are gentle on the skin and environmentally friendly. Essential oils such as lavender, peppermint, and tea tree oil not only provide a pleasant scent but also offer various skincare benefits. Additionally, base oils like coconut, olive, and shea butter are commonly used to create a moisturizing and nourishing soap base.
Incorporating natural colorants like turmeric, spirulina, and clay can add vibrancy to your soaps without the use of artificial dyes. These natural ingredients not only bring aesthetic appeal to your creations but also contribute to the overall natural and eco-friendly aspect of your soaps. Experimenting with different combinations of ingredients can lead to unique and personalized soap formulations that cater to individual preferences and skin needs.
• Essential oils such as lavender, peppermint, and tea tree oil
• Base oils like coconut, olive, and shea butter
• Natural colorants like turmeric, spirulina, and clay
By carefully selecting these ingredients and experimenting with various combinations, soap makers can create high-quality natural soaps that are both effective and environmentally conscious. Whether you’re looking to make soaps for personal use or as gifts for loved ones, having a good understanding of these key ingredients is essential in producing top-notch products. With the right ingredients at your disposal, the possibilities for creating unique and luxurious natural soaps are endless.
Benefits of Using Natural Ingredients in Soaps
Using natural ingredients in your soap offers a plethora of benefits for both your skin and the environment. Natural ingredients such as olive oil, coconut oil, and shea butter help to nourish and moisturize the skin without causing irritation or dryness. These ingredients are rich in vitamins, minerals, and antioxidants that promote healthy skin and can help alleviate issues such as eczema and acne.
In addition to being gentle on the skin, natural soaps are also environmentally friendly. By using ingredients that are sustainably sourced and biodegradable, you can reduce your carbon footprint and minimize the amount of harmful chemicals entering our waterways. Making the switch to natural soaps not only benefits your skin but also contributes to a cleaner and greener planet for future generations.
• Natural ingredients like olive oil, coconut oil, and shea butter nourish and moisturize the skin
• Rich in vitamins, minerals, and antioxidants that promote healthy skin
• Can help alleviate issues such as eczema and acne
• Environmentally friendly due to sustainably sourced and biodegradable ingredients
• Reduces carbon footprint and minimizes harmful chemicals entering waterways
• Contributes to a cleaner and greener planet for future generations
Essential Oils for Scenting Your Soaps
When it comes to scenting your homemade soaps with essential oils, there is a vast array of options to choose from. Essential oils not only provide a pleasant aroma to your soaps but also offer various benefits for the skin and overall well-being. Popular essential oils for soap making include lavender, tea tree, peppermint, and citrus oils, each adding a unique touch to your creations. Experimenting with different essential oil combinations can help you create custom scents that cater to your preferences.
It is essential to research the properties and potential skin sensitivities of each essential oil before incorporating them into your soap recipes. Some essential oils may be more suitable for certain skin types or conditions, so understanding their effects can help you tailor your soaps to specific needs. Additionally, using high-quality, pure essential oils will ensure that your soaps retain their fragrances and therapeutic benefits over time.
• Lavender, tea tree, peppermint, and citrus oils are popular choices for scenting homemade soaps
• Experimenting with different essential oil combinations can create unique scents
• Research the properties and potential skin sensitivities of each essential oil before use
• Tailor your soap recipes to specific skin types or conditions by understanding the effects of different essential oils
• Use high-quality, pure essential oils to ensure long-lasting fragrances and therapeutic benefits
Choosing the Right Base Oils for Soap Making
When it comes to creating your own homemade soaps, selecting the right base oils is crucial in achieving the desired characteristics for your soap. Each type of base oil brings its unique properties, such as hardness, lather, moisturizing abilities, and more. Commonly used base oils include coconut oil, olive oil, palm oil, and castor oil.
Coconut oil is known for producing a bubbly lather and adding hardness to soap, while olive oil contributes to a creamy lather and moisturizing properties. Palm oil helps create a stable lather and hardness in soap bars, and castor oil boosts lather and acts as a humectant. Depending on your preferences and skin type, you can experiment with different combinations and ratios of these base oils to tailor your soap recipe to suit your needs.
• Coconut oil is great for bubbly lather and hardness
• Olive oil provides a creamy lather and moisturizing properties
• Palm oil contributes to stable lather and hardness in soap bars
• Castor oil boosts lather and acts as a humectant
Experimenting with these base oils can help you create the perfect soap recipe that suits your skin type and desired characteristics. Whether you want a luxurious, moisturizing bar or a bubbly, cleansing one, choosing the right combination of base oils is essential in soap making. Remember to consider factors such as scent, color, texture, and overall feel when selecting your base oils to ensure that your homemade soaps turn out just the way you want them.
Colorants for Adding Vibrancy to Your Soaps
Adding colorants to your homemade soaps can elevate their visual appeal, making them not only cleansing but also aesthetically pleasing. Natural colorants like clays, botanical powders, and spices offer a safe and eco-friendly way to add vibrancy to your soap creations. These colorants not only tint your soaps but also bring additional skin-loving properties to the final product.
When selecting colorants for your soaps, consider experimenting with different shades and combinations to achieve unique and eye-catching results. Micas and oxides are popular synthetic colorants that provide a wide range of colors for you to play with. Remember to mix your colorants thoroughly into the soap mixture to ensure even distribution and vibrant hues in the finished bars.
• Natural colorants like clays, botanical powders, and spices offer a safe and eco-friendly option
• These colorants not only tint the soaps but also bring additional skin-loving properties
• Experiment with different shades and combinations for unique results
• Micas and oxides are popular synthetic colorants that provide a wide range of colors to play with
• Mix colorants thoroughly into the soap mixture for even distribution
Tools Required for Making Homemade Soaps
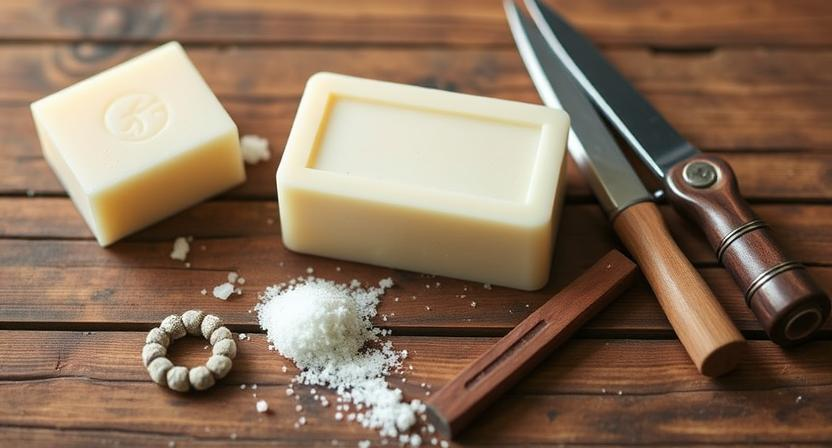
When it comes to making homemade soaps, having the right tools is essential to ensure a successful crafting process. Some of the basic tools you will need include a digital scale for accurately measuring ingredients, heat-resistant containers for melting oils and mixing lye solution, a thermometer to monitor temperatures during the soap-making process, and a stick blender for blending the oils and lye together to reach trace. Additionally, having molds to shape and pour your soap mixture, gloves and safety goggles for protection when handling lye, and a workspace that is well-ventilated are all important considerations to keep in mind.
In addition to the basic tools, other helpful items to have on hand include measuring spoons for smaller quantities of ingredients, spatulas for scraping out every last bit of soap mixture from your containers, a plastic covering to insulate your soap molds during the curing process, and a dedicated workspace where you can comfortably work without interruptions. By having these tools readily available, you can streamline the soap-making process and create beautiful homemade soaps with ease.
• Digital scale for accurately measuring ingredients
• Heat-resistant containers for melting oils and mixing lye solution
• Thermometer to monitor temperatures during the soap-making process
• Stick blender for blending oils and lye together to reach trace
• Molds to shape and pour soap mixture
• Gloves and safety goggles for protection when handling lye
• Well-ventilated workspace
Additional helpful items:
• Measuring spoons for smaller quantities of ingredients
• Spatulas for scraping out every last bit of soap mixture from containers
• Plastic covering to insulate soap molds during curing process
• Dedicated workspace without interruptions
Safety Precautions to Follow When Making Soaps
Always prioritize safety when making your own soaps at home. Ensure that your workspace is well-ventilated to avoid inhaling fumes from lye or other chemicals. It is crucial to wear protective gear such as gloves, goggles, and long sleeves to prevent any accidental spills or splashes from coming into contact with your skin or eyes.
Keep all soap-making ingredients and equipment out of reach of children and pets to prevent any accidents or ingestion of harmful substances. When working with lye, always add it to water slowly and carefully, never the other way around, as it can cause a violent reaction. Be mindful of the temperature of your ingredients and surroundings, as hot oils and lye solutions can cause serious burns if not handled with caution. Always follow the recommended safety guidelines and procedures to ensure a safe and enjoyable soap-making experience.
• Ensure that your workspace is well-ventilated
• Wear protective gear such as gloves, goggles, and long sleeves
• Keep all soap-making ingredients and equipment out of reach of children and pets
• Add lye to water slowly and carefully, never the other way around
• Be mindful of the temperature of your ingredients and surroundings
Step-by-Step Guide to Making Cold Process Soaps
For beginners looking to delve into the world of soap making, mastering the art of cold process soaps can be a rewarding experience. The first step in this process involves carefully weighing out the water and caustic soda, followed by slowly mixing them together to create a lye solution. It is crucial to handle the caustic soda with care and wear protective gear such as gloves and goggles to avoid any accidents.
Once the lye solution is prepared, the next step is to heat the base oils until they are fully melted. These oils will serve as the foundation of your soap and can be chosen based on their unique properties and benefits for the skin. Once the oils are heated and mixed together, the lye solution is carefully poured into the oils while continuously stirring to ensure a thorough blend. This mixture will then need to be stirred until it reaches the desired consistency known as “trace,” where the soap batter leaves a trail when drizzled back onto itself.
• Carefully weigh out the water and caustic soda
• Mix them together to create a lye solution
• Handle caustic soda with care and wear protective gear
• Heat base oils until fully melted
• Choose oils based on their benefits for the skin
• Pour lye solution into oils while stirring continuously
• Stir mixture until it reaches “trace” consistency
Tips for Successfully Curing Your Homemade Soaps
Curing homemade soaps is a crucial step in the soap-making process to ensure a long-lasting bar with a gentle lather. Once you’ve molded your soap, allow it to cure for 4-6 weeks in a cool, dry place with good airflow. This time allows the soap to harden and excess water to evaporate, resulting in a firmer, milder bar that lasts longer in the shower.
During the curing process, be patient and resist the temptation to use your soap right away. The longer you let your soap cure, the milder and longer-lasting it will be. To test if your soap is ready, give it a gentle press with your finger – if it feels firm and dry, it’s likely cured and ready for use. Remember, good things come to those who wait, and this holds true for well-cured homemade soaps as well.
• Be patient and allow your soap to cure for 4-6 weeks
• Place the soap in a cool, dry place with good airflow
• Test if the soap is ready by giving it a gentle press with your finger
• The longer you let your soap cure, the milder and longer-lasting it will be
Adding Herbs and Botanicals to Your Soaps
When it comes to enhancing the visual appeal and therapeutic properties of your homemade soaps, incorporating herbs and botanicals can be a wonderful option. Dried herbs such as lavender, chamomile, rosemary, and calendula not only add a touch of natural beauty to your soaps but also offer various skin-soothing benefits. Botanicals like rose petals, jasmine, and marigold can infuse your soaps with delightful fragrances and textures, making each bathing experience a sensory delight.
To incorporate herbs and botanicals into your soap recipes, you can infuse oils with these natural ingredients before adding them to your soap mixture. This process allows the oils to absorb the beneficial properties of the herbs, resulting in soaps that are not only visually appealing but also skin-nourishing. Alternatively, you can sprinkle dried herbs and botanicals directly into your soap mold before pouring in the soap batter, creating a beautifully textured and aromatic finished product.
• Infuse oils with herbs and botanicals before adding to soap mixture
• Enhances visual appeal and therapeutic properties of homemade soaps
• Dried herbs like lavender, chamomile, rosemary, and calendula offer skin-soothing benefits
• Botanicals like rose petals, jasmine, and marigold add delightful fragrances and textures to soaps
• Sprinkle dried herbs directly into soap mold for textured finished product
Creating Exfoliating Soaps with Natural Ingredients
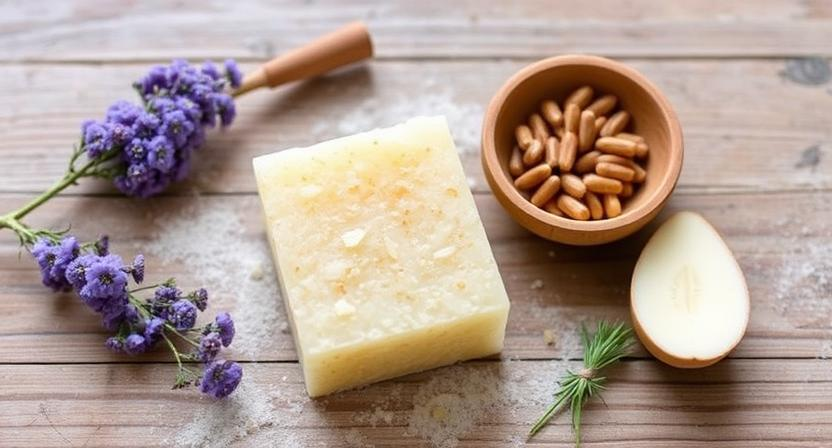
Exfoliating soaps are a great way to cleanse and rejuvenate the skin, leaving it feeling silky smooth and refreshed. By incorporating natural ingredients like ground oats, sea salt, or coffee grounds into your soap recipe, you can create a gentle yet effective scrub that helps to slough off dead skin cells and reveal a brighter complexion. These exfoliants not only provide a physical scrubbing action but also offer additional benefits like improved circulation and skin texture.
When making exfoliating soaps, it’s essential to consider the type of exfoliant you use to ensure it’s suitable for the skin on your body. For more sensitive areas like the face, you may want to opt for finer exfoliants like sugar or powdered herbs to avoid causing irritation. On the other hand, coarser exfoliants such as crushed walnut shells or pumice powder can be ideal for tougher areas like elbows or feet. Experimenting with different natural exfoliants can help you tailor your soaps to meet the specific exfoliation needs of different parts of your body for a truly customized skincare experience.
• Ground oats provide a gentle exfoliation suitable for sensitive skin
• Sea salt offers minerals that can help detoxify and rejuvenate the skin
• Coffee grounds not only exfoliate but also provide a stimulating effect for improved circulation
• Sugar is a fine exfoliant perfect for delicate areas like the face
• Crushed walnut shells or pumice powder are ideal for tougher areas like elbows and feet
Customizing Your Soap Recipes for Different Skin Types
Customizing your soap recipes for different skin types is essential to ensure that your handmade soaps cater to the specific needs of various individuals. When crafting soaps for sensitive skin, opt for gentle ingredients like oatmeal, honey, or chamomile to soothe and nourish the skin without causing irritation. For oily or acne-prone skin, consider incorporating ingredients like activated charcoal, tea tree oil, or clay to help control excess oil production and cleanse clogged pores.
On the other hand, for dry skin types, choose moisturizing oils such as avocado oil, shea butter, or coconut oil to provide the skin with hydration and nourishment. Adding ingredients like aloe vera, calendula, or lavender can also help soothe dry, flaky skin and promote overall skin health. By customizing your soap recipes based on different skin types, you can create products that are not only effective but also tailored to meet the specific skincare needs of your customers.
– For sensitive skin, use gentle ingredients like oatmeal, honey, or chamomile
– For oily or acne-prone skin, consider activated charcoal, tea tree oil, or clay
– Dry skin types benefit from moisturizing oils such as avocado oil, shea butter, or coconut oil
– Ingredients like aloe vera, calendula, or lavender can help soothe dry skin and promote overall skin health
Using Natural Additives to Enhance Your Soaps
When it comes to enhancing the quality and appeal of your homemade soaps, incorporating natural additives can make a significant difference. From botanical extracts to nutrient-rich clays, these additives not only add unique properties to your soaps but also offer various benefits for the skin. Herbs like lavender, chamomile, and calendula can impart soothing and calming effects, making them ideal choices for sensitive or irritated skin types. Additionally, clays such as French green clay or kaolin clay can help detoxify the skin and provide gentle exfoliation in your soaps.
Furthermore, natural additives like oatmeal, honey, and goat milk can also contribute to enhancing the moisturizing and nourishing qualities of your soaps. Oatmeal can offer gentle exfoliation and soothe dry, itchy skin, while honey provides antibacterial properties and helps retain moisture. Goat milk is known for its creamy lather and hydrating effects, making it a popular choice for adding a luxurious touch to handmade soaps. By incorporating these natural additives thoughtfully into your soap recipes, you can create unique products that cater to specific skin concerns and preferences.
• Botanical extracts like lavender, chamomile, and calendula offer soothing effects
• Clays such as French green clay or kaolin clay help detoxify the skin
• Oatmeal provides gentle exfoliation and soothes dry, itchy skin
• Honey offers antibacterial properties and helps retain moisture
• Goat milk adds a creamy lather and hydrating effects to soaps
Troubleshooting Common Issues in Soap Making
One common issue that soap makers may encounter is the formation of soda ash on the surface of their soap. This white, powdery substance can develop due to excess moisture exposure or improper insulation during the curing process. To prevent soda ash, ensure that your soap is properly covered and insulated while it hardens. You can also spritz the soap with rubbing alcohol before and after unmolding to help minimize the formation of soda ash.
Another issue that soap makers may face is soap seizing during the mixing process. Seizing occurs when the ingredients in the soap mixture react too quickly, resulting in a thick and unworkable texture. To prevent seizing, it’s important to work quickly and have all your ingredients measured and ready before mixing. If your soap does seize, try gently heating the mixture in a water bath to help soften it and make it easier to pour into molds.
• To prevent soda ash, ensure proper insulation and cover soap while curing
• Spritz soap with rubbing alcohol before and after unmolding to minimize soda ash formation
• Seizing can occur when ingredients react too quickly, resulting in a thick texture
• Work quickly and have all ingredients measured and ready before mixing to prevent seizing
• If soap seizes, gently heat the mixture in a water bath to soften it for easier pouring into molds
Packaging and Storing Your Homemade Soaps
Once your homemade soaps have fully cured, it’s important to consider the packaging and storing options to maintain their quality. To preserve the fragrance and texture of your soaps, opt for airtight containers or packaging that will protect them from moisture and humidity. This will prevent your soaps from becoming soggy or losing their scent over time.
When storing your homemade soaps, choose a cool, dry location away from direct sunlight. Excessive heat or light exposure can cause the ingredients in your soaps to degrade, affecting their quality and performance. By storing your soaps properly, you can ensure that they maintain their effectiveness and longevity, allowing you to enjoy them for an extended period.
• To preserve the fragrance and texture, use airtight containers or packaging
• Protect soaps from moisture and humidity to prevent sogginess
• Store homemade soaps in a cool, dry location away from direct sunlight
• Excessive heat or light exposure can degrade ingredients in the soap
• Proper storage ensures effectiveness and longevity of homemade soaps
Selling Your Natural Soaps at Farmer’s Markets and Craft Fairs
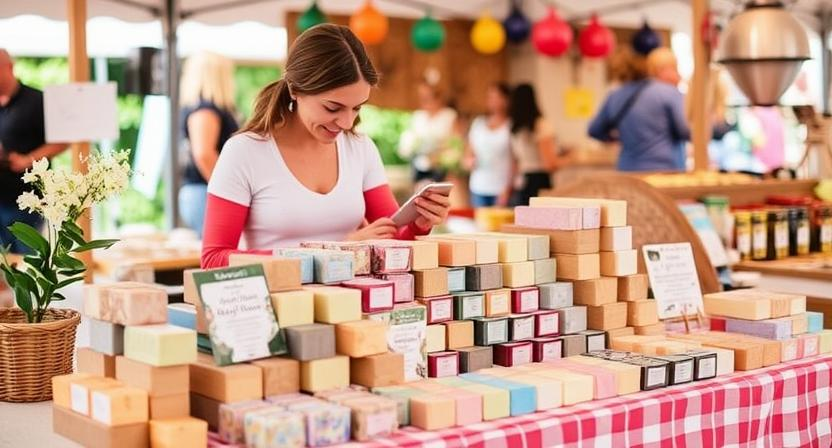
When considering selling your natural soaps at farmer’s markets and craft fairs, it’s essential to showcase your products in an appealing way. A visually attractive display can draw potential customers in, so invest time in creating an eye-catching booth that highlights the uniqueness of your handmade soaps. Using natural elements like wooden crates, burlap tablecloths, and fresh flowers can enhance the aesthetic appeal of your stall and attract the attention of passersby.
In addition to a visually compelling presentation, engaging with customers in a friendly and informative manner can greatly impact your sales. Be prepared to answer questions about the ingredients used, the benefits of natural soaps, and any special features of your products. Offering testers or samples can allow customers to experience the quality of your soaps firsthand, helping them make a purchase decision. Building rapport with potential buyers through personalized interactions can create a positive shopping experience and increase the likelihood of repeat business.
• Use natural elements like wooden crates, burlap tablecloths, and fresh flowers for a visually appealing display
• Engage with customers in a friendly and informative manner to answer questions about ingredients and benefits
• Offer testers or samples to allow customers to experience the quality of your soaps firsthand
• Build rapport with potential buyers through personalized interactions for repeat business
Environmental Benefits of Making Your Own Natural Soaps
Making your own natural soaps can have a positive impact on the environment. By using natural ingredients and avoiding harsh chemicals, you can reduce the amount of pollutants that end up in our water systems. Commercial soaps often contain synthetic detergents that can be harmful to aquatic life, whereas homemade natural soaps are biodegradable and eco-friendly.
Additionally, creating your own natural soaps allows you to minimize plastic waste. By using reusable molds and packaging your soaps in eco-friendly materials, you can cut down on single-use plastics that contribute to landfills and ocean pollution. Making the switch to homemade natural soaps not only benefits your skin but also helps protect the planet for future generations.
• Using natural ingredients reduces pollutants in water systems
• Homemade natural soaps are biodegradable and eco-friendly
• Minimizing plastic waste by using reusable molds and eco-friendly packaging
• Cutting down on single-use plastics that contribute to landfills and ocean pollution
• Switching to homemade natural soaps benefits both skin health and the environment for future generations
Sharing Your Soap Making Journey on Social Media
Sharing your soap making journey on social media is a fantastic way to connect with like-minded individuals who share your passion for creating natural soaps. By posting photos and videos of your soap making process, you can inspire others to embark on their own soap making adventures and provide valuable tips and tricks along the way. Social media platforms such as Instagram, Facebook, and Pinterest are excellent tools for showcasing your creativity and building a community of fellow soap makers.
Engaging with your followers through captions and comments allows you to share your knowledge, answer questions, and receive feedback on your soap making creations. Additionally, participating in soap making groups and online forums can further expand your reach and provide opportunities for collaboration with other enthusiasts. Sharing your experiences, successes, and even failures on social media not only documents your soap making journey but also fosters a sense of camaraderie within the soap making community.
• Posting photos and videos of your soap making process can inspire others to start their own journey
• Social media platforms like Instagram, Facebook, and Pinterest are great for showcasing creativity
• Engaging with followers through captions and comments allows for sharing knowledge and receiving feedback
• Participating in soap making groups and forums can expand reach and offer collaboration opportunities
• Sharing experiences, successes, and failures on social media fosters a sense of camaraderie within the soap making community
Connecting with Other Soap Making Enthusiasts for Inspiration
One of the best ways to stay inspired and motivated on your soap making journey is to connect with other enthusiasts in the soap making community. Sharing your experiences, learning from others, and gaining valuable tips and tricks can help you grow as a soap maker. Whether you join online forums, attend local soap making workshops, or participate in soap making groups on social media, interacting with like-minded individuals can spark creativity and passion in your craft.
By engaging with other soap making enthusiasts, you can exchange ideas, troubleshoot common issues, and celebrate successes together. Building a network of fellow soap makers can provide a sense of camaraderie and support, making your soap making experience more rewarding and enjoyable. Whether you are a beginner or a seasoned soap maker, connecting with others in the community can offer a wealth of knowledge and inspiration to enhance your soap making skills.
• Joining online forums dedicated to soap making can help you connect with a global community of enthusiasts.
• Attending local soap making workshops allows you to learn new techniques and interact with fellow soap makers in person.
• Participating in social media groups focused on soap making can provide a platform for sharing ideas, asking questions, and showcasing your creations.
• Collaborating with other soap makers on projects or challenges can push you out of your comfort zone and expand your skills.
Experimenting with Advanced Soap Making Techniques
Once you have mastered the basics of soap making, you may feel ready to explore advanced techniques to elevate your creations. Advanced soap making techniques can include intricate swirl designs, layering different colored soap batters, incorporating embeds or creating complex patterns within the soap. These techniques require patience, practice, and attention to detail to achieve professional-looking results.
Additionally, experimenting with advanced soap making techniques allows you to unleash your creativity and develop unique, one-of-a-kind soap designs. Whether you are interested in creating artisanal soaps with intricate designs or exploring new ingredients and additives to enhance your products, advanced techniques offer a world of possibilities for soap makers looking to expand their skills and create truly exceptional soaps.
• Intricate swirl designs can add a beautiful touch to your soap creations
• Layering different colored soap batters can create stunning visual effects
• Incorporating embeds such as flowers or herbs can add texture and interest to your soaps
• Creating complex patterns within the soap requires precision and attention to detail