


How to Make Beeswax Wraps for Food Storage
Materials Needed
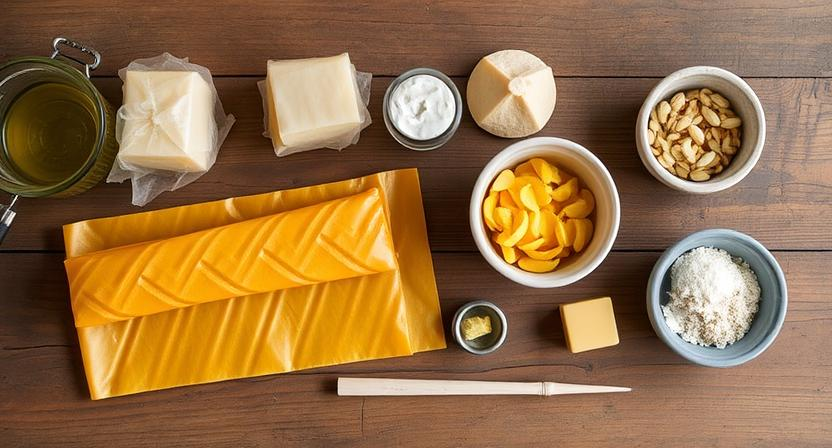
Beeswax wraps are a sustainable and eco-friendly alternative to plastic wraps, perfect for storing food and reducing waste in your kitchen. To create your own beeswax wraps, you will need a few key materials. Firstly, you will need 100% cotton fabric, preferably in various sizes to cater to different storage needs. Look for thin and lightweight fabrics that are easy to mold and shape. Beeswax pellets or grated beeswax blocks are essential for coating the fabric and creating the reusable wrap. Additionally, you will need pine resin to give the wraps a sticky texture for better adherence, as well as jojoba or coconut oil to add flexibility and prevent the wraps from becoming brittle.Optional tools include a paintbrush for applying the wax mixture, a baking sheet, and parchment paper for baking the wraps to set the wax.
• 100% cotton fabric in various sizes
• Beeswax pellets or grated beeswax blocks
• Pine resin
• Jojoba or coconut oil
• Optional: paintbrush, baking sheet, parchment paper
Choosing the Right Fabric
When selecting fabric for making beeswax wraps, it’s essential to choose materials that are breathable and have a tight weave. Natural fabrics such as organic cotton, hemp, or linen are popular choices due to their absorbency and flexibility. Avoid synthetic fabrics or those with a coating, as they may not allow the beeswax mixture to adhere properly to the cloth.
Consider the intended use of the beeswax wrap when selecting the fabric weight. Lighter fabrics are suitable for covering bowls or wrapping sandwiches, while heavier fabrics work well for items like cheese blocks or bread loaves. Additionally, opt for fabrics in colors or patterns that you enjoy, as these wraps can be a fun and eco-friendly way to add a personal touch to your kitchen storage solutions.
• Natural fabrics such as organic cotton, hemp, or linen are ideal choices for beeswax wraps
• Avoid synthetic fabrics or those with a coating that may not allow the beeswax mixture to adhere properly
• Consider the intended use of the wrap when selecting fabric weight – lighter fabrics for bowls and sandwiches, heavier fabrics for cheese blocks or bread loaves
• Choose colors or patterns that you enjoy to add a personal touch to your kitchen storage solutions
Preparing the Fabric
Before starting the process of making beeswax wraps, it is crucial to prepare the fabric properly. Begin by washing and drying the fabric to remove any dirt, oils, or residues that could interfere with the beeswax mixture adhering to the material. Make sure that the fabric is clean and completely dry before moving on to the next steps.
Once the fabric is clean and dry, you can cut it into your desired sizes for the beeswax wraps. Common sizes include small squares for wrapping snacks or large rectangles for covering bowls. Take your time to cut the fabric neatly and accurately, as this will ensure that the beeswax wraps are effective in creating a tight seal around food items. Properly preparing the fabric is essential for the success of your beeswax wraps, so pay attention to this step to achieve the best results.
• Wash and dry the fabric to remove dirt, oils, or residues
• Ensure the fabric is clean and completely dry before proceeding
• Cut the fabric into desired sizes for beeswax wraps
– Small squares for snacks
– Large rectangles for bowls
• Take time to cut fabric neatly and accurately
– Ensures effective seal around food items
Melting the Beeswax
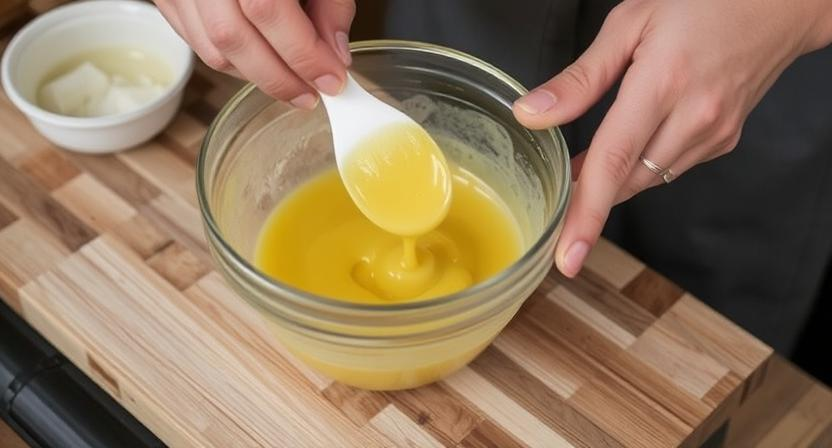
Once you have gathered the necessary beeswax, pine resin, and jojoba oil, it is time to melt the beeswax. This step is crucial in creating the perfect mixture that will make your beeswax wraps effective in preserving food.
To melt the beeswax, you can use a double boiler method by placing a heat-safe bowl over a pot of simmering water. Add the beeswax pellets to the bowl and allow them to melt slowly, stirring occasionally to ensure even melting. Alternatively, you can melt the beeswax in the microwave by placing it in a microwave-safe container and heating it in short intervals, stirring in between until it is completely melted.Once the beeswax has melted to a smooth consistency, you are ready to move on to the next step of adding the additional ingredients to create the perfect mixture for your beeswax wraps.
• Gather the necessary beeswax, pine resin, and jojoba oil
• Use a double boiler method to melt the beeswax
• Stir occasionally for even melting
• Alternatively, melt the beeswax in the microwave in short intervals
• Stir in between until completely melted
• Once melted to a smooth consistency, proceed to add additional ingredients
Adding Additional Ingredients
To enhance the functionality and durability of your homemade beeswax wraps, you can consider incorporating additional ingredients into the beeswax mixture. Some popular additives that you can include are pine resin and jojoba oil. Pine resin helps to make the wraps sticky and provides a better grip when sealing around containers or food items. Jojoba oil, on the other hand, adds flexibility to the wraps and helps keep them soft and pliable.
Another option to consider is using coconut oil in your beeswax blend. Coconut oil has antimicrobial properties, which can help prolong the freshness of the food items wrapped in the beeswax wraps. Additionally, coconut oil can contribute to a pleasant aroma in the wraps, making them even more appealing to use. Experimenting with different combinations of these additional ingredients can allow you to customize your beeswax wraps to suit your specific needs and preferences.
• Pine resin can make the wraps sticky and provide a better grip
• Jojoba oil adds flexibility and keeps the wraps soft
• Coconut oil has antimicrobial properties to prolong freshness
• Coconut oil can add a pleasant aroma to the wraps
• Experimenting with different combinations allows for customization
Applying the Beeswax Mixture
Spread the prepared beeswax mixture evenly over the fabric using a brush or spoon. Make sure to cover the entire surface, reaching the edges to ensure maximum effectiveness. The mixture will solidify quickly, so work efficiently to avoid any patchy areas on the fabric.
Once the beeswax mixture is applied, use a heat source to melt it into the fabric. You can use either an oven or a hairdryer to achieve this. The heat will help the fabric absorb the beeswax, creating a tight seal that will keep your food fresh and protected.
• Spread the prepared beeswax mixture evenly over the fabric using a brush or spoon.
• Make sure to cover the entire surface, reaching the edges to ensure maximum effectiveness.
• Work efficiently to avoid any patchy areas on the fabric.
• Use a heat source such as an oven or hairdryer to melt the beeswax into the fabric.
• The heat will help the fabric absorb the beeswax, creating a tight seal for freshness and protection.
Spreading the Beeswax Evenly
Once you have poured the beeswax mixture onto the fabric, it is important to spread it evenly. Using a paintbrush or a dedicated beeswax wrap application tool, gently spread the mixture from the center towards the edges. Make sure to cover the entire fabric surface, paying special attention to the corners and edges to prevent any areas from being missed.
By spreading the beeswax evenly, you will ensure that the fabric absorbs just the right amount for effective food storage. Avoid leaving thick clumps of beeswax in one area as this can lead to uneven coverage and potential leakage. Aim for a thin, uniform layer across the entire wrap to achieve optimal results when using your beeswax wrap for preserving food.
• Start spreading the beeswax mixture from the center towards the edges
• Use a paintbrush or dedicated beeswax wrap application tool for even distribution
• Pay special attention to corners and edges to prevent any missed areas
• Ensure thin, uniform layer for optimal results in food preservation
Baking the Wraps
Once the beeswax mixture has been evenly applied to the fabric, it’s time to bake the wraps. Preheat your oven to a low temperature, around 200 degrees Fahrenheit, and place the wraps on a baking sheet lined with parchment paper. Make sure the wraps are spread out in a single layer to ensure even melting of the beeswax.
Place the baking sheet in the oven for a few minutes, keeping a close eye on the wraps to prevent overheating. The heat from the oven will melt the beeswax, allowing it to penetrate the fabric and create a protective coating. Once the beeswax is fully melted, remove the baking sheet from the oven and let the wraps cool and set before trimming the edges for a clean finish.
• Preheat oven to 200 degrees Fahrenheit
• Place wraps on baking sheet lined with parchment paper
• Spread wraps out in a single layer for even melting
• Keep a close eye on wraps while in the oven to prevent overheating
• Remove from oven once beeswax is fully melted
• Let wraps cool and set before trimming edges for clean finish
Cooling and Setting
Once the wraps have been baked and taken out of the oven, it is important to let them cool and set properly. This process allows the beeswax mixture to harden and adhere to the fabric, creating a sturdy and reusable wrap. Placing the wraps on a flat surface will help them cool evenly and maintain their shape.
Avoid handling the wraps too soon after removing them from the oven to prevent any potential damage to the freshly applied beeswax mixture. Allowing the wraps to cool undisturbed for the recommended time will ensure that they set properly and are ready for use. Once completely cooled, the wraps can be trimmed to remove any excess fabric and achieve a clean edge for a neat finish.
• It is important to let the wraps cool and set properly after baking.
• Placing the wraps on a flat surface will help them cool evenly and maintain their shape.
• Avoid handling the wraps too soon after removing them from the oven to prevent potential damage.
• Allowing the wraps to cool undisturbed for the recommended time ensures they set properly.
• Once completely cooled, trim any excess fabric for a neat finish.
Trimming the Edges
After the beeswax wraps have been successfully baked and cooled, the next step is to trim the edges to give them a clean and tidy finish. Using sharp scissors, carefully cut along the edges of the wraps to remove any excess fabric or uneven edges. It’s important to trim the wraps neatly to ensure they look presentable and function effectively.
Trimming the edges not only enhances the appearance of the beeswax wraps but also helps prevent any loose fabric from interfering with their performance. By tidying up the edges, you can ensure that the wraps seal tightly around containers and food items, helping to keep them fresh for longer periods of time. Be sure to trim the edges evenly on all sides to maintain a uniform look across all your beeswax wraps.
• Trimming the edges of beeswax wraps is essential for a clean and tidy finish
• Use sharp scissors to carefully cut along the edges to remove excess fabric
• Neatly trimmed edges help the wraps seal tightly around containers and food items
• Tidying up the edges enhances the appearance of the beeswax wraps and prevents loose fabric interference
Testing the Wraps
To test the beeswax wraps for effectiveness, place a wrap over a bowl, dish, or piece of food, ensuring that the edges are securely sealed by the warmth of your hands. Gently press down on the wrap to create a seal. If the wrap adheres well and maintains its shape, it is ready for use.
Another way to test the wraps is to fold them over a piece of bread or a block of cheese, pressing the edges together to create a seal. If the wrap holds its shape and adheres firmly without coming loose, it is suitable for storing food. Testing the wraps before regular use will help ensure that they provide the desired level of protection and freshness for your food items.
• Place a wrap over a bowl, dish, or piece of food
• Ensure edges are securely sealed by the warmth of your hands
• Gently press down on the wrap to create a seal
• If the wrap adheres well and maintains its shape, it is ready for use
• Fold wraps over a piece of bread or block of cheese
• Press edges together to create a seal
• Check if the wrap holds its shape and adheres firmly without coming loose
• Testing wraps before regular use will ensure desired level of protection and freshness
Storing the Wraps
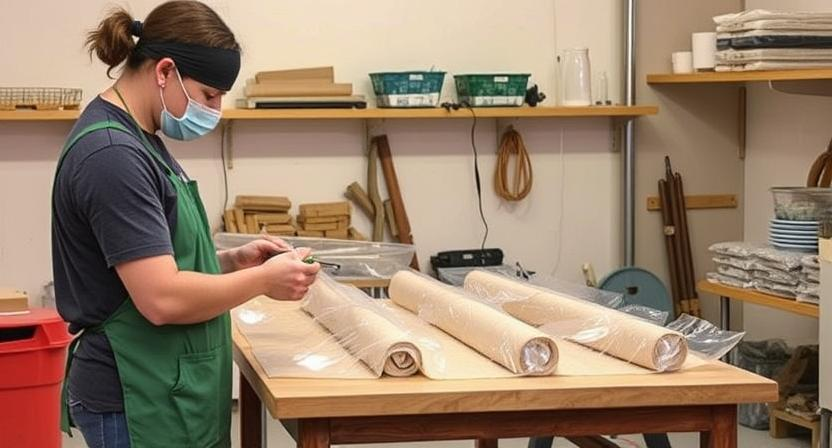
After baking and trimming the beeswax wraps, it is important to store them properly to maintain their efficiency and durability. Storing the wraps in a cool, dry place is essential to prevent the beeswax from melting or becoming too sticky. A drawer or a cupboard in the kitchen works well for storing the wraps, ensuring they are protected from direct sunlight and heat sources.
Additionally, it is recommended to stack the wraps neatly on top of each other or roll them up to save space and keep them organized. Storing the wraps flat can help maintain their shape and prevent any creases or folds that could affect their seal. By following these storage tips, you can prolong the lifespan of your beeswax wraps and continue to enjoy their eco-friendly benefits.
• Storing the wraps in a cool, dry place is essential
• A drawer or cupboard in the kitchen works well for storing the wraps
• Protect them from direct sunlight and heat sources
• Stack the wraps neatly on top of each other or roll them up to save space
• Storing the wraps flat can help maintain their shape and prevent creases
Cleaning the Wraps
Once your beeswax wraps have been used to wrap various food items, it is important to clean them properly to ensure longevity and hygiene. To clean the wraps, gently hand wash them using lukewarm water and mild soap. Avoid using hot water or harsh cleaning agents as they can degrade the beeswax coating.
After washing, make sure to air dry the wraps completely before storing them. Do not wring or twist the wraps as this can damage the wax coating. Once dry, your beeswax wraps will be ready to be used again to conveniently and sustainably store your food items.
Cleaning beeswax wraps is a simple process that can help extend their lifespan and maintain their effectiveness. Here are some tips on how to properly clean your beeswax wraps:
• Gently hand wash the wraps with lukewarm water and mild soap
• Avoid using hot water or harsh cleaning agents
• Air dry the wraps completely before storing them
• Do not wring or twist the wraps as it can damage the wax coating
By following these steps, you can ensure that your beeswax wraps remain in good condition for longer periods of time, allowing you to continue using them as an eco-friendly alternative to plastic wrap.
Reusing the Wraps
To reuse beeswax wraps, simply wipe them clean with a damp cloth or rinse with cool water and mild soap. Avoid using hot water or harsh cleaning agents as these can degrade the beeswax coating. Once clean, allow the wraps to air dry completely before storing them in a cool, dry place away from direct sunlight.
If the wraps start to lose their stickiness over time, you can refresh them by placing them on a baking sheet in a preheated oven at a low temperature for a few minutes. This will help the beeswax to redistribute and adhere better to the fabric. With proper care and maintenance, beeswax wraps can be reused multiple times, reducing waste and contributing to a more sustainable lifestyle.
• To reuse beeswax wraps, wipe them clean with a damp cloth or rinse with cool water and mild soap
• Avoid using hot water or harsh cleaning agents as they can degrade the beeswax coating
• Allow wraps to air dry completely before storing in a cool, dry place away from direct sunlight
• If wraps lose stickiness over time, refresh them by placing on a baking sheet in preheated oven at low temperature for a few minutes
• Proper care and maintenance of beeswax wraps allow for multiple uses, reducing waste and promoting sustainability.
Refreshing the Wraps
One way to refresh your beeswax wraps is to simply reapply a thin layer of melted beeswax mixture. This can help replenish the coating and ensure the wraps maintain their effectiveness in preserving food freshness. By giving them a quick refresh, you can extend the lifespan of your wraps and continue to enjoy their eco-friendly benefits.
Another method to refresh your wraps is to place them in the sun for a few hours. The heat from the sun can help soften the beeswax coating, making it easier to redistribute and smooth out any uneven areas. This natural method can help revitalize the wraps and restore their clinginess, keeping your food fresh and reducing the need for disposable plastic alternatives.
• Reapply a thin layer of melted beeswax mixture
• Extend the lifespan of your wraps
• Maintain effectiveness in preserving food freshness
• Place wraps in the sun for a few hours
• Soften beeswax coating
• Redistribute and smooth out any uneven areas
• Revitalize the wraps and restore clinginess
Avoiding Certain Foods

When using beeswax wraps to store food, it is important to avoid certain types of foods to ensure the longevity and effectiveness of the wraps. Foods that are particularly acidic or oily can cause the beeswax coating to deteriorate more quickly. Examples of foods to avoid include citrus fruits, tomatoes, and oily fish.
Additionally, hot foods should not be directly placed on beeswax wraps as the heat can melt the beeswax coating, affecting its ability to effectively seal and preserve the food. It is best to let hot foods cool to a suitable temperature before wrapping them in beeswax wraps. By being mindful of the foods you store in beeswax wraps, you can prolong their lifespan and continue to enjoy their eco-friendly benefits.
• Citrus fruits
• Tomatoes
• Oily fish
• Avoid placing hot foods directly on beeswax wraps
• Let hot foods cool to a suitable temperature before wrapping them in beeswax wraps
Proper Care and Maintenance
To ensure the longevity of your beeswax wraps, it is essential to follow proper care and maintenance practices. After each use, gently wash the wraps with mild soap and cool water. Avoid using hot water or abrasive scrubbers, as this can damage the beeswax coating. Once clean, allow the wraps to air dry completely before storing them in a cool, dry place away from direct sunlight.
Regularly inspect your beeswax wraps for any signs of wear and tear, such as small holes or worn spots. If any damage is detected, it is advisable to mend the wraps using beeswax pellets or an iron to reseal the affected areas. By taking these simple steps to care for your beeswax wraps, you can extend their lifespan and continue to enjoy the benefits of this eco-friendly alternative to plastic wrap.
• After each use, wash wraps with mild soap and cool water
• Avoid hot water or abrasive scrubbers to prevent damage
• Air dry completely before storing in a cool, dry place away from sunlight
• Regularly inspect for wear and tear such as holes or worn spots
• Mend any damage using beeswax pellets or an iron to reseal affected areas
Benefits of Beeswax Wraps
Beeswax wraps offer a multitude of benefits that make them a popular choice for those looking to reduce their carbon footprint and live a more sustainable lifestyle. These reusable wraps are an eco-friendly alternative to plastic cling film and aluminum foil, helping to decrease the amount of waste ending up in landfills. By using beeswax wraps, individuals can actively contribute to protecting the environment and promoting a greener way of living.
Moreover, beeswax wraps are a versatile and practical option for preserving food and keeping it fresh for longer periods. These wraps are breathable, allowing food to stay fresh while also reducing the risk of mold growth. The natural antibacterial properties of beeswax make them an excellent choice for storing various types of produce, cheeses, bread, and more, ensuring that food remains at its best quality.
• Beeswax wraps are a sustainable alternative to plastic cling film and aluminum foil
• They help reduce waste ending up in landfills
• Beeswax wraps contribute to protecting the environment and promoting a greener lifestyle
• These wraps are versatile and practical for preserving food
• Breathable nature of beeswax wraps helps keep food fresh for longer periods
• Natural antibacterial properties make them ideal for storing various types of produce, cheeses, bread, etc.
Environmental Impact
Using beeswax wraps in place of single-use plastic wrap or aluminum foil can have a positive environmental impact. By reusing beeswax wraps multiple times, less plastic waste is generated, leading to a reduction in landfill accumulation. Additionally, beeswax wraps are biodegradable, so when they eventually wear out, they will break down naturally without contributing to environmental pollution.
The production of beeswax wraps also has a lower carbon footprint compared to the manufacturing of conventional plastic wraps. Beeswax wraps can be made using sustainable materials like organic cotton, which further decreases the environmental impact. Choosing to incorporate beeswax wraps into daily household practices can contribute to a more sustainable lifestyle and help individuals reduce their overall ecological footprint.
• By using beeswax wraps, less plastic waste is generated
• Beeswax wraps are biodegradable, reducing environmental pollution
• Production of beeswax wraps has a lower carbon footprint compared to conventional plastic wraps
• Beeswax wraps can be made using sustainable materials like organic cotton
• Incorporating beeswax wraps into daily practices can lead to a more sustainable lifestyle and reduce ecological footprint
Alternative Uses for Beeswax Wraps
Beeswax wraps are not just limited to covering food items. They can also be utilized in various alternative ways around the house. For instance, you can use them to wrap around a bouquet of flowers to keep them fresh for longer. The beeswax coating will help retain moisture and extend the lifespan of your blooms.
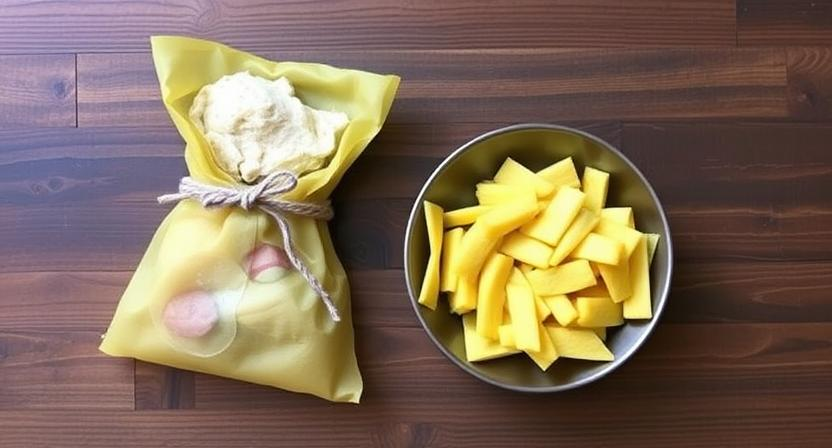
Additionally, beeswax wraps can be fashioned into pouches or small bags by folding and securing them with string or a rubber band. These makeshift pouches can be handy for storing small items like jewelry, buttons, or even as a travel case for toiletries. The versatility of beeswax wraps extends beyond the kitchen, offering practical solutions for everyday needs.
– Beeswax wraps can be used to wrap around a bouquet of flowers to keep them fresh for longer
– They can be fashioned into pouches or small bags by folding and securing them with string or a rubber band
– These makeshift pouches are handy for storing small items like jewelry, buttons, or even as a travel case for toiletries