

How to Build a Simple Compost Bin with Pallets
Materials Needed
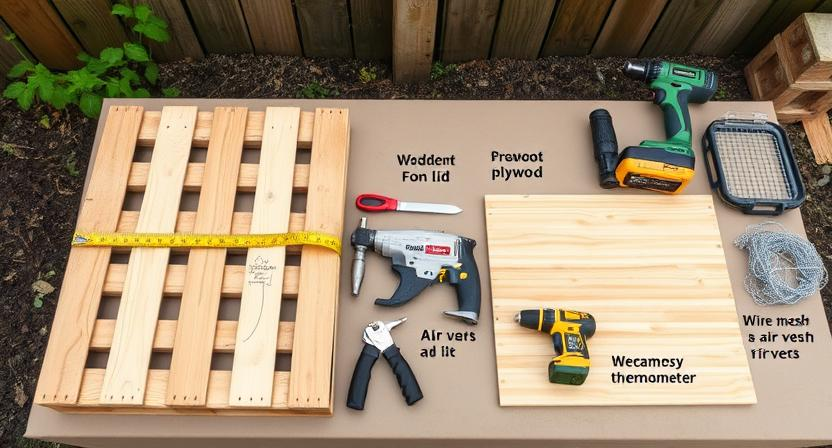
To build a compost bin, you will need the following materials: four wooden pallets of the same size, a tape measure, a saw, hammer, nails, hinges, and a drill. These basic materials will provide you with a sturdy foundation to create your composting system. Make sure the pallets are in good condition and free from any harmful chemicals or treatments that could potentially contaminate your compost.
Additionally, gather some extra materials like a piece of plywood for the lid, wire mesh for air vents, and a compost thermometer for monitoring temperature levels. Having these materials on hand will help you construct a functional and effective compost bin that allows for proper aeration and decomposition of organic matter. Once you have all the necessary materials assembled, you can begin the process of building your own compost bin to recycle food scraps and organic waste into nutrient-rich soil for your garden.
• Four wooden pallets of the same size
• Tape measure
• Saw
• Hammer
• Nails
• Hinges
• Drill
Additionally, gather:
• Piece of plywood for the lid
• Wire mesh for air vents
• Compost thermometer
Having these materials on hand will help you construct a functional and effective compost bin that allows for proper aeration and decomposition of organic matter. Once you have all the necessary materials assembled, you can begin the process of building your own compost bin to recycle food scraps and organic waste into nutrient-rich soil for your garden.
Choosing the Right Pallets
When selecting pallets for your compost bin project, it is essential to choose ones that are sturdy and in good condition. Look for pallets that are not damaged or treated with harmful chemicals, as these can leach into your compost pile. Opt for pallets made from untreated wood to ensure the safety of your composting materials.
Another factor to consider when choosing pallets is the size. Select pallets that are uniform in dimensions to make the construction process easier and to ensure a neat and stable compost bin structure. Pallets that are of similar size will fit together seamlessly, creating a more secure environment for your composting materials.
• When selecting pallets for your compost bin project, look for ones that are sturdy and in good condition
• Avoid pallets that are damaged or treated with harmful chemicals
• Opt for pallets made from untreated wood to ensure the safety of your composting materials
• Choose pallets that are uniform in dimensions to make construction process easier
• Pallets of similar size will fit together seamlessly, creating a more secure environment for your composting materials
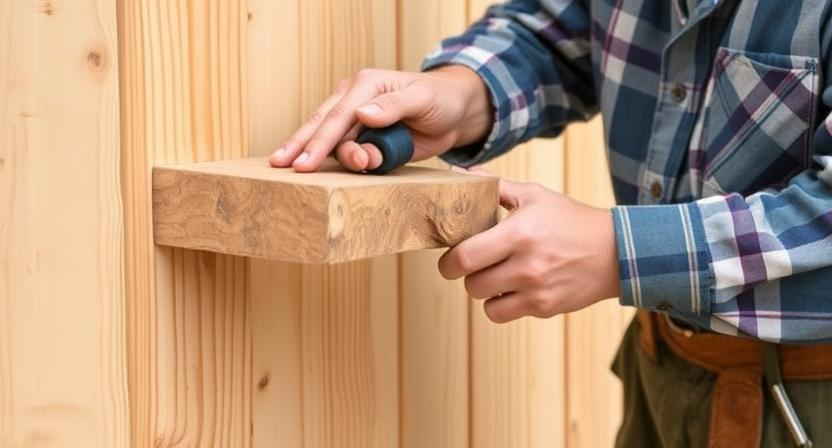
Preparing the Pallets
Pallets are a versatile and cost-effective material to use for building a compost bin. Before you start constructing your compost bin, it’s essential to carefully prepare the pallets to ensure they are clean and safe for use. Begin by inspecting each pallet for any damage or contamination, and remove any nails or staples that may be protruding.
Once you have inspected the pallets, give them a thorough cleaning by scrubbing them with a mixture of water and mild detergent. This will help remove any dirt, debris, or contaminants that may be present on the surface of the pallets. Allow the pallets to dry completely before moving on to the next steps of building your compost bin.
• Inspect each pallet for damage or contamination
• Remove any nails or staples that may be protruding
• Scrub the pallets with water and mild detergent to clean them thoroughly
• Allow the pallets to dry completely before moving on to building your compost bin.
Measuring and Cutting the Pallets
When preparing to build a compost bin using pallets, accurate measurements and precise cutting play a crucial role in ensuring a sturdy and functional structure. Before diving into the construction process, it is essential to assess the dimensions of the pallets you have available. Measure the length, width, and thickness of each pallet to determine how they can be best utilized in constructing the compost bin.
Once the measurements have been taken, mark the pallets with a pencil or chalk according to the desired dimensions for the compost bin. Using a saw appropriate for cutting through wood, such as a circular saw or a reciprocating saw, carefully cut along the marked lines to create the necessary pieces for the base, walls, and lid of the compost bin. Precision in cutting the pallets will ensure a clean and professional finish to your compost bin, enhancing both its appearance and functionality.
• Measure the length, width, and thickness of each pallet
• Mark the pallets with a pencil or chalk according to desired dimensions
• Use a saw appropriate for cutting through wood
• Cut along marked lines to create necessary pieces for base, walls, and lid of compost bin
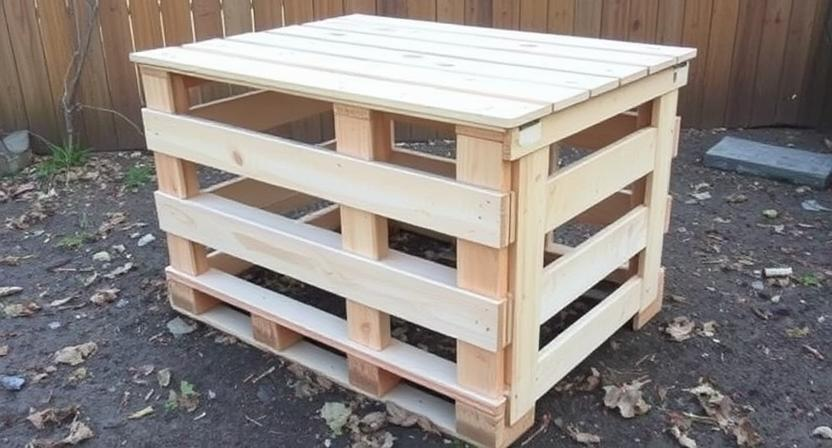
Assembling the Base of the Compost Bin
To assemble the base of the compost bin, start by laying out the pallets on a flat surface in a square or rectangular shape. Make sure the pallets are in good condition and free from any damage that could compromise the integrity of the compost bin. Secure the corners of the pallets together using screws or nails to form a sturdy base.
Next, add additional support by placing wooden stakes along the inner corners of the pallets and hammering them into the ground. This will help keep the pallets in place and provide extra reinforcement for the base of the compost bin. Once the base is securely assembled, you can move on to building the walls of the compost bin to contain the organic materials as they decompose.
• Lay out the pallets on a flat surface in a square or rectangular shape
• Ensure pallets are in good condition and free from damage
• Secure corners of pallets together using screws or nails to form a sturdy base
• Add wooden stakes along inner corners of pallets for additional support
• Hammer stakes into the ground for reinforcement
• Move on to building walls of the compost bin to contain organic materials as they decompose
Building the Walls of the Compost Bin
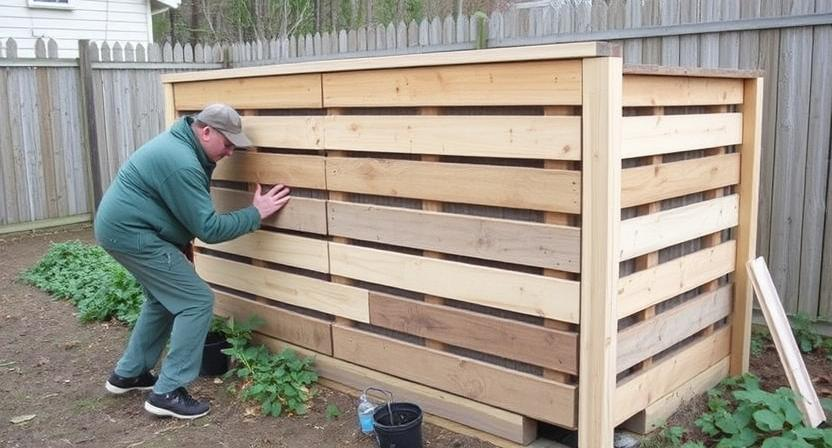
Now that the base of the compost bin is secure, it’s time to focus on constructing the walls. This step is crucial in containing the compost pile and providing structure to the bin. Utilize the pallets or materials chosen earlier to create walls that are sturdy and at least three feet high to ensure proper heat retention and decomposition within the bin. Ensure that the walls are securely fastened together to prevent any collapse once the compost pile starts to build up.
When building the walls, consider leaving gaps or spaces between the slats of the pallets to allow for airflow within the compost bin. Adequate air circulation is essential for the composting process, as it helps promote aerobic decomposition and prevent the pile from becoming too compacted. Additionally, make sure the walls are positioned securely on the base, creating a stable structure that can withstand the weight of the compost materials inside.
• When building the walls, make sure they are at least three feet high for proper heat retention and decomposition
• Securely fasten the walls together to prevent collapse once the compost pile builds up
• Leave gaps or spaces between pallet slats for airflow within the bin
• Adequate air circulation is crucial for promoting aerobic decomposition
• Position walls securely on the base to create a stable structure
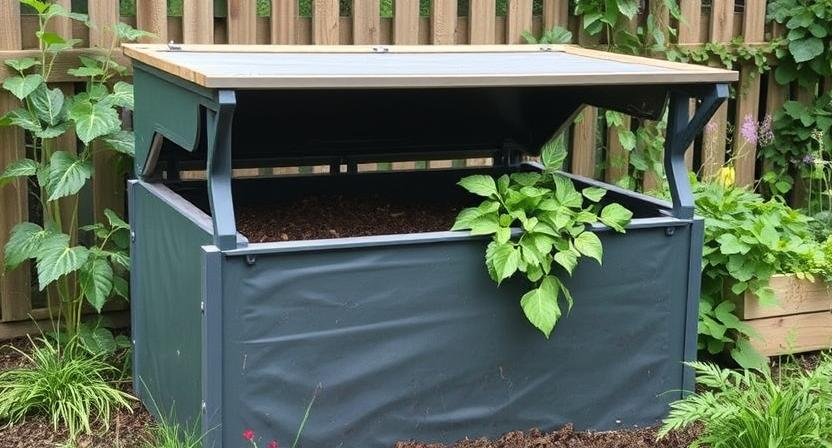
Creating a Lid for the Compost Bin
To protect your compost pile from unwanted pests and excessive moisture, it is essential to create a lid for your compost bin. A lid can be as simple as a piece of plywood or a secure covering made from repurposed materials such as old plastic or metal roofing. The lid should fit snugly over the top of the bin to keep out rainwater while still allowing for proper airflow.
When constructing the lid for your compost bin, make sure it is easy to open and close for adding or turning the compost pile. Additionally, consider adding handles for convenience when accessing the bin. A well-designed lid not only helps in maintaining the proper balance of moisture and airflow within the compost bin but also contributes to the overall functionality and longevity of your composting system.
• To protect your compost pile, it is important to create a lid for your compost bin
• A simple lid can be made from plywood or repurposed materials like old plastic or metal roofing
• The lid should fit snugly over the top of the bin to keep out rainwater while allowing proper airflow
• Ensure the lid is easy to open and close for adding or turning the compost pile
• Consider adding handles for convenience when accessing the bin
Adding Air Vents
To ensure proper airflow within the compost bin, adding air vents is essential. Adequate ventilation is crucial for the composting process to thrive as it allows oxygen to reach the microorganisms responsible for breaking down the organic matter. Without sufficient oxygen, the decomposition process can slow down, leading to a smelly and anaerobic environment. By incorporating air vents into your compost bin, you can promote aerobic decomposition and reduce the chances of unpleasant odors.
When installing air vents, consider placing them strategically around the compost bin to facilitate airflow evenly. You can opt for drilling multiple small holes on the sides of the pallets or installing PVC pipes with drilled holes to serve as ventilation ducts. Remember to periodically check the air vents to ensure they remain unobstructed by debris or compacted compost. By maintaining proper ventilation through well-placed air vents, you can support the decomposition process and yield nutrient-rich compost for your garden.
• Proper airflow is essential for composting process
• Adequate ventilation allows oxygen to reach microorganisms
• Lack of oxygen can slow down decomposition and cause odors
• Air vents help promote aerobic decomposition
• Strategically place air vents around compost bin for even airflow
• Options include drilling holes in pallets or installing PVC pipes with holes
• Regularly check air vents to prevent blockages
• Well-placed air vents support decomposition process and yield nutrient-rich compost
Positioning the Compost Bin
When positioning the compost bin in your garden, select a spot that receives a good amount of sunlight. This helps in the decomposition process as the warmth from the sun aids in breaking down the organic materials. Additionally, ensure that the location is easily accessible for you to add and turn the compost pile when necessary.
Avoid placing the compost bin directly on grass or soil to prevent leachate from seeping into the ground. It’s recommended to place the bin on a hard surface like concrete or gravel to allow for proper drainage. Keep in mind to position the compost bin near a water source for easy moistening of the compost pile during dry periods.
Positioning the compost bin in your garden is crucial for successful decomposition and nutrient-rich compost. Here are some tips to consider:
• Choose a spot that receives ample sunlight to aid in the decomposition process.
• Ensure the location is easily accessible for adding and turning the compost pile.
• Avoid placing the bin directly on grass or soil to prevent leachate seepage.
• Place the bin on a hard surface like concrete or gravel for proper drainage.
• Position the compost bin near a water source for easy moistening during dry periods.
By following these guidelines, you can create an ideal environment for your compost pile to thrive and produce high-quality organic fertilizer for your garden. Proper positioning of the compost bin will result in nutrient-rich soil amendment that benefits both your plants and the environment.
Layering Green and Brown Materials
After building the walls of the compost bin, it’s time to start layering green and brown materials. Green materials include kitchen scraps like fruit and vegetable peels, coffee grounds, and grass clippings. These materials are rich in nitrogen and help speed up the decomposition process. Brown materials, on the other hand, consist of items such as dried leaves, straw, and newspaper. These carbon-rich materials provide structure to the compost pile and help maintain airflow.
To effectively layer green and brown materials, it’s recommended to start with a thick layer of brown materials at the bottom of the compost bin. This layer will prevent the pile from becoming too compacted and aid in drainage. Then, alternate layers of green and brown materials, making sure to evenly distribute them throughout the pile. The ideal ratio is roughly 2-3 parts brown materials to 1 part green materials. This balance ensures that the compost pile decomposes efficiently and produces nutrient-rich compost for your garden.
• Start with a thick layer of brown materials at the bottom
• Alternate layers of green and brown materials evenly
• Maintain a ratio of 2-3 parts brown to 1 part green materials for optimal decomposition
• Ensure proper airflow by layering materials effectively
• Monitor moisture levels to ensure the compost pile stays damp but not soggy
Maintaining the Compost Bin
One crucial aspect of maintaining the compost bin is to regularly monitor the moisture levels. Compost should feel like a damp sponge – not too wet that water drips out when squeezed, but also not too dry that it crumbles easily. Adjusting the moisture content by adding more green materials for moisture or brown materials for absorption can help maintain the ideal balance for decomposition.
Additionally, turning the compost pile is essential in aerating the materials and ensuring even decomposition. Use a pitchfork or shovel to carefully turn the pile every few weeks, mixing the outer materials with the inner core. This process helps introduce oxygen, which promotes the growth of beneficial microorganisms and speeds up the decomposition process.
• Regularly monitor the moisture levels of the compost bin
• Adjust moisture content by adding green materials for moisture or brown materials for absorption
• Compost should feel like a damp sponge
• Turning the compost pile is essential for aerating materials
• Use a pitchfork or shovel to carefully turn the pile every few weeks
• Mixing outer materials with inner core promotes oxygen flow and speeds up decomposition
Turning the Compost Pile
When it comes to maintaining a healthy compost pile, turning is a crucial step. This process involves using a pitchfork or shovel to aerate the compost and mix the materials thoroughly. By turning the compost pile regularly, you help distribute oxygen and moisture evenly, which aids in the decomposition process. This turning also prevents the formation of anaerobic pockets that can lead to unpleasant odors.
The frequency of turning your compost pile depends on various factors such as the size of the pile, the materials used, and the ambient temperature. In general, a good rule of thumb is to turn the compost pile every 1-2 weeks. However, during hot weather or if you notice the pile becoming too wet or compacted, more frequent turning may be necessary. Keep an eye on the temperature and moisture levels within the pile to gauge when it’s time for the next turn.
• Turning the compost pile is essential for maintaining a healthy decomposition process
• Aeration and mixing of materials are key benefits of turning the compost pile
• Regular turning helps distribute oxygen and moisture evenly throughout the pile
• Prevents the formation of anaerobic pockets that can cause unpleasant odors
• Frequency of turning depends on factors like size, materials used, and ambient temperature
• General rule is to turn the compost every 1-2 weeks
• During hot weather or if pile becomes too wet or compacted, more frequent turning may be needed
• Monitor temperature and moisture levels to determine when it’s time for the next turn
Monitoring Temperature and Moisture Levels
To ensure successful decomposition within your compost bin, it is crucial to regularly monitor the temperature and moisture levels. A compost pile that is too dry will decompose slowly, while one that is too wet can become anaerobic and produce foul odors. Use a compost thermometer to check the internal temperature of the pile, aiming for a range between 120-160°F (49-71°C) for optimal decomposition. Additionally, periodically insert your hand into the pile to assess moisture levels; the compost should feel like a damp sponge, with enough moisture to help the microorganisms thrive.
Adjusting the moisture levels of your compost pile may be necessary to maintain the ideal environment for decomposition. If the pile is too dry, consider adding water using a hose or watering can to evenly distribute moisture throughout. Conversely, if the pile is too wet, incorporate dry materials such as straw, leaves, or cardboard to help absorb excess moisture. Aim to strike a balance that promotes microbial activity and efficient breakdown of organic matter for nutrient-rich compost. Regularly checking and adjusting these factors will aid in producing high-quality compost for your garden.
• To ensure successful decomposition within your compost bin, monitor temperature and moisture levels regularly
• A compost pile that is too dry will decompose slowly, while one that is too wet can become anaerobic and produce foul odors
• Use a compost thermometer to check internal temperature aiming for 120-160°F (49-71°C) for optimal decomposition
• Periodically insert your hand into the pile to assess moisture levels; it should feel like a damp sponge
• Adjusting moisture levels may be necessary; add water if too dry or incorporate dry materials if too wet
• Aim for a balance that promotes microbial activity and efficient breakdown of organic matter
• Regularly checking and adjusting these factors will help produce high-quality compost for your garden.
Harvesting the Compost
Once the compost has broken down and reached a rich, dark consistency, it is time to harvest it for use in your garden. Using a pitchfork or shovel, carefully turn over the compost pile to expose the finished compost at the bottom. Be mindful to sift through the compost and remove any large chunks or unprocessed materials that can be returned to the bin for further decomposition.
It’s essential to only harvest the mature compost at the bottom of the pile, allowing the rest to continue decomposing. You can sift the compost through a mesh screen to remove any remaining large particles, leaving you with a fine, crumbly texture that is ready to be added to your garden beds. Harvested compost should be stored in a covered container or spread directly over your garden soil to enrich its nutrients and improve overall soil health.
• Carefully turn over the compost pile to expose finished compost at the bottom
• Remove any large chunks or unprocessed materials
• Harvest only mature compost, leaving rest to continue decomposing
• Sift compost through a mesh screen to remove remaining large particles
• Store harvested compost in covered container or spread directly over garden soil
Troubleshooting Common Issues
One common issue that may arise when composting is a foul odor coming from the bin. This can be a sign of improper aeration or a high level of moisture in the compost pile. To address this problem, ensure that the compost bin has adequate air vents for oxygen circulation and turn the pile more frequently to aerate it. Additionally, consider adding more brown materials like dried leaves or newspaper to help balance the moisture levels in the compost.
Another issue that you may encounter is slow decomposition of materials in the compost bin. This could be due to a lack of nitrogen-rich green materials or an incorrect carbon-to-nitrogen ratio in the pile. To accelerate the decomposition process, add more green materials such as fruit scraps or grass clippings, and ensure that the compost pile is adequately moist. Mixing the materials thoroughly can also help to distribute the nutrients evenly and speed up decomposition.
• Ensure compost bin has adequate air vents for oxygen circulation
• Turn the pile more frequently to aerate it
• Add more brown materials like dried leaves or newspaper to balance moisture levels
• Add more green materials such as fruit scraps or grass clippings
• Ensure compost pile is adequately moist
• Mix materials thoroughly to distribute nutrients evenly and speed up decomposition
Repurposing Old Compost
Before tossing out old compost that no longer seems usable, consider repurposing it in various ways. One option is to mix the old compost with fresh soil to create a nutrient-rich mixture for potted plants or garden beds. This blend can provide plants with essential minerals and organic matter to support healthy growth.
Another way to repurpose old compost is to incorporate it into new compost piles. By adding the aged compost to fresh organic materials, you can enhance the microbial activity and accelerate the decomposition process. This approach helps maximize the nutrients in the original compost and contributes to the overall richness of the new compost batch.
• Mix old compost with fresh soil for potted plants or garden beds
• Create a nutrient-rich blend for healthy plant growth
• Incorporate old compost into new compost piles
• Enhance microbial activity and accelerate decomposition process
• Maximize nutrients in original compost
• Contribute to overall richness of new compost batch
Expanding or Upgrading the Compost Bin
If you find that your compost needs more space or if you want to increase its capacity, expanding or upgrading the compost bin is a straightforward process. You can easily add more pallets or build a new bin adjacent to the existing one. By following the same steps for preparing pallets, measuring, cutting, and assembling, you can create a larger composting area to accommodate your needs.
Furthermore, upgrading your compost bin can involve adding features like a hinged door for easier access, a more secure lid, or even wheels for mobility. These enhancements can improve the functionality and convenience of your composting system. Upgrading can also allow you to customize the bin to better suit your preferences and gardening practices.
• Adding more pallets or building a new bin adjacent to the existing one
• Following steps for preparing pallets, measuring, cutting, and assembling
• Creating a larger composting area to accommodate needs
• Adding features like a hinged door for easier access, a more secure lid, or wheels for mobility
• Improving functionality and convenience of composting system
• Customizing the bin to better suit preferences and gardening practices
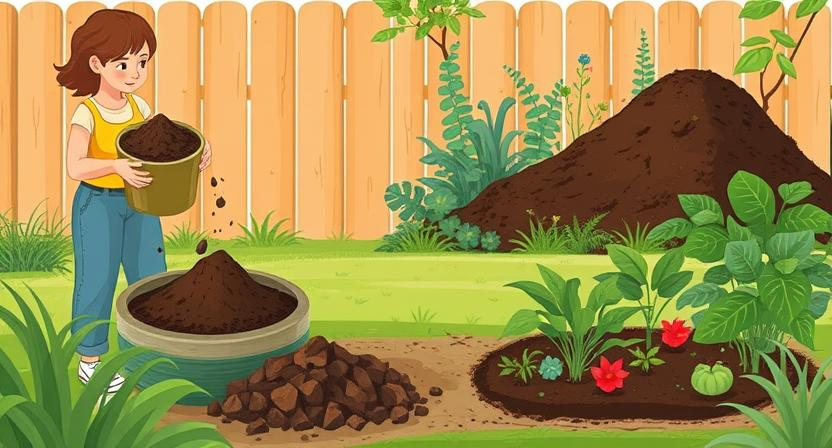
Utilizing Compost in Your Garden
When it comes to utilizing compost in your garden, there are various ways to reap the benefits of this rich, nutrient-filled soil amendment. One of the simplest methods is to spread a layer of compost over your garden beds before planting. This helps improve soil structure, enhances water retention, and provides a steady supply of essential nutrients to your growing plants.
Additionally, you can create compost tea by steeping compost in water to create a liquid fertilizer that can be easily applied to your garden with a watering can or sprayer. This method allows for a quick absorption of nutrients by the plants’ roots, promoting healthy growth and vibrant blooms. Experiment with incorporating compost into your gardening routine to see the positive impact it can have on your plants and overall garden health.
• Spread a layer of compost over garden beds before planting to improve soil structure
• Enhance water retention and provide essential nutrients to plants
• Create compost tea by steeping compost in water for liquid fertilizer
• Easily apply compost tea with watering can or sprayer for quick nutrient absorption
• Experiment with incorporating compost into gardening routine for positive impact on plant health
Tips for Success
To ensure successful composting, it is crucial to maintain a proper balance of green and brown materials in your compost bin. Green materials, such as fruit and vegetable scraps, provide nitrogen, while brown materials, like dried leaves and straw, supply carbon. Aim for a ratio of about 2:1 browns to greens to create an optimal environment for decomposition.
Consistently monitoring the moisture levels and temperature of your compost pile is key to its success. The ideal moisture content should resemble a damp sponge, not too wet or too dry. Additionally, regularly turning the compost pile will help aerate it and promote the breakdown process. By paying attention to these factors and making adjustments as needed, you can maintain a healthy compost pile that produces nutrient-rich compost for your garden.
• Green materials such as fruit and vegetable scraps provide nitrogen
• Brown materials like dried leaves and straw supply carbon
• Aim for a ratio of about 2:1 browns to greens for optimal decomposition
• Monitor moisture levels to resemble a damp sponge
• Regularly turn compost pile for aeration and breakdown process
• Make adjustments as needed for a healthy compost pile
Final Thoughts
In conclusion, building and maintaining a compost bin can be a fulfilling and sustainable practice for any home gardener. By following the steps outlined in this guide, you can create nutrient-rich compost to enhance the health and vitality of your garden plants while reducing waste and promoting environmental consciousness. Remember to regularly turn the compost pile, monitor its temperature and moisture levels, and troubleshoot any issues that may arise to ensure successful composting.
As you continue to utilize compost in your garden, you will witness the positive impact it has on the soil structure and plant growth. Embrace the opportunity to repurpose old compost and consider expanding or upgrading your compost bin to accommodate larger volumes of organic waste. With dedication and care, your composting efforts will not only benefit your garden but also contribute to a more sustainable and eco-friendly lifestyle.
• Regularly turn the compost pile
• Monitor temperature and moisture levels
• Troubleshoot any issues that may arise
As you witness the positive impact of compost on your garden, consider repurposing old compost and expanding or upgrading your bin for larger volumes of organic waste. With dedication and care, your efforts will not only benefit your garden but also contribute to a more sustainable lifestyle. Composting is a simple yet powerful way to reduce waste, improve soil health, and promote environmental consciousness in your community. Remember, every small step towards sustainability makes a difference in the long run.