

Homemade Candles: A Step-by-Step Guide for Beginners
Materials Needed for Making Homemade Candles
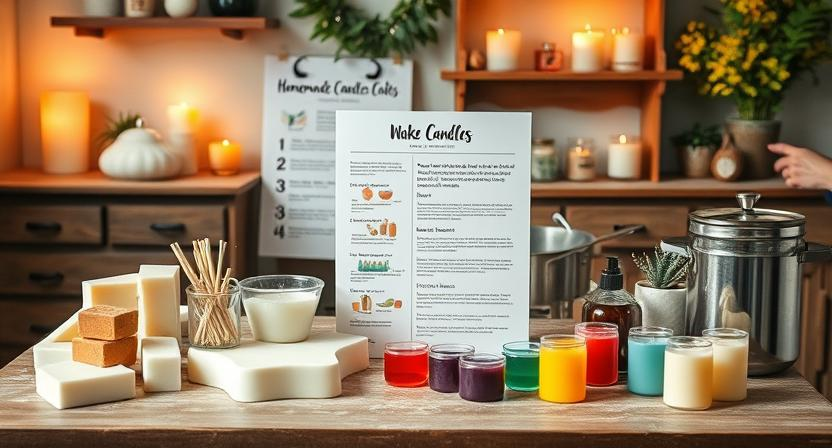
For making homemade candles, the essential materials needed include wax, wicks, a double boiler or microwave-safe container for melting the wax, a thermometer, fragrance oils or essential oils, colorants, a stirring utensil, a pouring pot, and candle molds. These basic materials will serve as the foundation for creating your candles in various shapes, sizes, and scents.
Additionally, having a workspace with good ventilation, clean surfaces, and a fire extinguisher nearby is crucial for safety. It is also advisable to have paper towels or old towels on hand for any potential spills or messes that may occur during the candle-making process. By gathering all these materials before beginning your candle-making journey, you can ensure a smoother and more enjoyable crafting experience.
• Wax
• Wicks
• Double boiler or microwave-safe container
• Thermometer
• Fragrance oils or essential oils
• Colorants
• Stirring utensil
• Pouring pot
• Candle molds
Having a workspace with good ventilation, clean surfaces, and a fire extinguisher nearby is crucial for safety. It is also advisable to have paper towels or old towels on hand for any potential spills or messes that may occur during the candle-making process. By gathering all these materials before beginning your candle-making journey, you can ensure a smoother and more enjoyable crafting experience.
Choosing the Right Wax for Your Homemade Candles
When it comes to choosing the right wax for your homemade candles, there are a few key factors to consider. The most commonly used waxes for candle making are paraffin wax, soy wax, beeswax, and palm wax. Each type of wax has its own unique characteristics and benefits, so it’s essential to understand the differences between them before making your selection.
Paraffin wax is a popular choice for beginners due to its affordability and ease of use. It has excellent scent throw and color retention, making it ideal for scented and colored candles. On the other hand, soy wax is a natural and environmentally friendly option that burns cleaner and longer than paraffin wax. Beeswax is known for its natural honey scent and air-cleaning properties, making it a great choice for those looking for a more organic option. Palm wax is a hard and brittle wax that creates beautiful crystalline patterns in candles, perfect for decorative purposes. Ultimately, the choice of wax will depend on your preference for scent throw, burn time, eco-friendliness, and the overall aesthetic of your homemade candles.
• Paraffin wax is affordable and easy to use
• Soy wax burns cleaner and longer than paraffin wax
• Beeswax has a natural honey scent and air-cleaning properties
• Palm wax creates beautiful crystalline patterns in candles
When choosing the right wax for your homemade candles, consider factors such as scent throw, burn time, eco-friendliness, and aesthetic appeal. Experiment with different waxes to find the one that best suits your needs and preferences. Remember that each type of wax has its own unique characteristics, so don’t be afraid to try out new options until you find the perfect fit for your candle making projects.
Selecting the Perfect Wick for Your Homemade Candles
Choosing the right wick for your homemade candles is crucial for ensuring that your candles burn efficiently and evenly. The wick size is determined by the diameter of your candle container or mold. A wick that is too small may result in a tunneling effect where the wax does not melt evenly, while a wick that is too large can cause smoking and sooting.
Cotton wicks are a popular choice for homemade candles as they burn cleanly and provide a steady flame. When selecting a wick, consider factors such as the type of wax used, the diameter of your candle, and whether you want a slow or fast burn. Testing different wick sizes and types is key to finding the perfect match for your candles.
• Cotton wicks are a popular choice for homemade candles
• Wick size is determined by the diameter of your candle container or mold
• A wick that is too small may result in tunneling effect
• A wick that is too large can cause smoking and sooting
• Consider factors such as type of wax used, candle diameter, and burn speed when selecting a wick
Understanding Fragrance Oils and Essential Oils for Homemade Candles
When it comes to adding scents to your homemade candles, you have two main options: fragrance oils and essential oils. Fragrance oils are synthetic scents that often mimic natural aromas, offering a wide variety of choices for candle making. They are typically stronger in scent throw and come in a vast array of fragrances, making them popular for candle crafting.
On the other hand, essential oils are natural oils extracted from plants, flowers, and fruits, providing a more natural and therapeutic aroma to your candles. While essential oils offer a more subtle scent compared to fragrance oils, they are favored by those looking for a more organic and holistic approach to candle making. It’s essential to note that essential oils may have different flashpoints and properties, so it’s crucial to research and understand each oil’s characteristics before incorporating them into your candles.
• Fragrance oils are synthetic scents that mimic natural aromas
• They offer a wide variety of choices for candle making
• Typically stronger in scent throw than essential oils
• Come in a vast array of fragrances, popular for candle crafting
• Essential oils are natural oils extracted from plants, flowers, and fruits
• Provide a more natural and therapeutic aroma to candles
• Offer a more subtle scent compared to fragrance oils
• Favored by those looking for an organic and holistic approach to candle making
It’s important to research and understand the characteristics of each oil before using them in your candles. Flashpoints and properties can vary between different essential oils, so make sure you know how to handle them safely. Whether you choose fragrance oils or essential oils for your homemade candles, both options can add delightful scents to create a warm and inviting atmosphere in your home.
Essential Tools for Making Homemade Candles
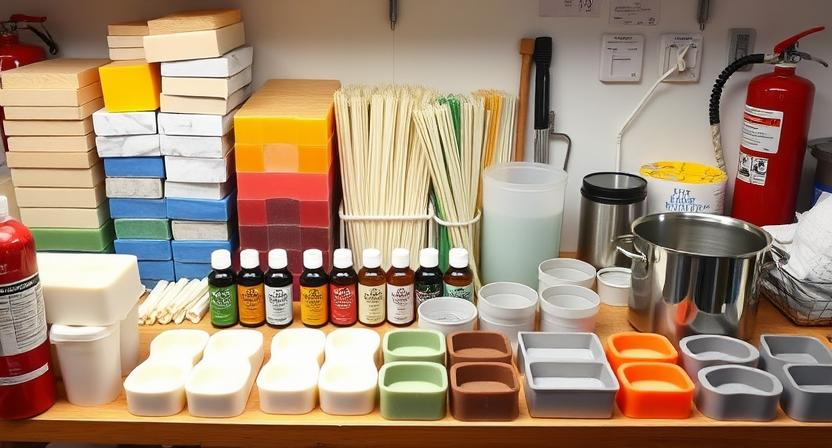
When it comes to making homemade candles, having the right tools is essential to ensure a successful and enjoyable crafting experience. Some of the must-have tools include a double boiler or a microwave-safe container for melting wax, a thermometer to monitor the temperature, a stirring utensil like a wooden spoon or chopstick, and a heat-resistant surface to work on. Additionally, having a scale to accurately measure ingredients, a pouring pitcher for easy wax transfer, and a pair of scissors for trimming wicks are all useful tools that can streamline the candle-making process.
In addition to these basic tools, it’s also beneficial to have a selection of molds or containers to shape your candles, a wick holder to keep the wick centered during pouring, and a heat gun or blow dryer to smooth out the candle top and remove any air bubbles. As you gain more experience with candle making, you may want to invest in specialized tools such as wick trimmers, wick holders, and mold sealers to further refine your craft and achieve professional-looking results. Having a well-stocked arsenal of tools will not only make the candle-making process more efficient but also open up endless possibilities for creativity and experimentation in your homemade candle projects.
• Double boiler or microwave-safe container for melting wax
• Thermometer to monitor temperature
• Stirring utensil like a wooden spoon or chopstick
• Heat-resistant surface to work on
• Scale to accurately measure ingredients
• Pouring pitcher for easy wax transfer
• Pair of scissors for trimming wicks
• Selection of molds or containers
• Wick holder to keep the wick centered during pouring
• Heat gun or blow dryer to smooth out candle top and remove air bubbles
Invest in specialized tools such as:
– Wick trimmers
– Wick holders
– Mold sealers
Having a well-stocked arsenal of tools will not only make the candle-making process more efficient but also open up endless possibilities for creativity and experimentation in your homemade candle projects.
Safety Precautions to Keep in Mind While Making Candles at Home
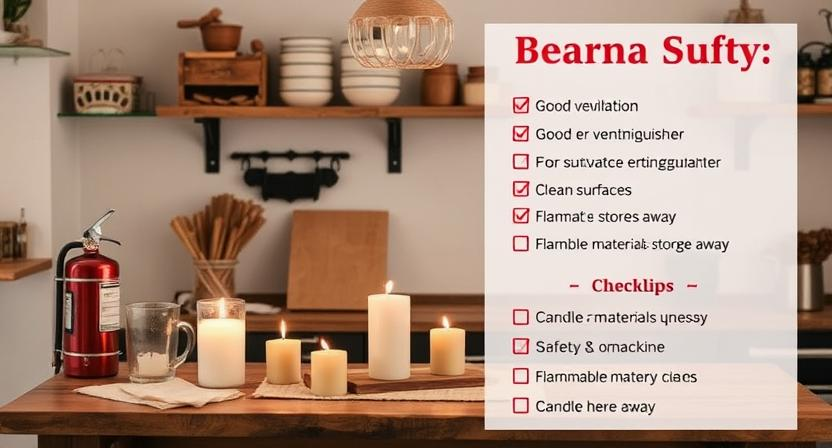
When making candles at home, it is crucial to prioritize safety throughout the entire process. Always work in a well-ventilated area to prevent the accumulation of fumes from the melted wax. Additionally, ensure that flammable materials are kept away from the heat source to minimize the risk of fire hazards.
Another essential safety precaution is to never leave the melting wax unattended. It is crucial to stay vigilant and monitor the wax closely to prevent overheating and potential accidents. Always have a fire extinguisher or a bowl of water nearby in case of emergencies, and never pour water on a wax fire as it can escalate the situation.
• Always work in a well-ventilated area
• Keep flammable materials away from heat sources
• Never leave melting wax unattended
• Monitor wax closely to prevent overheating
• Have a fire extinguisher or bowl of water nearby
• Do not pour water on a wax fire
Measuring and Melting the Wax for Your Homemade Candles
When it comes to making homemade candles, an essential step is measuring and melting the wax properly. The first thing to consider is the type of wax you are using for your candles. Whether it’s soy wax, beeswax, paraffin wax, or gel wax, each type requires different handling and melting points.
Once you have chosen your wax, accurately measuring it is crucial to ensure a successful candle-making process. Use a kitchen scale to measure the exact amount of wax needed for your desired candle size. It’s important to remember that too much or too little wax can affect how the candle burns and the overall quality of the final product. After measuring, melting the wax can be done using a double boiler or a microwave. Be cautious not to overheat the wax, as this can lead to discoloration or even a fire hazard. Melt the wax slowly and gently until it reaches the appropriate temperature for adding color and fragrance oils.
• Choose the type of wax suitable for your candles: soy wax, beeswax, paraffin wax, or gel wax
• Accurately measure the amount of wax needed using a kitchen scale
• Avoid using too much or too little wax to ensure proper burning and quality
• Melt the wax slowly and gently using a double boiler or microwave
• Be cautious not to overheat the wax to prevent discoloration or fire hazard
Adding Color to Your Homemade Candles
To add color to your homemade candles, you have several options available that allow you to customize the look of your creations. One popular choice is using candle dye, which comes in various colors and can be easily mixed into the melted wax. Make sure to follow the instructions on the dye packaging to achieve the desired shade and intensity. Another alternative is using crayons or oil-based pigments to color your candles. Simply shave the desired amount of crayon or pigment into the melted wax and stir well to distribute the color evenly.
Additionally, you can explore natural ingredients like spices, herbs, or flowers to create unique and earthy tones for your homemade candles. Experiment with different combinations and quantities to achieve the color palette you envision. Keep in mind that natural ingredients may produce more subtle hues compared to synthetic dyes, but they can add a lovely touch of organic charm to your candles. Remember to strain out any solid particles before pouring the wax into the mold to ensure a smooth and even color finish.
• Candle dye is a popular choice for adding color to homemade candles
• Follow instructions on the dye packaging for desired shade and intensity
• Crayons or oil-based pigments can also be used to color candles by shaving into melted wax
• Experiment with natural ingredients like spices, herbs, or flowers for unique tones
• Strain out any solid particles before pouring wax into mold
Mixing Fragrance Oils or Essential Oils into Your Homemade Candles
When incorporating fragrance oils or essential oils into your homemade candles, it’s essential to ensure they are thoroughly mixed to disperse the scent evenly throughout the wax. Before adding the oils, make sure to follow the recommended fragrance load guidelines provided by the oil manufacturer to avoid overpowering or underwhelming aromas in your candles. Keep in mind that different oils have varying strengths, so it’s advisable to start with a small amount and add more as needed to achieve the desired intensity of fragrance.
To blend the oils into the melted wax effectively, gently stir the mixture using a non-reactive utensil like a wooden skewer or a metal spoon. Avoid using wooden spoons that may absorb the oils and affect the scent of future batches. Take care not to stir too vigorously, as this can introduce air bubbles into the wax, leading to an uneven burn when the candle is lit. Stirring the oils into the wax thoroughly ensures that the fragrance is evenly distributed and will be released consistently as the candle burns.
• Before adding oils, follow recommended fragrance load guidelines
• Start with a small amount and adjust for desired intensity
• Use non-reactive utensils like wooden skewers or metal spoons to blend oils into wax
• Avoid using wooden spoons that may absorb oils
• Stir gently to avoid introducing air bubbles into the wax
• Thoroughly stir oils into wax for even distribution of fragrance
Preparing the Candle Mold for Pouring
When preparing the candle mold for pouring, ensure that it is clean and free of any debris. Cleaning the mold thoroughly will help the candle to release easily once it has set. You can use rubbing alcohol to wipe down the inside of the mold before beginning the pouring process for a seamless finish.
Additionally, it is essential to secure the wick in the center of the mold before pouring the melted wax. You can do this by using a wick holder or tape to keep the wick in place. Ensuring that the wick is centered will help the candle to burn evenly once it is finished.
• Clean the mold thoroughly with rubbing alcohol before pouring
• Secure the wick in the center of the mold using a wick holder or tape
• Centered wick will help candle burn evenly
Pouring the Melted Wax into the Candle Mold
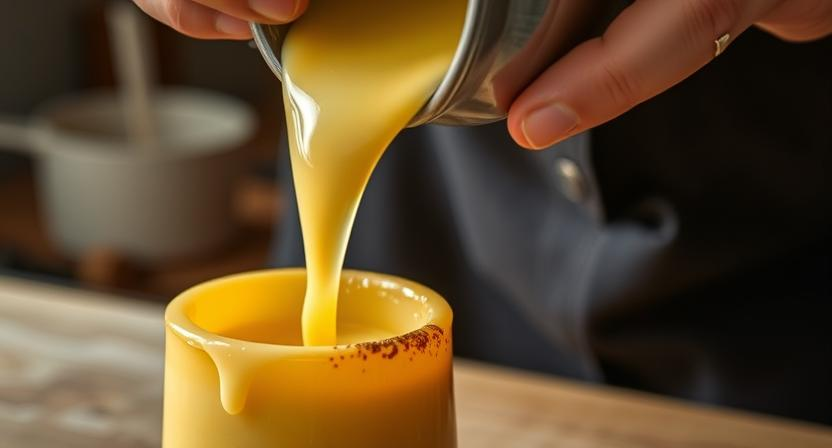
Once your wax is fully melted and reached the desired temperature, it is time to carefully pour it into the prepared candle mold. Gently and steadily pour the melted wax into the mold, ensuring that you do not overflow or spill any wax outside of the mold. Be cautious not to pour too quickly, as this could create air bubbles in the candle, affecting its final look and burn.
As you pour the wax into the mold, be mindful of leaving some space at the top to accommodate the wick. The wick should be able to stand upright and centered in the candle once the wax has hardened. A good practice is to keep a steady hand while pouring the wax and to fill the mold to the desired height, leaving a bit of room for finishing touches later on.
• Slowly pour the melted wax into the candle mold
• Be careful not to overflow or spill any wax outside of the mold
• Avoid pouring too quickly to prevent air bubbles in the candle
• Leave some space at the top of the mold for the wick to stand upright and centered
• Keep a steady hand while pouring and fill the mold to desired height
Inserting the Wick and Allowing the Candle to Set
Once the melted wax is poured into the candle mold, it’s time to carefully place the wick in the center of the container. Make sure the wick stays upright and in the middle by using wick holders or sticks to keep it steady. Avoid touching or moving the wick while the wax is still liquid to prevent any disturbances in its positioning.
After inserting the wick, allow the candle to set undisturbed until it completely solidifies. This process may take several hours depending on the size of the candle and the type of wax used. Avoid moving or jostling the candle during this time to ensure a smooth and even finish. Once the wax has hardened, you can trim the wick to the desired length before removing the candle from the mold.
• Carefully place the wick in the center of the container
• Use wick holders or sticks to keep the wick steady and upright
• Avoid touching or moving the wick while wax is still liquid
• Allow the candle to set undisturbed until completely solidified
• Process may take several hours depending on size and wax type
• Avoid moving or jostling candle for smooth finish
• Trim the wick to desired length after wax has hardened
• Remove candle from mold once it is fully set
Trimming the Wick and Removing the Candle from the Mold
After allowing your candle to fully set, it’s time to trim the wick to the appropriate length before taking the candle out of the mold. Using a sharp pair of scissors or wick trimmers, carefully cut the wick down to about a quarter of an inch above the surface of the candle. This step helps control the size of the flame and ensures a clean, even burn when you light your candle.
Next, gently remove the candle from the mold by pressing on the sides or bottom of the mold to release the wax. If the candle is still stuck, you can try placing it in the refrigerator for a few minutes to help shrink the wax slightly, making it easier to remove. Once the candle is out of the mold, inspect it for any imperfections or rough edges that may need smoothing out. Your freshly trimmed and removed candle is now ready to be enjoyed or further decorated to your liking.
• After allowing your candle to fully set, it’s time to trim the wick to the appropriate length before taking the candle out of the mold.
• Using a sharp pair of scissors or wick trimmers, carefully cut the wick down to about a quarter of an inch above the surface of the candle.
• This step helps control the size of the flame and ensures a clean, even burn when you light your candle.
• Next, gently remove the candle from the mold by pressing on the sides or bottom of the mold to release the wax.
• If the candle is still stuck, you can try placing it in refrigerator for a few minutes to help shrink wax slightly making it easier to remove.
• Once removed inspect for imperfections or rough edges that may need smoothing out.
Your freshly trimmed and removed candles are now ready either be enjoyed as they are decorated further according liking.
Decorating Your Homemade Candles (Optional)
When it comes to decorating your homemade candles, the possibilities are endless. Adding a personal touch to your candles can make them unique and special. One simple way to decorate your candles is by using dried flowers or herbs. You can press these botanicals against the outside of the candle before the wax fully sets, creating a beautiful and natural design. Another option is to sprinkle glitter or mica powder on top of the candle while the wax is still soft, giving it a touch of shimmer and glam.
For those looking to add a touch of elegance to their candles, consider using decorative ribbons or charms. Tie a pretty ribbon around the base of the candle or attach a small charm to the wick for a sophisticated look. Additionally, you can use heat-resistant stickers or decals to embellish the outside of your candles with intricate designs or patterns. These simple yet effective decorating techniques can elevate the visual appeal of your homemade candles and make them truly stand out.
• Press dried flowers or herbs against the candle before wax sets
• Sprinkle glitter or mica powder on top of soft wax for shimmer
• Tie decorative ribbons around base or attach charms to wick for elegance
• Use heat-resistant stickers or decals for intricate designs
Troubleshooting Common Issues When Making Homemade Candles
One common issue when making homemade candles is tunneling, where the wax burns down the center of the candle, leaving a thick layer of unmelted wax around the edges. To troubleshoot this problem, ensure that the first burn is long enough to create a full melt pool that reaches the edges of the candle. Additionally, trim the wick to the recommended length before each use to prevent tunneling and promote an even burn.
Another issue that may arise is frosting, which appears as a white, powdery residue on the surface of the candle. To address frosting, try pouring the wax at a slightly higher temperature and avoid sudden temperature changes during the cooling process. You can also wrap the candle in a towel while it cools to insulate it from fluctuations in temperature. Experimenting with different waxes and additives can also help minimize frosting and achieve a smoother finish on your homemade candles.
• Ensure the first burn creates a full melt pool reaching edges
• Trim wick to recommended length before each use
• Pour wax at slightly higher temperature to prevent frosting
• Avoid sudden temperature changes during cooling process
• Wrap candle in towel while cooling to insulate from temperature fluctuations
• Experiment with different waxes and additives for smoother finish
Storing and Caring for Your Homemade Candles
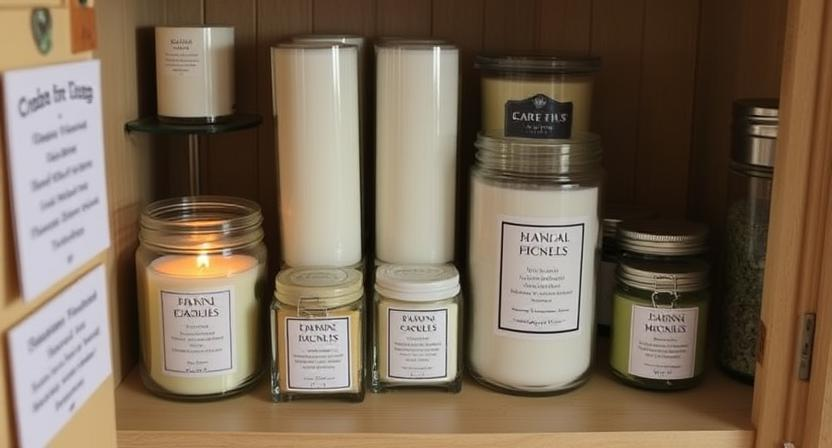
To ensure the longevity of your homemade candles, proper storage is key. Store your candles in a cool, dry place away from direct sunlight and heat sources. Extreme temperatures can cause the candles to warp or melt, affecting their appearance and performance. Additionally, keeping them away from drafts will help maintain an even burn when the candles are lit.
When caring for your homemade candles, always remember to trim the wick to about a quarter of an inch before each use. This helps prevent soot buildup and ensures a clean, steady burn. Extinguish the candle carefully using a snuffer or gently blowing it out to avoid wax splatter. Avoid burning candles for more than 4 hours at a time to prevent the container from overheating. By following these storage and care tips, you can enjoy your homemade candles safely and effectively.
• Store your candles in a cool, dry place away from direct sunlight and heat sources
• Keep candles away from drafts to maintain an even burn when lit
• Trim the wick to about a quarter of an inch before each use to prevent soot buildup
• Extinguish the candle carefully using a snuffer or gently blowing it out
• Avoid burning candles for more than 4 hours at a time to prevent overheating of the container
By following these simple storage and care tips, you can ensure that your homemade candles last longer and provide you with a beautiful ambiance whenever they are lit. Proper care will not only enhance their appearance but also improve their performance over time. Enjoy the warm glow and lovely scents of your homemade candles while knowing that you are taking good care of them for long-lasting enjoyment.
Different Ways to Package and Present Your Homemade Candles
When it comes to packaging and presenting your homemade candles, the possibilities are endless. One popular option is to place your finished candles in elegant glass jars or containers, which not only showcase the candle but also protect it from dust and debris. Tie a ribbon or twine around the jar for a touch of sophistication, or add a personalized label for a custom look. Another creative way to package your candles is to use eco-friendly materials such as kraft paper or recycled cardboard boxes, adding a rustic and environmentally conscious flair to your product presentation.
For a more whimsical and festive approach, consider placing your homemade candles in decorative tins or mason jars adorned with colorful fabric or lace. These charming containers are perfect for gifting or adding a unique touch to your home decor. You can also explore the option of wrapping your candles in tissue paper, cellophane, or organza bags for a delicate and stylish presentation. Remember, the way you package and present your candles can make a lasting impression on customers or gift recipients, so let your creativity shine through in every detail.
• Glass jars or containers with ribbons or personalized labels
• Eco-friendly materials like kraft paper or recycled cardboard boxes
• Decorative tins or mason jars with colorful fabric or lace
• Wrapping candles in tissue paper, cellophane, or organza bags for a delicate touch
Tips for Selling Your Homemade Candles
When it comes to selling your homemade candles, presentation is key. Invest in high-quality packaging that complements the aesthetic of your candles. Whether it’s sleek and modern or rustic and charming, packaging plays a significant role in attracting potential customers. Consider eco-friendly options like recycled materials or reusable containers to appeal to environmentally conscious consumers.
Networking and building relationships within your community can be invaluable for promoting your homemade candles. Attend local markets, fairs, or craft shows to showcase your products and connect with customers face-to-face. Additionally, harness the power of social media to reach a broader audience. Create engaging content that highlights the uniqueness of your candles and encourages followers to support your small business.
• Invest in high-quality packaging that complements the aesthetic of your candles
• Consider eco-friendly options like recycled materials or reusable containers
• Networking and building relationships within your community is invaluable for promoting your homemade candles
• Attend local markets, fairs, or craft shows to showcase your products and connect with customers face-to-face
• Harness the power of social media to reach a broader audience
• Create engaging content that highlights the uniqueness of your candles
Inspiring Candle Making Ideas for Beginners
Candle making can be a creative and fulfilling hobby for beginners. One idea to start is experimenting with different colors and scents to create unique combinations for your candles. You can try blending various fragrance oils or essential oils to personalize your creations and bring your own touch to each candle you make.
Another inspiring idea for beginners is to use different types of molds to add variety to your candle designs. Instead of traditional cylindrical molds, consider using silicone molds in various shapes and sizes like hearts, stars, or even animals. This can add a fun and whimsical element to your candles, making them not only functional but also visually appealing.
• Experiment with different colors and scents to create unique combinations
• Blend various fragrance oils or essential oils for personalized creations
• Use silicone molds in shapes like hearts, stars, or animals for variety
• Add a fun and whimsical element to your candles
Taking Your Candle Making to the Next Level: Advanced Techniques and Tips
Once you have mastered the basic techniques of candle making and are ready to elevate your craft to the next level, consider experimenting with unique wax blends. Mixing different types of waxes, such as soy wax with beeswax or paraffin, can create interesting textures and enhance the burn characteristics of your candles. Be sure to conduct small test batches to determine the optimal blend for your desired results before committing to larger production quantities.
In addition to experimenting with wax blends, advanced candle makers can also explore the art of multi-layered candles. This technique involves pouring different colored and scented layers of wax in a single container, creating visually stunning candles with complex fragrances. To achieve clean and distinct layering, ensure each layer has cooled and solidified enough to support the next pour without blending together. This advanced technique adds a level of creativity and sophistication to your homemade candles, making them truly unique pieces of art.
• Experiment with unique wax blends such as soy wax with beeswax or paraffin
• Conduct small test batches to determine optimal blend for desired results
• Mixing different types of waxes can create interesting textures and enhance burn characteristics
• Explore the art of multi-layered candles for visually stunning creations
• Pour different colored and scented layers in a single container
• Ensure each layer has cooled and solidified before pouring the next layer for clean and distinct results