

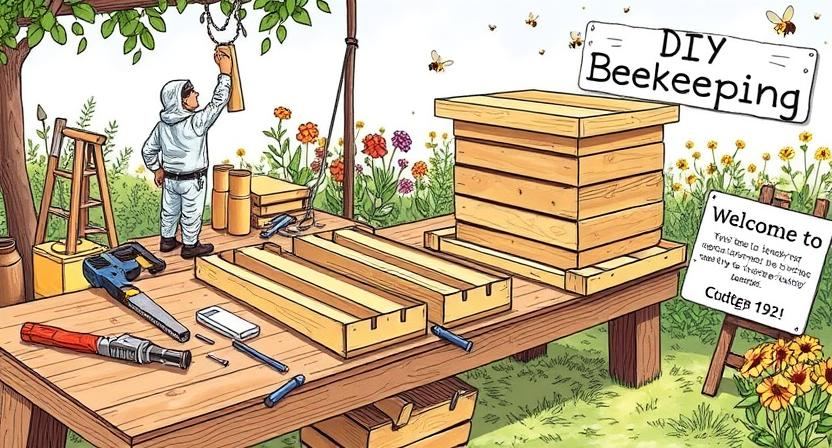
DIY Beekeeping: How to Build Your First Hive
Materials Needed for Building a Beehive
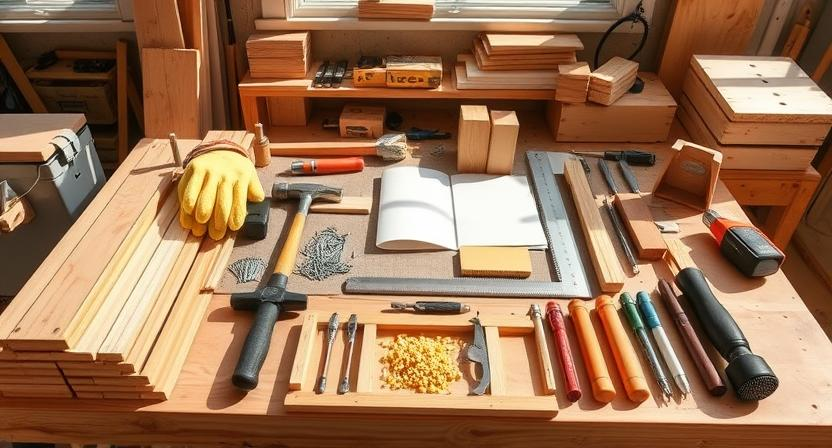
To build a beehive, you will need a list of essential materials. These include wooden boards for constructing the hive components, nails or screws for assembly, a hammer or screwdriver, and protective gear such as gloves and a beekeeping suit. Additionally, you will require a saw for cutting the wood to the desired dimensions, a ruler or measuring tape for accuracy, and a level to ensure the hive is constructed evenly.
Furthermore, you will need beeswax or plastic foundation sheets for the frames inside the hive, as well as a queen excluder to separate the brood boxes from the honey supers. Don’t forget to have a smoker on hand for calming the bees during hive inspections, and a bee brush for gently moving the bees if needed. Lastly, consider obtaining a hive tool for prying apart hive components and scraping off excess propolis. Having these materials ready will ensure a smooth and efficient beehive construction process.
• Wooden boards for constructing hive components
• Nails or screws for assembly
• Hammer or screwdriver
• Protective gear (gloves, beekeeping suit)
• Saw for cutting wood to desired dimensions
• Ruler or measuring tape for accuracy
• Level to ensure even construction
• Beeswax or plastic foundation sheets for frames inside hive
• Queen excluder to separate brood boxes from honey supers
• Smoker for calming bees during inspections
• Bee brush for moving bees gently
• Hive tool for prying apart components and scraping off propolis
Choosing the Right Location for Your Beehive
When selecting the location for your beehive, it is essential to consider a few key factors to ensure the well-being and productivity of your bees. Firstly, choose a spot that receives good morning sunlight to help the bees get an early start to their day. This will also aid in warming up the hive and stimulating the bees’ activity levels.
Additionally, it is important to place the beehive in an area that is sheltered from strong winds. Bees can struggle to fly in windy conditions, and strong gusts could potentially damage the hive structure. Providing a windbreak, such as a fence or hedge, can help protect your bees and hive from the negative effects of windy weather.
• Choose a spot that receives good morning sunlight
• Helps bees get an early start to their day
• Warms up the hive and stimulates bee activity levels
• Place the beehive in an area sheltered from strong winds
• Bees struggle to fly in windy conditions
• Strong gusts could damage hive structure
• Provide a windbreak like a fence or hedge for protection
Understanding the Different Types of Hives
When it comes to beekeeping, there are several types of hives that you can choose from. The most common types include Langstroth hives, which are known for their modular design that allows for easy expansion and maintenance. Another popular option is the top-bar hive, which is a more natural and simplistic hive design that is great for beekeepers looking for a more hands-off approach.
In addition to these, there are also Warre hives, which are similar to top-bar hives but have a vertical design that promotes the bees building their comb downwards. Lastly, there are skep hives, which are traditional dome-shaped hives made of straw or wicker. Each type of hive has its own advantages and considerations, so it’s important to choose the one that best fits your beekeeping goals and preferences.
• Langstroth hives are known for their modular design
• Top-bar hives offer a more natural and simplistic approach
• Warre hives have a vertical design promoting downward comb building
• Skep hives are traditional dome-shaped hives made of straw or wicker
Each type of hive has its own advantages and considerations, so it’s important to choose the one that best fits your beekeeping goals and preferences.
Planning the Layout of Your Beehive
Once you have selected the location for your beehive, it is crucial to carefully plan the layout to ensure the efficiency and functionality of the hive. The layout of the beehive should consider the natural behavior of bees, allowing for easy access and movement within the hive. A well-thought-out layout will also facilitate hive inspections and maintenance tasks.
When planning the layout of the beehive, take into account the placement of components such as the bottom board, brood boxes, honey supers, and covers. Ensure that there is enough space around the hive for proper ventilation and sunlight exposure. Additionally, consider the accessibility of the hive for both yourself and the bees, making sure to place it in a location that is easy to approach and work around. By thoughtfully designing the layout of your beehive, you can create a conducive environment for your bees to thrive and increase the overall productivity of your hive.
• Consider the natural behavior of bees for easy access and movement within the hive
• Plan placement of components such as bottom board, brood boxes, honey supers, and covers
• Ensure proper ventilation and sunlight exposure around the hive
• Place the hive in a location that is easily accessible for both yourself and the bees
• Design layout to create a conducive environment for bees to thrive
Constructing the Bottom Board of the Hive
To construct the bottom board of the hive, you will need to start with a solid base that provides stability and protection for the rest of the hive. The bottom board serves as the foundation on which the entire hive will sit, so it is crucial to ensure that it is well-built and durable. Begin by cutting a piece of plywood to the desired dimensions, typically matching the size of the beehive boxes you will be using. Sand the edges to smooth out any rough surfaces that could potentially harm the bees or disrupt the hive’s structure.
Next, you will need to attach wooden cleats to the bottom board to create space for airflow. These cleats will elevate the bottom board slightly off the ground, allowing for proper ventilation within the hive. Secure the cleats to the edges of the bottom board using nails or screws, making sure they are evenly spaced to provide adequate support. Once the cleats are in place, your bottom board is ready to be installed as the base of your beehive, ensuring a solid foundation for your bees to thrive.
• Start by cutting a piece of plywood to desired dimensions
• Sand the edges to smooth out rough surfaces
• Attach wooden cleats to create space for airflow
• Secure cleats to bottom board using nails or screws
• Ensure cleats are evenly spaced for adequate support
Assembling the Brood Boxes
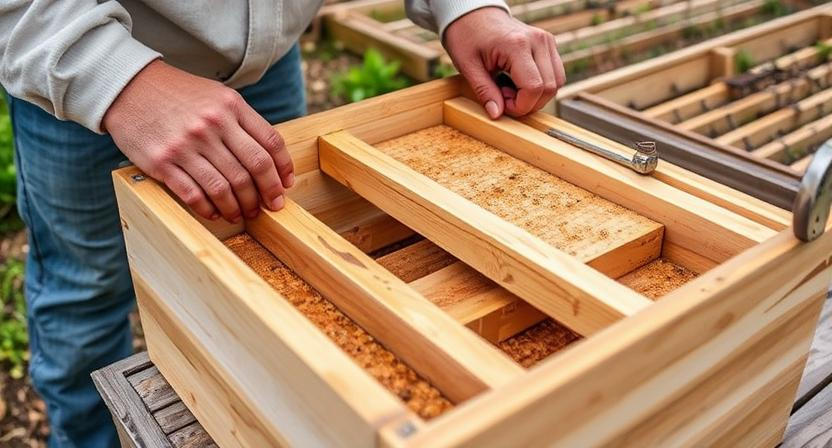
Once you have constructed the bottom board of your beehive, the next step is to assemble the brood boxes. Brood boxes are where the queen bee lays her eggs and the worker bees raise the brood. These boxes typically serve as the lower sections of the hive and are where the majority of the colony resides. When assembling the brood boxes, ensure that the frames fit snugly and securely within the box to prevent any gaps where bees could potentially build comb where it’s not wanted.
After the brood boxes are assembled, it is crucial to add the frames and foundation to provide structure for the bees to build their comb. Frames are where the bees will create the honeycomb and store honey and pollen. Foundation sheets can be added to the frames to guide the bees in building straight comb. It is essential to check that the frames are evenly spaced within the brood box to allow for proper bee movement and maintenance within the hive. Once the frames and foundation are in place, the brood box is ready to be stacked upon the bottom board to continue building your beehive.
• Ensure frames fit snugly in the brood box
• Add frames and foundation for structure
• Check frames are evenly spaced within the brood box
• Stack brood box on bottom board to continue building hive
Adding Frames and Foundation to the Brood Boxes
Once the brood boxes are assembled, it’s time to add frames and foundation to provide a structure for the bees to build their comb. The frames serve as a support system for the bees to construct their honeycombs and raise their brood. Ensure that the frames are evenly spaced within the brood box to allow for proper bee movement and comb development.
When adding the foundation to the frames, choose between plastic or wax-coated foundation based on your preference and beekeeping practices. The foundation provides a guide for the bees to start building their comb in a straight and uniform manner. Secure the foundation onto the frames carefully to prevent any gaps or uneven surfaces that could hinder the bees’ comb-building process. Remember to inspect the frames and foundation periodically to monitor the bees’ progress and ensure a healthy beehive.
• Make sure to evenly space the frames within the brood box for proper bee movement
• Choose between plastic or wax-coated foundation based on your preference and beekeeping practices
• Secure the foundation onto the frames carefully to prevent any gaps or uneven surfaces
• Inspect the frames and foundation periodically to monitor bees’ progress and ensure a healthy beehive
Installing the Queen Excluder
After assembling the brood boxes and adding frames and foundation, the next step in setting up your beehive is installing the queen excluder. This essential component is typically placed between the brood boxes and honey supers to prevent the queen bee from laying eggs in the honey storage area. The queen excluder features gaps that are large enough for worker bees to pass through but too small for the queen bee to fit, ensuring that the honey remains free of brood.
To install the queen excluder, simply place it on top of the brood boxes before adding the honey supers. Ensure that the edges of the queen excluder fit snugly on top of the brood boxes to prevent the queen bee from bypassing it. This simple yet crucial step will help in organizing the hive and segregating the brood rearing area from the honey storage area, ultimately leading to a more efficient honey production process.
• After assembling the brood boxes and adding frames and foundation, the next step is installing the queen excluder.
• The queen excluder prevents the queen bee from laying eggs in the honey storage area.
• It features gaps that allow worker bees to pass through but are too small for the queen bee to fit.
• To install, place it on top of the brood boxes before adding honey supers.
• Ensure edges fit snugly on top of brood boxes to prevent queen bee bypassing it.
• This step helps organize hive and segregate brood rearing area from honey storage area.
Setting Up the Honey Supers
Once the brood boxes are in place and the colony is thriving, it’s time to add the honey supers to your beehive. These shallow boxes are where the bees will store excess honey, separate from where the queen lays her eggs. Ensure the frames in the honey supers have a foundation for the bees to build their honeycomb on, providing them with the space needed to store nectar and pollen.
When setting up the honey supers, it’s crucial to make sure they are level and properly spaced to prevent comb misalignment. Bees prefer consistency, so maintaining uniformity in the hive structure will help them work efficiently. Once the honey supers are established, regularly inspect them to monitor honey production and harvest it accordingly to prevent overcrowding and ensure a healthy hive environment.
• Before adding honey supers, ensure the brood boxes are well-established and thriving
• Honey supers should have frames with foundation for bees to build honeycomb on
• Make sure honey supers are level and properly spaced to prevent comb misalignment
• Consistency in hive structure helps bees work efficiently
• Regularly inspect honey supers to monitor production and harvest honey accordingly
Constructing the Inner Cover
Start by measuring and cutting a piece of plywood to the dimensions of your hive’s inner cover. Make sure the size is appropriate to fit snugly on top of the brood boxes. Sand down any rough edges for a smooth finish that will protect your bees from splinters or sharp corners.
Next, attach four wooden cleats to the underside of the plywood using wood screws. These cleats will create a small space between the inner cover and the top of the brood boxes, allowing for proper ventilation and air circulation within the hive. Ensure the cleats are securely fastened to provide stability and durability for the inner cover.
To construct the inner cover for your hive, follow these steps:
• Measure and cut a piece of plywood to fit the dimensions of your hive’s top
• Sand down any rough edges for a smooth finish
• Attach four wooden cleats to create space between the inner cover and brood boxes
• Use wood screws to securely fasten the cleats for stability and durability
By following these simple steps, you can create an inner cover that will help protect your bees and promote proper ventilation within the hive. This essential component will contribute to the overall health and productivity of your bee colony.
Building the Outer Cover
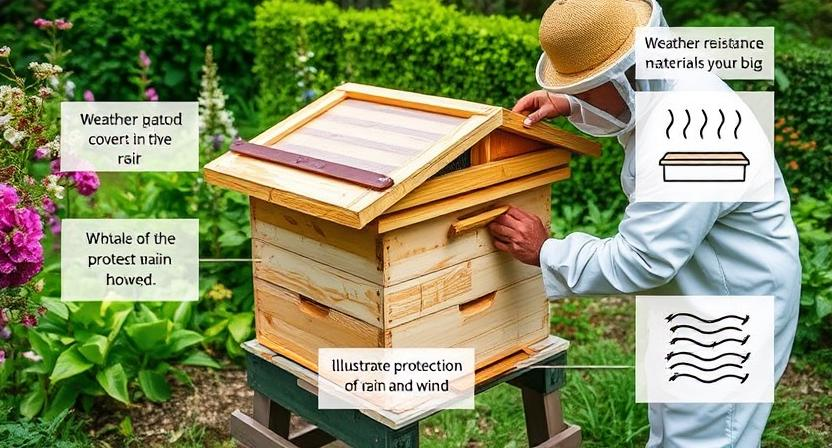
The outer cover of the beehive is an essential component that provides protection to the hive from external elements such as rain, wind, and extreme temperatures. It serves as the topmost layer of the hive, shielding the bees and their honeycombs from any potential harm. When constructing the outer cover, it is crucial to use durable and weather-resistant materials to ensure the longevity of the hive.
A well-built outer cover will also help in regulating the temperature and humidity levels inside the hive. It acts as a barrier against moisture seeping into the hive, which can be detrimental to the bees and their brood. Additionally, the outer cover plays a role in insulating the hive, keeping the bees warm during colder months and cool during the hot summer days. Proper ventilation is key when designing the outer cover to prevent condensation and mold growth within the hive.
• The outer cover should be securely fastened to the rest of the hive to prevent it from being blown off during strong winds.
• Regular maintenance and inspection of the outer cover are necessary to ensure its effectiveness in protecting the hive.
• Painting or treating the outer cover with weather-resistant sealants can help prolong its lifespan and maintain its structural integrity.
• Consider adding an overhang to the outer cover to provide additional protection against rainwater entering the hive.
Creating an Entrance for the Bees
Once you have constructed the main components of your beehive, it is crucial to create a suitable entrance for the bees. The entrance serves as the point of entry and exit for the bees as they forage for resources and tend to their hive. A well-designed entrance allows for efficient traffic flow and ventilation within the hive, aiding in the overall health and productivity of the colony.
When creating the entrance for your bees, consider the size and placement carefully. The entrance should be large enough to accommodate the volume of bees entering and exiting the hive, especially during peak times. Additionally, the entrance should be positioned in a way that minimizes exposure to wind and inclement weather, while also providing easy access to nearby food sources. By providing a well-designed entrance, you are ensuring that your bees can efficiently carry out their essential tasks and thrive within their environment.
• When creating the entrance for your bees, consider the size and placement carefully
• The entrance should be large enough to accommodate the volume of bees entering and exiting the hive
• Positioning of the entrance is crucial to minimize exposure to wind and inclement weather
• Ensure easy access to nearby food sources for efficient foraging
• A well-designed entrance aids in efficient traffic flow and ventilation within the hive
Installing the Hive Stand
Before you can set up your beehive, one crucial step is installing the hive stand. The hive stand serves as the foundation for your hive, lifting it off the ground to prevent moisture from seeping in and providing a stable base for the structure. When choosing the location for your hive stand, ensure it is on level ground and can support the weight of the hive once fully assembled. Placing the hive stand in a spot that receives ample sunlight and is easily accessible for maintenance will contribute to the overall health and productivity of your bee colony.
To install the hive stand, begin by clearing the area of any debris and ensuring the ground is level. Place the stand in the desired location, adjusting as needed to ensure stability. Once positioned correctly, secure the hive stand in place using fasteners or by burying the legs slightly into the ground for added support. Double-check that the stand is level to prevent any issues once the hive components are added on top. The hive stand plays a crucial role in the longevity and success of your beekeeping endeavors, so take care to install it properly for the well-being of your bees.
• Before you can set up your beehive, one crucial step is installing the hive stand.
• The hive stand serves as the foundation for your hive, lifting it off the ground to prevent moisture from seeping in and providing a stable base for the structure.
• When choosing the location for your hive stand, ensure it is on level ground and can support the weight of the hive once fully assembled.
• Placing the hive stand in a spot that receives ample sunlight and is easily accessible for maintenance will contribute to the overall health and productivity of your bee colony.
To install the hive stand:
• Begin by clearing the area of any debris and ensuring the ground is level.
• Place the stand in the desired location, adjusting as needed to ensure stability.
• Once positioned correctly, secure the hive stand in place using fasteners or by burying legs slightly into
the ground for added support.
• Double-check that the stand is level to prevent any issues once hive components are added on top.
The hive stands play a crucial role in longevity and success of beekeeping endeavors so take care to install properly for well-being bees.
Adding Feeders to the Hive
When adding feeders to the hive, it is essential to ensure that your bees have a readily available and easily accessible food source. Feeders can help supplement the nectar flow during times of scarcity or provide necessary nutrition when natural sources are limited. They play a crucial role in supporting the health and productivity of the bee colony, especially during the crucial stages of brood rearing and honey production.
There are various types of feeders that you can choose from, such as entrance feeders, top feeders, frame feeders, and division board feeders. Each type has its advantages and placement considerations, depending on your hive setup and beekeeping preferences. Select a feeder that suits your hive design and location, ensuring that it is secure, leak-proof, and easy for the bees to access. Additionally, regularly monitor and refill the feeder to prevent starvation and promote the overall well-being of your bees.
• Entrance feeders: Placed at the entrance of the hive for easy access by bees
• Top feeders: Located on top of the hive, providing a larger capacity for food storage
• Frame feeders: Integrated into the hive frames, allowing bees to access food while minimizing disturbance
• Division board feeders: Positioned within the hive, separating brood chambers and providing a controlled feeding area
It is important to consider factors such as weather conditions, colony size, and available resources when selecting and using feeders in your beekeeping operation. By carefully choosing the right feeder type and implementing proper feeding practices, you can ensure that your bees receive adequate nutrition and support their overall health and productivity. Remember to regularly check on your hives and adjust feeding strategies as needed to meet changing conditions throughout the seasons.
Protecting Your Hive from Predators
When it comes to safeguarding your hive from potential predators, it is important to be vigilant and proactive. One of the most common threats to beehives are bears, who are attracted to the sweet smell of honey. To protect your hive from bear attacks, consider installing an electric fence around your apiary to deter them from coming too close.
Another predator to watch out for are skunks, which are known to raid beehives for their brood. To prevent skunks from accessing your hive, ensure that your entrance reducer is properly installed to make it difficult for them to enter. Additionally, placing a hardware cloth or wire mesh around the base of your hive can also serve as a barrier against these nocturnal marauders. Vigilance and implementing these preventive measures can go a long way in protecting your precious bee colony from predators.
• Install an electric fence to deter bears from approaching your hive
• Properly install entrance reducer to prevent skunks from accessing the hive
• Place hardware cloth or wire mesh around the base of the hive as an additional barrier
• Vigilance is key in protecting your bee colony from predators
Maintaining Proper Ventilation in the Hive
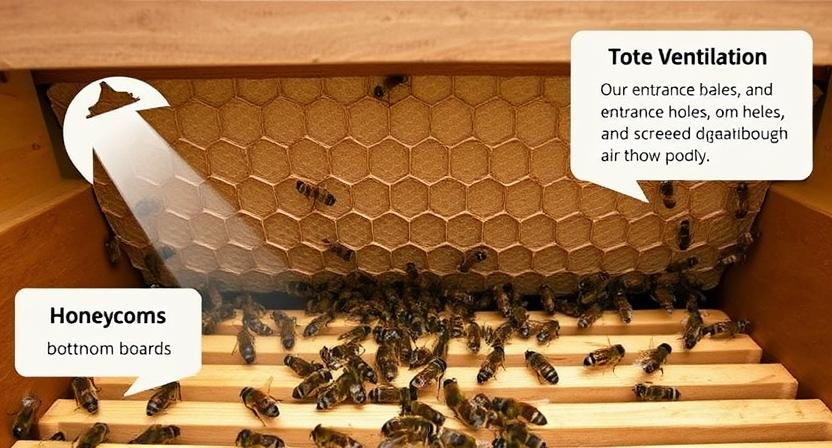
One key aspect of beekeeping that is crucial for the health and productivity of your hive is maintaining proper ventilation. Adequate airflow within the hive helps regulate temperature, remove excess moisture, and prevent the buildup of stale air that can lead to various issues. To ensure good ventilation, it is important to provide enough entrance space for the bees to come and go freely.
Additionally, you can consider using screened bottom boards or ventilation holes in the hive to improve air circulation. These measures help prevent condensation, mold growth, and the spread of diseases within the hive. Regularly monitoring the ventilation in your hive and making adjustments as needed will contribute to a thriving bee colony and a successful beekeeping experience.
• Proper ventilation is crucial for the health and productivity of your hive
• Adequate airflow helps regulate temperature, remove excess moisture, and prevent stale air buildup
• Provide enough entrance space for bees to come and go freely
• Consider using screened bottom boards or ventilation holes in the hive
• These measures help prevent condensation, mold growth, and spread of diseases
• Regularly monitor ventilation in your hive and make adjustments as needed.
Ensuring Sufficient Sunlight for Your Bees
Adequate sunlight is essential for the health and productivity of your bees. When selecting a location for your beehive, ensure that it receives enough sunlight throughout the day. Bees thrive in a warm environment, and sunlight helps regulate the temperature inside the hive. Place your hive in an area that gets plenty of natural light, but also consider providing some shade during the hottest parts of the day to prevent overheating.
In addition to warmth, sunlight also plays a crucial role in helping bees navigate and forage. Bees rely on the position of the sun for orientation and communication within the hive. By ensuring that your hive has sufficient sunlight, you are aiding the bees in their daily activities such as foraging for nectar and pollen. Proper exposure to sunlight will contribute to the overall well-being of your bee colony and support their essential functions.
• Bees thrive in a warm environment, so adequate sunlight is crucial for regulating hive temperature
• Provide shade during the hottest parts of the day to prevent overheating
• Sunlight helps bees navigate and communicate within the hive
• Proper exposure to sunlight supports bees in foraging for nectar and pollen
Monitoring the Temperature Inside the Hive
To ensure the health and productivity of your bee colony, monitoring the temperature inside the hive is crucial. Bees are highly sensitive to temperature changes, and maintaining a stable environment within the hive is essential for their well-being. The ideal temperature range for a beehive is between 32°C to 35°C (89.6°F to 95°F), which is necessary for the bees to carry out their daily activities effectively.
Fluctuations in temperature can disrupt the normal functions of the hive, affecting the bees’ ability to rear brood, store honey, and regulate the hive’s humidity levels. Monitoring the temperature inside the hive can be done using a thermometer placed in a central location within the hive. Regularly checking and recording the temperature will help you identify any deviations from the optimal range and take necessary actions to maintain a comfortable environment for your bees.
• Bees are highly sensitive to temperature changes
• Maintaining a stable environment within the hive is essential for their well-being
• Ideal temperature range for a beehive is between 32°C to 35°C (89.6°F to 95°F)
• Fluctuations in temperature can disrupt normal hive functions
• Monitoring the temperature inside the hive using a thermometer placed centrally
• Regularly checking and recording temperatures helps identify deviations from optimal range
Checking for Signs of Disease in Your Beehive
When inspecting your beehive, it is crucial to keep an eye out for any signs of disease. Look for dead bees outside the hive, unusual or foul odors emanating from the hive, or bees exhibiting abnormal behavior such as crawling rather than flying. Additionally, check for any discoloration or abnormalities in the brood pattern as this could be an indication of disease.
Regularly monitoring the health of your bee colony is essential for preventing the spread of diseases and ensuring the longevity of your hive. Familiarize yourself with common bee diseases such as American foulbrood or nosema, and stay informed about the symptoms associated with each. By promptly identifying and addressing any signs of disease in your beehive, you can take proactive measures to protect your bees and maintain a thriving colony.
• Dead bees outside the hive
• Unusual or foul odors from the hive
• Abnormal behavior of bees (crawling instead of flying)
• Discoloration or abnormalities in brood pattern
Regularly monitoring bee colony health is crucial for preventing disease spread and ensuring hive longevity. Knowing common bee diseases like American foulbrood and nosema, along with their symptoms, is important. Prompt identification and treatment of any signs of disease can help protect bees and maintain a thriving colony.
Preparing Your Hive for Winter months
As colder temperatures approach, it is crucial to prepare your beehive for the winter months to ensure the health and survival of your bees. One important aspect of winter preparation is to ensure that your hive is well-insulated to help maintain a stable temperature inside. This can be achieved by wrapping the hive with insulating materials or providing extra layers within the hive itself.
Another essential step in preparing your hive for winter is to ensure that your bees have enough food reserves to last through the season when foraging becomes limited. It is recommended to leave sufficient honey stores for the bees by not harvesting all the honey during the fall. Additionally, you can provide sugar syrup or fondant as supplementary feed to help the bees through the winter months when natural food sources are scarce.
• Insulate your hive using materials such as foam insulation or tar paper
• Add extra layers within the hive to help trap heat and keep the bees warm
• Leave enough honey stores for the bees to feed on during winter
• Consider providing sugar syrup or fondant as supplementary feed to ensure they have enough food
• Monitor the hive regularly during winter months to check on food reserves and overall health of the colony.