

Basic Carpentry Skills Every Homesteader Should Learn
Safety Precautions in Carpentry
Wearing appropriate safety gear is crucial before starting any carpentry project. This includes safety glasses to protect your eyes from flying debris and sawdust, as well as hearing protection to prevent damage from loud power tools. Additionally, always make sure to wear work gloves to protect your hands when handling sharp tools and rough materials.
Maintaining a clean and organized work area is also essential for safety in carpentry. By keeping your workspace free of clutter and ensuring that tools are stored properly when not in use, you can prevent accidents and injuries. It is also important to always handle sharp tools with care and respect, making sure to use them only for their intended purposes to avoid accidents.
• Always wear safety glasses, hearing protection, and work gloves
• Keep work area clean and organized to prevent accidents
• Store tools properly when not in use
• Handle sharp tools with care and respect for safety
Types of Wood commonly used in Carpentry
There are several types of wood commonly used in carpentry, each with its unique characteristics and suitability for different projects. Pine is a popular choice due to its affordability and ease of workability. It is often used for framing, shelving, and other structural components in woodworking projects. Maple is another commonly used wood known for its durability and attractive grain patterns, making it ideal for furniture making and cabinetry.
Oak is a hardwood that is prized for its strength and resistance to wear and tear. It is commonly used in flooring, furniture, and decorative trim work. Birch is a versatile wood that is often chosen for its smooth surface and uniform grain, making it suitable for a variety of applications, from furniture to cabinetry. Each type of wood brings its own unique qualities to a carpentry project, allowing for a wide range of creative possibilities.
• Pine is popular for its affordability and workability
• Maple is known for its durability and attractive grain patterns
• Oak is prized for its strength and resistance to wear and tear
• Birch is versatile with a smooth surface and uniform grain
Understanding different types of Nails and Screws
When it comes to carpentry projects, understanding the different types of nails and screws is essential for achieving strong and lasting structures. Nails are commonly used for fastening two pieces of wood together through a straightforward process of hammering them in. They come in various sizes and types, such as common nails, finishing nails, and brad nails, each designed for specific applications in carpentry work. On the other hand, screws offer a more secure fastening method compared to nails due to their threading, which grips the wood tightly. Screws come in different head shapes like flat head, round head, and hex head, each serving a particular purpose in carpentry projects.
Choosing the right nail or screw for your carpentry task is crucial to ensuring the structural integrity and durability of your creation. Nails are ideal for quick and temporary fastenings, while screws are best for applications where added strength and stability are required. Additionally, understanding the differences between nails and screws, as well as their respective uses, will help you select the appropriate fastener for the specific woodworking task at hand.
• Nails are commonly used for fastening two pieces of wood together through hammering
• Types of nails include common nails, finishing nails, and brad nails
• Screws offer a more secure fastening method due to their threading
• Different types of screws include flat head, round head, and hex head
• Choosing the right nail or screw is crucial for structural integrity in carpentry projects
• Nails are ideal for quick and temporary fastenings
• Screws provide added strength and stability when needed
• Understanding the differences between nails and screws helps in selecting the appropriate fastener
How to properly measure and mark wood
To ensure accuracy and precision in your carpentry projects, it is essential to properly measure and mark your wood before making any cuts or constructions. Begin by using a reliable measuring tape or ruler to measure the dimensions required for your project. Make sure to double-check your measurements to avoid any mistakes that could lead to waste of materials or ill-fitting pieces.
Once you have determined the correct measurements, use a pencil or marking knife to mark the wood where cuts or joints need to be made. It is important to make clear and visible marks that are easy to follow during the cutting and assembly process. Taking the time to measure and mark accurately will help you achieve professional-looking results in your carpentry endeavors.
• Measure the dimensions required for your project using a reliable measuring tape or ruler
• Double-check your measurements to avoid mistakes and waste of materials
• Use a pencil or marking knife to make clear and visible marks on the wood
• Ensure that the marks are easy to follow during cutting and assembly process
• Taking time to measure and mark accurately will result in professional-looking carpentry projects
Essential Hand Tools for Carpentry
Having the right hand tools is essential for any carpentry project. A hammer is one of the most basic tools needed for driving nails into wood. It’s important to choose a hammer with a comfortable grip and a weight that feels balanced to you. A tape measure is another crucial tool for accurately measuring and marking wood for cutting. Look for a tape measure with clear markings and a sturdy construction to ensure accuracy in your measurements.
A set of chisels is important for shaping and carving wood. Chisels come in various sizes and shapes for different woodworking tasks, so it’s helpful to have a few different options in your toolkit. A combination square is useful for marking right angles and measuring out accurate cuts in wood. It can also be used for checking the flatness of a surface. Lastly, a utility knife is handy for tasks like scoring wood before cutting or trimming edges. Choose a utility knife with a sharp, replaceable blade for precision cutting.
• Hammer: Choose one with a comfortable grip and balanced weight
• Tape Measure: Look for clear markings and sturdy construction for accuracy
• Chisels: Have a set of various sizes and shapes for shaping and carving wood
• Combination Square: Useful for marking right angles and measuring accurate cuts
• Utility Knife: Handy for scoring wood before cutting or trimming edges
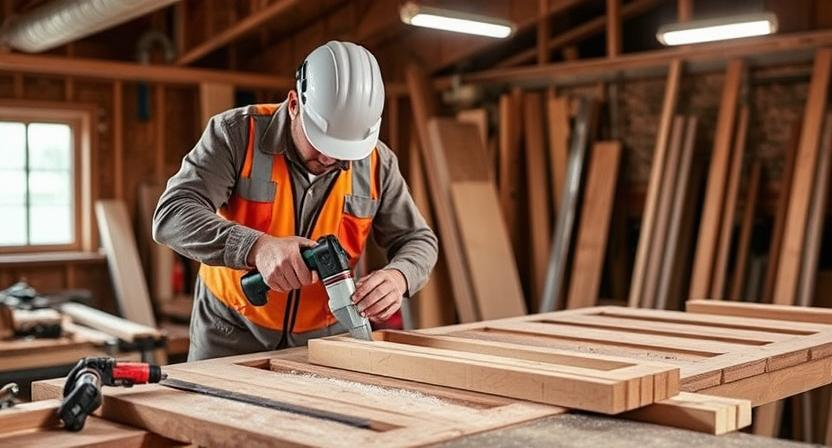
Power Tools for Carpentry Projects

When it comes to carpentry projects, power tools play a crucial role in making tasks more efficient and precise. One of the most essential power tools for carpentry is the power drill. This versatile tool can be used for drilling holes, driving screws, and even mixing paint or mortar with the right attachments.
Another indispensable power tool in carpentry is the circular saw. Ideal for making straight cuts in wood, this tool is perfect for cutting boards, panels, and even plywood with ease. Its portability and ability to make quick and accurate cuts make it a go-to tool for many carpenters.
• Power drill:
– Versatile tool for drilling holes, driving screws
– Can mix paint or mortar with right attachments
• Circular saw:
– Ideal for making straight cuts in wood
– Perfect for cutting boards, panels, and plywood
– Portable and makes quick, accurate cuts
Basic Cutting Techniques in Carpentry
When it comes to cutting wood in carpentry, it’s essential to use the right tools for the job. A handsaw is commonly used for making straight and curved cuts in wood. Ensure the blade is sharp for clean and precise cuts. Additionally, a coping saw is handy for intricate and detailed cuts, especially for creating shapes and patterns in wood.
For larger and thicker pieces of wood, a power saw such as a circular saw or jigsaw can be employed for more efficient cutting. These power tools offer speed and precision in cutting through various types of wood. Remember to always use safety gear such as goggles and gloves when operating power saws to protect yourself from potential injuries.
• When using a handsaw, ensure the blade is sharp for clean cuts
• A coping saw is useful for intricate and detailed cuts in wood
• For larger pieces of wood, consider using a power saw like a circular saw or jigsaw
• Always wear safety gear such as goggles and gloves when operating power tools
Joinery Techniques for Strong Wood Joints
Joinery techniques play a crucial role in the structural integrity and overall strength of woodworking projects. One commonly used method is the dovetail joint, known for its interlocking design that provides exceptional strength and durability. This joint is often used in fine woodworking, such as creating drawers or cabinets, where a sturdy connection is paramount for longevity and aesthetic appeal.
Another popular joinery technique is the mortise and tenon joint, which involves a protruding piece (tenon) fitting into a carved slot (mortise) to create a strong bond. This classic method is versatile and commonly used in furniture making to secure legs, frames, and other structural components. By mastering these and other joinery techniques, carpenters can elevate the quality and durability of their woodworking projects.
• Dovetail joints are known for their interlocking design
• Mortise and tenon joints involve a protruding piece fitting into a carved slot
• Joinery techniques play a crucial role in the structural integrity of woodworking projects
• These methods are commonly used in fine woodworking, furniture making, and other carpentry projects
Understanding Wood Grain and its Importance
The grain of wood refers to the pattern and direction of the wood fibers in a piece of lumber. It is an essential characteristic that greatly influences the strength, appearance, and workability of the wood material. The direction of the grain can impact how the wood will behave when cut, sanded, or joined, making it important for carpenters to have a good understanding of wood grain when working on projects.
When cutting wood, it is crucial to pay attention to the grain direction to prevent splintering or tear-out. Cutting against the grain can cause the wood fibers to tear, leaving a rough and uneven edge. Working with the grain allows for cleaner cuts and smoother surfaces. Additionally, the appearance of the wood grain plays a significant role in the aesthetic appeal of finished woodworking projects, as different types of wood grains can create unique patterns and textures that enhance the overall look of the piece.
• The grain of wood refers to the pattern and direction of the wood fibers
• It greatly influences the strength, appearance, and workability of the wood material
• Understanding wood grain is important for carpenters working on projects
• Cutting against the grain can cause splintering or tear-out
• Working with the grain allows for cleaner cuts and smoother surfaces
• Different types of wood grains create unique patterns and textures in finished woodworking projects
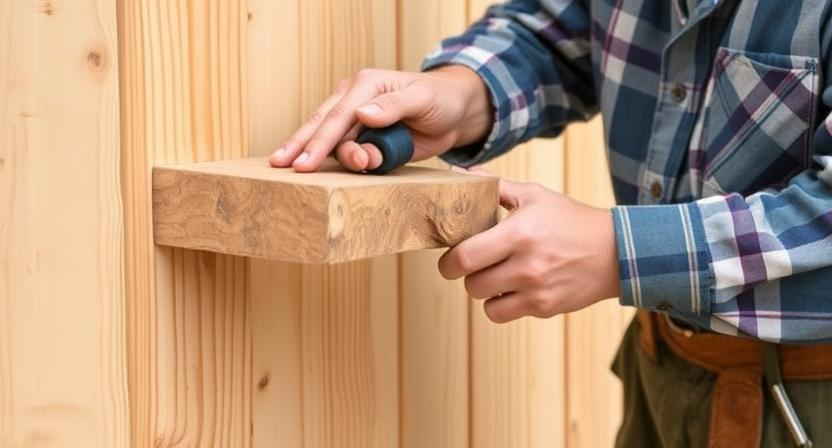
How to Sand Wood for a Smooth Finish
Start by selecting the appropriate sandpaper grit for the job. Coarse grits like 60-80 are suitable for heavy sanding and removing old finishes or rough surfaces. Medium grits around 100-150 are perfect for general sanding and smoothing out imperfections. Fine grits such as 180-220 are best used for finishing touches and achieving a smooth surface. Always sand in the direction of the wood grain to avoid creating scratches that will be visible after finishing.
After sanding with the coarsest grit needed, gradually work your way up to finer grits for a polished finish. Make sure to remove any dust between each sanding stage to prevent scratches and ensure a clean surface. Before applying a finish, run your hand over the sanded wood to check for smoothness and make any final touch-ups if needed. Sanding is a crucial step in woodworking that not only enhances the appearance of the wood but also ensures a professional-looking end result.
• Coarse grits like 60-80 are suitable for heavy sanding
• Medium grits around 100-150 are perfect for general sanding
• Fine grits such as 180-220 are best used for finishing touches
• Always sand in the direction of the wood grain to avoid scratches
• Gradually work your way up to finer grits for a polished finish
• Remove dust between each sanding stage to prevent scratches
• Check smoothness by running hand over sanded wood before applying finish
• Sanding is crucial in woodworking for a professional-looking result
Different Types of Wood Finishes and their Applications

Wood finishes serve both practical and aesthetic purposes in carpentry projects. Varnish is a popular choice, providing a durable and glossy finish that enhances the natural beauty of the wood. It also offers protection against moisture and scratches, making it ideal for furniture and other wooden surfaces exposed to everyday wear and tear.
Another widely used wood finish is lacquer, known for its quick-drying properties and high-gloss appearance. Lacquer creates a smooth and durable finish that is resistant to chipping and fading over time. It is commonly used on furniture, cabinetry, and woodwork where a high level of sheen is desired. Different types of wood finishes offer varying levels of protection and visual appeal, allowing carpenters to choose the most suitable option based on the project requirements.
• Varnish provides a durable and glossy finish
• Varnish enhances the natural beauty of wood
• Varnish offers protection against moisture and scratches
• Ideal for furniture and other wooden surfaces exposed to wear and tear
• Lacquer is known for quick-drying properties
• Lacquer creates a high-gloss appearance
• Resistant to chipping and fading over time
• Commonly used on furniture, cabinetry, and woodwork where high sheen is desired
Wood finishes not only protect the wood but also enhance its aesthetic appeal. From matte to glossy finishes, there are various options available to cater to different preferences. Whether you prefer a traditional look with varnish or a modern touch with lacquer, choosing the right wood finish can make all the difference in your carpentry projects.
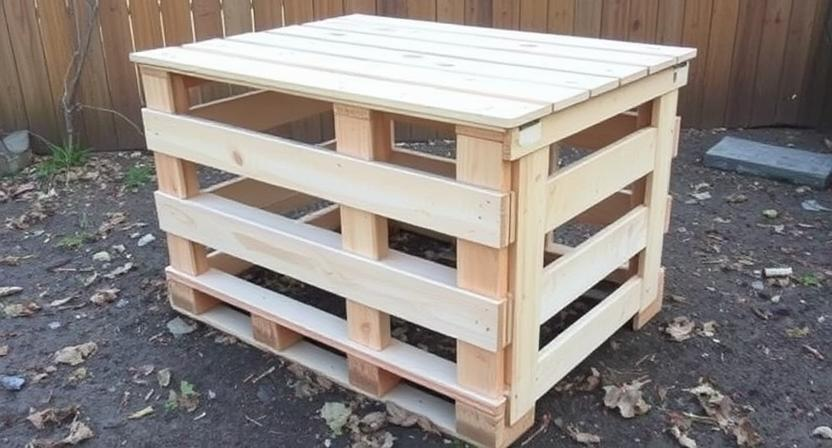
Building a Simple Wood Frame Structure
When constructing a simple wood frame structure, it is important to first select the appropriate type of wood for the project. Softwoods like pine or cedar are commonly used for their affordability and ease of workability, while hardwoods like oak or maple are preferred for their durability and strength.
Once the wood type is chosen, the next step involves measuring and cutting the wood pieces according to the blueprint or design plan. Accurate measurements are crucial for ensuring a precise and sturdy frame structure. Using a carpenter’s square and a quality handsaw or circular saw, each piece of wood should be carefully cut to the correct dimensions before assembly.
• Select the appropriate type of wood for the project
• Softwoods like pine or cedar are affordable and easy to work with
• Hardwoods like oak or maple offer durability and strength
• Measure and cut wood pieces according to blueprint or design plan
• Use a carpenter’s square for accurate measurements
• Use a quality handsaw or circular saw for cutting wood pieces
• Ensure each piece is cut to correct dimensions before assembly
Creating Basic Wood Furniture Pieces
When venturing into the world of carpentry, creating basic wood furniture pieces can be a fulfilling endeavor. From simple coffee tables to rustic chairs, the possibilities are endless when it comes to crafting your own pieces. Starting with straightforward designs such as a wooden bench or a small side table can help you hone your skills before moving on to more intricate projects.
Basic wood furniture pieces often require minimal materials and tools, making them ideal for beginners or those looking for a quick DIY project. By selecting sturdy wood such as pine or oak and using essential hand tools like a saw, hammer, and sandpaper, you can create functional and stylish furniture pieces for your home. Remember to take precise measurements and pay attention to details such as sanding and finishing to ensure a professional-looking final product.
• When starting out, consider creating a wooden bench or a small side table to practice your skills
• Basic wood furniture pieces require minimal materials and tools, making them perfect for beginners
• Choose sturdy wood like pine or oak for durability in your furniture pieces
• Essential hand tools such as a saw, hammer, and sandpaper are necessary for crafting basic wood furniture pieces
• Pay attention to details like precise measurements, sanding, and finishing to achieve a professional look
Repairing Common Wood Damage
When it comes to repairing common wood damage, it is essential to assess the extent of the issue before determining the best course of action. For minor scratches and dings on wooden surfaces, a quick fix can often be achieved by using wood filler to fill in the imperfections. Once the filler has dried, sanding the area smooth and applying a matching stain can help blend the repaired spot seamlessly with the rest of the wood surface.
In cases where the wood damage is more substantial, such as deep gouges or cracks, a more involved repair process may be necessary. Using wood glue to carefully piece together any broken sections and clamping them in place until the glue sets can help restore the structural integrity of the wood. After the repair has dried, sanding down any excess glue and refinishing the area can help restore the wood to its original appearance.
• For minor scratches and dings, use wood filler to fill in imperfections
• Sand the area smooth after filler has dried
• Apply matching stain to blend repaired spot with rest of wood surface
• For substantial damage like deep gouges or cracks, use wood glue to piece together broken sections
• Clamp pieces in place until glue sets for structural integrity restoration
• Sand down excess glue after repair has dried
• Refinish the area to restore original appearance
Installing and Hanging Doors
When it comes to installing and hanging doors in your home, precision is key to ensuring a proper fit and smooth operation. Before starting the installation process, it is essential to carefully measure the door frame to ensure the door will fit correctly. Make sure to account for any flooring or carpet that may affect the door clearance.
Once you have the correct measurements, you can begin by attaching the hinges to the door first, using a chisel to create the mortises for a flush fit. Then, with the help of a second set of hands, carefully hang the door onto the frame, making any necessary adjustments to ensure it swings open and closes smoothly. Finish off the installation by securing the hinges tightly and testing the door to ensure it functions properly.
• Measure the door frame accurately before beginning installation
• Account for any flooring or carpet that may affect door clearance
• Attach hinges to the door first using a chisel to create mortises for flush fit
• Have a second set of hands to help hang the door onto the frame
• Make necessary adjustments to ensure smooth swinging and closing of the door
• Secure hinges tightly after hanging the door
• Test the door to ensure proper functionality
Building and Installing Shelves

Shelves are a versatile and practical addition to any space, providing storage and adding a decorative touch. When building and installing shelves, it is important to first measure the space accurately where the shelves will be placed. This ensures a proper fit and alignment when it comes to installation. It is also essential to choose the right type of wood that complements the existing decor or meets the desired aesthetic for the shelves.
Once the measurements are taken and the wood is selected, the next step is to cut the wood pieces according to the desired shelf dimensions. Using precise cutting techniques will ensure that the shelves fit together seamlessly. After the pieces are cut, assembling the shelves can be done using various joinery techniques to create strong and sturdy structures. Finally, installing the shelves securely onto the wall with appropriate brackets or supports will complete the project, providing a functional and visually appealing storage solution.
• Measure the space accurately for proper fit
• Choose the right type of wood that complements existing decor
• Cut wood pieces according to desired shelf dimensions with precision
• Assemble shelves using various joinery techniques for strength and sturdiness
• Install shelves securely onto the wall with appropriate brackets or supports
Constructing a Basic Wooden Fence
When building a basic wooden fence, preparation is key. Start by marking out the boundaries where the fence will be installed, ensuring accuracy and symmetry. Dig post holes at regular intervals along the marked line, making sure they are deep enough to provide stability and support for the fence posts.
Next, insert the fence posts into the holes and secure them with concrete to keep them in place. Allow the concrete to fully dry before proceeding with attaching the horizontal rails and vertical pickets to the posts. Make sure to check for level and plumb frequently to ensure a straight and well-constructed fence.
• Mark out boundaries for fence installation
• Dig post holes at regular intervals along marked line
• Insert fence posts and secure with concrete
• Allow concrete to dry before attaching rails and pickets
• Check for level and plumb frequently
Making Simple Repairs to Wooden Floors
When it comes to making simple repairs to wooden floors, the first step is to assess the extent of the damage. Whether it’s a scratch, dent, or a loose plank, identifying the problem accurately is crucial in determining the appropriate repair method. For minor scratches and dents, a simple solution could be using wood filler to fill in the imperfections.
If the damage is more significant, such as a loose plank, it may be necessary to secure it back into place using nails or screws. Make sure to use the right size and type of fastener to ensure a secure fit. Once the repair is completed, sanding down the area lightly and applying a matching wood finish can help blend the repair seamlessly with the rest of the floor.
• Assess the extent of the damage
• Identify the problem accurately
• Use wood filler for minor scratches and dents
• Secure loose planks with nails or screws
• Use appropriate size and type of fastener
• Sand down the area lightly after repair
• Apply matching wood finish to blend repair seamlessly
Tips for Maintaining Carpentry Tools
Keeping your carpentry tools in good condition is crucial for successful projects and a longer lifespan for your equipment. After each use, make sure to clean your tools thoroughly to remove any dust, debris, or buildup that could affect their performance. A simple wipe down with a clean cloth or brush can go a long way in preventing rust or corrosion.
Proper storage is also key in maintaining your carpentry tools. Keep them in a dry area to prevent moisture damage and store them in a way that prevents them from knocking into each other or getting damaged. Consider investing in a toolbox or tool chest to keep everything organized and protected when not in use. Remember, a little effort in maintenance can go a long way in ensuring your tools are always ready for your next project.
• After each use, clean your tools thoroughly to remove dust, debris, or buildup
• Proper storage is key in maintaining carpentry tools
• Keep tools in a dry area to prevent moisture damage
• Store them in a way that prevents knocking into each other or getting damaged
• Consider investing in a toolbox or tool chest for organization and protection
Advancing your Carpentry Skills through Practice and Projects
Developing your carpentry skills requires consistent practice and taking on challenging projects. As you hone your abilities, start by familiarizing yourself with advanced joinery techniques to create stronger and more intricate wood joints. Experimenting with different types of wood and understanding their unique characteristics will also broaden your expertise in working with various materials.
Additionally, consider exploring more complex woodworking projects like building furniture pieces with intricate designs or constructing structures with precise measurements. These endeavors will push your skills further and help you gain confidence in tackling more ambitious carpentry tasks. Remember, each project is an opportunity to learn and improve your craft, so don’t be afraid to challenge yourself and expand your carpentry skills through practice and hands-on experience.
– Practice advanced joinery techniques to create stronger wood joints
– Experiment with different types of wood to understand their unique characteristics
– Take on complex woodworking projects like building furniture pieces with intricate designs
– Construct structures with precise measurements to push your skills further
– View each project as an opportunity to learn and improve your craft