

How to Render Animal Fat for Cooking and Soapmaking
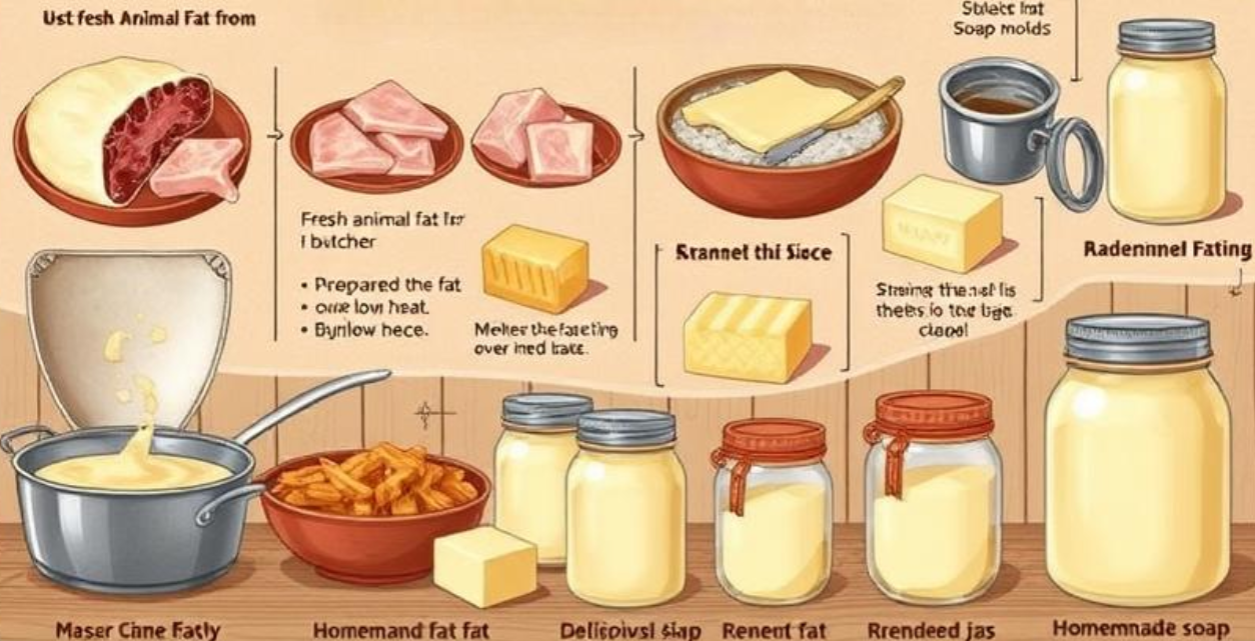
Obtaining Animal Fat
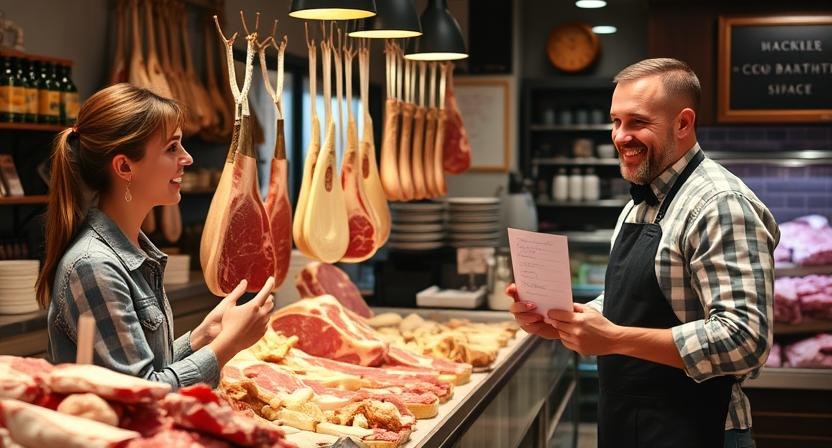
When it comes to obtaining animal fat for rendering, there are various sources to consider. One common option is to visit your local butcher or meat counter at the grocery store and ask for any trimmings or excess fat they may have available. Additionally, you can save fat trimmings from your own cooking or ask friends and family to gather fat scraps for you.
Another option for obtaining animal fat is to purchase it from specialty butchers or online suppliers that specifically sell high-quality fat for rendering purposes. These sources often offer a variety of animal fats such as beef, pork, or poultry, allowing you to choose the type that best suits your preferences and recipes. Remember to opt for fat that is fresh and free from any off-putting odors or discoloration for the best results in rendering.
• Visiting local butcher or meat counter for trimmings or excess fat
• Saving fat trimmings from your own cooking
• Asking friends and family to gather fat scraps for you
• Purchasing animal fat from specialty butchers or online suppliers
• Choosing from a variety of animal fats such as beef, pork, or poultry
• Opting for fresh fat free from any off-putting odors or discoloration
Selecting the Right Animal Fat
When selecting animal fat for rendering, it is essential to consider the type of fat that will best suit your intended use. Beef tallow, pork lard, chicken fat, and duck fat are popular options with distinct flavors and properties that can influence the outcome of your rendered fat. Beef tallow, for instance, is known for its high smoke point, making it ideal for frying and high-temperature cooking. On the other hand, pork lard offers a rich and savory flavor that enhances the taste of dishes like pastries and traditional recipes.
In addition to considering the flavor profile of the animal fat, it is important to choose high-quality, fresh fat for rendering. Opt for organic, pasture-raised, or grass-fed animal fats whenever possible to ensure a cleaner and more nutritious end product. Avoid using fats that have been heavily processed or contain additives, as they may affect the taste and quality of the rendered fat. Ultimately, selecting the right animal fat is crucial in achieving the desired results in your rendering and cooking endeavors.
• Beef tallow has a high smoke point, making it ideal for frying and high-temperature cooking
• Pork lard offers a rich and savory flavor that enhances the taste of dishes like pastries and traditional recipes
• Choose high-quality, fresh fat for rendering to ensure a cleaner and more nutritious end product
• Opt for organic, pasture-raised, or grass-fed animal fats whenever possible
• Avoid using heavily processed fats or those with additives as they may affect the taste and quality of the rendered fat.
Preparing the Animal Fat
To begin preparing animal fat for rendering, make sure the fat is fresh and trimmed of any undesirable portions such as skin or excess connective tissue. Cutting the fat into smaller, uniform pieces will help it melt more evenly, so using a sharp knife, dice the fat into manageable chunks. Removing any blood vessels or membranes during this process will result in a purer final product.
Once the fat is cut into pieces, consider the method of melting that best suits your needs. Whether using a double boiler, slow cooker, or oven, each method offers its own advantages in terms of control and convenience. Pay attention to the heat level and avoid overheating the fat, as this can lead to a burnt flavor and degrade the quality of the rendered fat.
• Trim the fat of any undesirable portions such as skin or excess connective tissue
• Cut the fat into smaller, uniform pieces for even melting
• Remove blood vessels or membranes for a purer final product
• Consider using a double boiler, slow cooker, or oven for melting
• Pay attention to heat levels to avoid overheating and burnt flavor
• Control and convenience are key factors in choosing a method
Cutting the Animal Fat into Pieces
Before moving on to the next step of rendering animal fat, it is crucial to properly prepare the fat by cutting it into manageable pieces. This process ensures that the fat will melt evenly and efficiently during the rendering process. To begin, take a sharp knife and carefully trim off any excess skin or meat from the fat. Once the fat is clean, proceed to cut it into evenly sized pieces, roughly one to two inches in diameter. Consistent sizing will help facilitate a more uniform melting process and result in a higher-quality rendered fat.
When cutting the animal fat into pieces, it is important to work on a clean and sturdy surface to prevent any accidents or contamination. Make sure to sharpen your knife beforehand to make the cutting process easier and safer. Additionally, consider the size of your cooking equipment and cut the fat into pieces that will fit comfortably in the chosen container for rendering. Taking the time to cut the animal fat into uniform pieces will ultimately contribute to a successful rendering process and yield a high-quality final product.
• Trim off any excess skin or meat from the fat
• Cut the fat into evenly sized pieces, roughly one to two inches in diameter
• Work on a clean and sturdy surface to prevent accidents or contamination
• Sharpen your knife before cutting for easier and safer process
• Consider the size of your cooking equipment when cutting the fat pieces
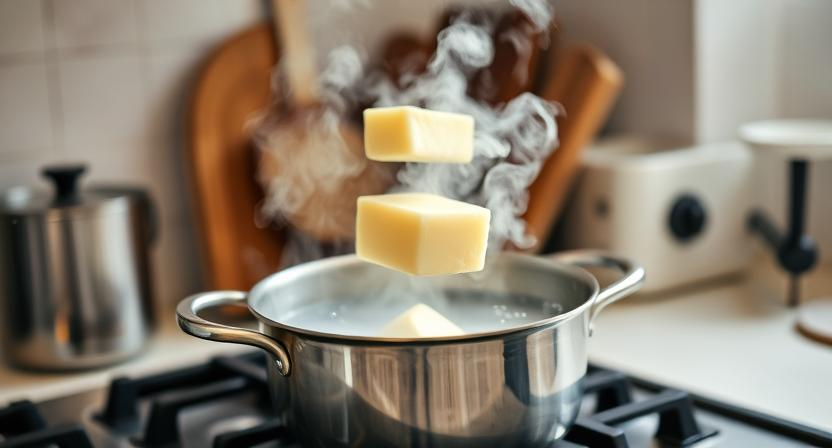
Melting the Animal Fat
To melt the animal fat, place the cut pieces in a heavy-bottomed pot over low heat. Stir occasionally to ensure even heating and prevent sticking. It’s important to monitor the melting process closely to prevent burning and maintain the quality of the rendered fat.
Another method to melt animal fat is by using a microwave-safe bowl. Place the fat pieces in the bowl and microwave in short intervals, stirring in between, until completely melted. Be cautious not to overheat the fat, as it can easily burn and alter the taste of the rendered fat.
• Place the cut pieces of animal fat in a heavy-bottomed pot over low heat
• Stir occasionally to ensure even heating and prevent sticking
• Monitor the melting process closely to prevent burning and maintain quality
• Alternatively, use a microwave-safe bowl to melt animal fat
• Microwave in short intervals, stirring in between until completely melted
• Be cautious not to overheat the fat to avoid altering the taste
Using a Double Boiler Method
To utilize the double boiler method for rendering animal fat, start by setting up a double boiler with water in the bottom pot and the animal fat in the top pot. Ensure that the water is simmering gently to avoid burning the fat. Allow the fat to slowly melt, stirring occasionally to help it melt evenly.
Once the fat has completely melted, carefully strain it through a fine-mesh sieve or cheesecloth to remove any impurities or leftover bits of protein. Transfer the strained fat into a clean container and let it cool to room temperature before storing it in the refrigerator. Using the double boiler method allows for a controlled and gentle heat source, resulting in a high-quality rendered fat that is perfect for various culinary and cosmetic purposes.
• To utilize the double boiler method for rendering animal fat, follow these steps:
– Set up a double boiler with water in the bottom pot and animal fat in the top pot.
– Ensure that the water is simmering gently to prevent burning the fat.
– Stir occasionally to help the fat melt evenly.
• Once the fat has completely melted, strain it through a fine-mesh sieve or cheesecloth to remove impurities.
– This step ensures that your rendered fat is clean and free of any leftover bits of protein.
• Transfer the strained fat into a clean container and let it cool to room temperature before storing it in the refrigerator.
– This will help preserve your rendered fat for future use.
• The double boiler method provides a controlled and gentle heat source, resulting in high-quality rendered fats suitable for culinary and cosmetic applications.
– Enjoy using your homemade rendered fats in various recipes or beauty products.
Using a Slow Cooker Method
To start the slow cooker method for rendering animal fat, begin by cutting the fat into small, uniform pieces. This will help the fat melt evenly and speed up the rendering process. Place the diced animal fat into the slow cooker, ensuring that it’s not more than three-quarters full to prevent overflowing as the fat melts. Set the slow cooker to low heat and allow the fat to slowly melt over several hours, stirring occasionally to prevent sticking or burning.
Once the animal fat has completely melted in the slow cooker, it’s time to strain the liquid fat from any remaining solid pieces. Use a fine mesh strainer or cheesecloth to separate the rendered fat from any impurities or debris. Allow the strained fat to cool slightly before transferring it into a storage container. Store the rendered animal fat in a cool, dark place or in the refrigerator for future use in cooking or other applications.
• To start the slow cooker method for rendering animal fat, begin by cutting the fat into small, uniform pieces.
• Place the diced animal fat into the slow cooker, ensuring that it’s not more than three-quarters full to prevent overflowing.
• Set the slow cooker to low heat and allow the fat to slowly melt over several hours, stirring occasionally.
• Once the animal fat has completely melted in the slow cooker, strain the liquid fat from any remaining solid pieces using a fine mesh strainer or cheesecloth.
• Allow the strained fat to cool slightly before transferring it into a storage container.
• Store the rendered animal fat in a cool, dark place or in the refrigerator for future use.
Using an Oven Method
To render animal fat using the oven method, start by preheating the oven to a low temperature, around 200-250°F. Next, place the pieces of animal fat in a single layer on a baking sheet or oven-safe dish. Make sure to spread them out evenly to ensure even melting. Place the baking sheet or dish in the oven and allow the fat to slowly melt over the course of a few hours, checking on it periodically.
Once the fat has completely melted, remove it from the oven and carefully strain it through a fine mesh sieve or cheesecloth to remove any impurities or leftover solid bits. Allow the rendered fat to cool slightly before transferring it to a glass jar or container for storage. The oven method is a simple and effective way to render animal fat, resulting in a clean and versatile product that can be used for cooking, soapmaking, and various other applications.
• Preheat the oven to 200-250°F
• Place animal fat pieces in a single layer on a baking sheet or dish
• Spread them out evenly for even melting
• Allow fat to melt slowly over a few hours in the oven
• Check periodically during the process
Once the fat has completely melted, remove it from the oven and carefully strain it through a fine mesh sieve or cheesecloth to remove any impurities or leftover solid bits. Allow the rendered fat to cool slightly before transferring it to a glass jar or container for storage. The oven method is a simple and effective way to render animal fat, resulting in a clean and versatile product that can be used for cooking, soapmaking, and various other applications.
Straining the Melted Fat
After the animal fat has melted down, it’s time to proceed with straining to remove any impurities or solids. To strain the melted fat, line a fine-mesh sieve or cheesecloth over a heatproof container. Carefully pour the liquid fat through the strainer, allowing the impurities to be caught in the sieve or cheesecloth while the clean fat passes through.
Once all the liquid fat has been strained, gently press down on the solids in the strainer to extract any remaining fat. Avoid pressing too hard as this may force unwanted particles through the sieve. Discard the strained solids and ensure the clean, rendered fat is now ready for further processing or storage.
• After melting the animal fat, strain it through a fine-mesh sieve or cheesecloth
• Pour the liquid fat carefully to remove impurities and solids
• Gently press down on the solids in the strainer to extract remaining fat
• Avoid pressing too hard to prevent unwanted particles from passing through
• Discard strained solids and store clean rendered fat for further use
Cooling the Rendered Fat
After the rendered animal fat has been strained, it is time to allow it to cool. This step is crucial in the rendering process as it solidifies the fat, transforming it into a usable form. Once the fat has cooled sufficiently, it will solidify into a creamy white or pale yellow substance, ready to be stored or used in various applications.
Properly cooling the rendered fat ensures its longevity and maintains its quality. Avoid exposing the fat to extreme temperature changes during this process, as it can affect the texture and consistency of the final product. Once the fat has cooled completely, it is ready to be stored in airtight containers or used in recipes where its unique flavor and properties can elevate the dish.
• After the rendered animal fat has been strained, it is crucial to allow it to cool
• Cooling solidifies the fat into a usable form, typically creamy white or pale yellow
• Properly cooling ensures longevity and maintains quality of the fat
• Avoid extreme temperature changes during cooling to preserve texture and consistency
• Once cooled completely, store in airtight containers or use in recipes for added flavor
Storing the Rendered Fat
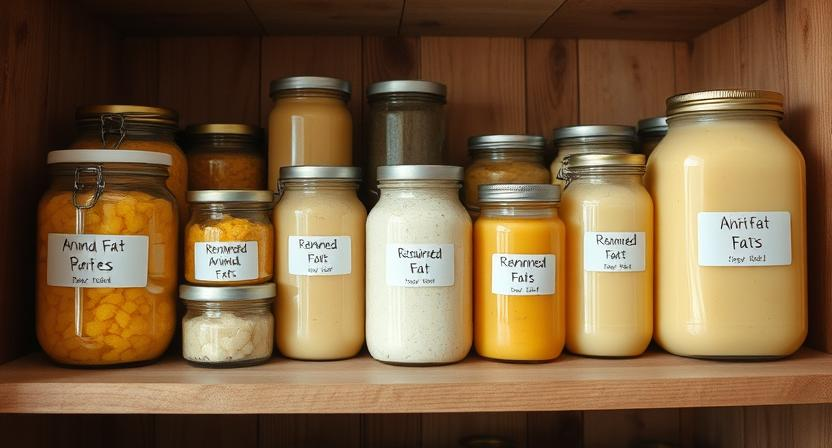
After rendering animal fat, storing it properly is crucial to maintain its quality and prevent it from spoiling. Once the fat has cooled to room temperature, transfer it to a clean, airtight container. Make sure the container is completely sealed to prevent any exposure to air, light, or moisture, which can lead to rancidity. Store the rendered fat in a cool, dark place such as a pantry or refrigerator to prolong its shelf life.
It is recommended to label the container with the type of fat and the date it was rendered to keep track of its freshness. Stored properly, rendered animal fat can last for several months to a year, depending on the type of fat and storage conditions. If you notice any off smells or discoloration, it may be a sign that the fat has gone bad and should be discarded. Properly stored rendered fat can be a convenient and versatile ingredient to enhance the flavor of various dishes.
• Once the fat has cooled to room temperature, transfer it to a clean, airtight container
• Make sure the container is completely sealed to prevent exposure to air, light, or moisture
• Store the rendered fat in a cool, dark place such as a pantry or refrigerator
• Label the container with the type of fat and date it was rendered for freshness tracking
• Rendered animal fat can last several months to a year if stored properly
• Discard any fat that shows signs of off smells or discoloration
• Properly stored rendered fat can enhance the flavor of various dishes
Reusing the Rendered Fat
After rendering animal fat, it can be reused several times before losing its effectiveness. To reuse the rendered fat, simply strain out any food particles or impurities and store it in an airtight container in the refrigerator or freezer. When ready to use again, melt the fat down and strain it once more to ensure its purity. The rendered fat can be used for cooking, frying, sautéing, or even as a base for homemade skincare products.
By reusing the rendered fat, not only do you save money by avoiding constant purchases of new cooking oil, but you also reduce waste and environmental impact. The flavors from previous uses can enhance the taste of your dishes, adding a rich and savory depth that is unique to animal fat. When properly stored and maintained, rendered fat can be a versatile and sustainable kitchen staple that elevates your culinary creations.
• Reusing rendered fat can save money and reduce waste
• Store rendered fat in an airtight container in the refrigerator or freezer
• Melt down and strain before each use to ensure purity
• Can be used for cooking, frying, sautéing, or as a base for skincare products
• Flavors from previous uses can enhance taste of dishes
Tips for Rendering Animal Fat
To ensure a successful rendering process, it is crucial to start with clean and fresh animal fat. Avoid using fat that has been previously cooked or has been sitting out for an extended period of time, as this can impact the quality of the rendered fat. Additionally, make sure to cut the fat into uniform pieces to promote even melting and prevent any burnt or under-rendered spots.
When melting animal fat, it is advisable to use low to medium heat to prevent scorching and maintain the quality of the final product. Stir the fat occasionally to ensure even heating and avoid any sticking to the bottom of the pot. Patience is key during the melting process, as rushing can result in a lower-quality rendered fat.
• Start with clean and fresh animal fat
• Avoid using fat that has been previously cooked or sitting out for a long time
• Cut fat into uniform pieces for even melting
• Use low to medium heat to prevent scorching
• Stir occasionally to ensure even heating
• Be patient during the melting process
Benefits of Using Rendered Animal Fat
Rendered animal fat, such as tallow and lard, have gained popularity in culinary circles due to their rich flavor and versatility in cooking. They add depth and richness to dishes, enhancing the overall taste and texture of the food. Using rendered animal fat in cooking can elevate the flavors of both savory and sweet dishes, making them more delicious and satisfying for the palate.
Furthermore, rendered animal fat is a cost-effective and sustainable cooking ingredient. Instead of discarding animal fat after cooking meat or frying foods, rendering it allows for its reuse in various culinary applications. This not only reduces food waste but also provides a budget-friendly alternative to store-bought cooking oils and fats. By incorporating rendered animal fat into your cooking repertoire, you can enhance the flavor profile of your dishes while minimizing your environmental impact.
• Rendered animal fat, such as tallow and lard, enhance the taste and texture of dishes
• Adds depth and richness to both savory and sweet dishes
• Cost-effective and sustainable cooking ingredient
• Reduces food waste by reusing animal fat instead of discarding it
• Provides a budget-friendly alternative to store-bought cooking oils and fats
• Minimizes environmental impact by using rendered animal fat in cooking
Different Uses for Rendered Animal Fat
Rendered animal fat has a wide range of uses beyond just cooking. One common application is utilizing it as a base for making homemade candles. With its high melting point and long burn time, rendered animal fat candles can provide a sustainable and cost-effective alternative to traditional candle wax. Additionally, rendered animal fat can be used in skincare products such as balms and salves due to its moisturizing properties and ability to create a protective barrier on the skin.
Another creative use for rendered animal fat is in the production of homemade bird feeders. By mixing it with birdseed and allowing it to solidify, you can create a nourishing and energy-rich treat for wild birds to enjoy. This DIY bird feeder not only helps attract a variety of bird species to your backyard but also provides them with essential nutrients during harsh weather conditions.
– Rendered animal fat can be used as a base for making homemade candles
– It has a high melting point and long burn time
– Provides a sustainable and cost-effective alternative to traditional candle wax
– Rendered animal fat can be utilized in skincare products such as balms and salves
– Its moisturizing properties create a protective barrier on the skin
– Rendered animal fat can be used in the production of homemade bird feeders
– Mixing it with birdseed and allowing it to solidify creates a nourishing treat for wild birds
– Helps attract different bird species to your backyard
– Provides essential nutrients during harsh weather conditions
Making Soap with Rendered Animal Fat
Making soap with rendered animal fat is a traditional method that has been used for centuries. The rich and creamy lather produced by animal fat-based soap is known for its moisturizing properties, making it a popular choice for those with sensitive or dry skin. When using rendered animal fat for soapmaking, it is important to ensure that the fat is properly rendered to remove any impurities and ensure a high-quality soap product.
To make soap with rendered animal fat, first gather all the necessary ingredients and equipment, including lye, water, essential oils for fragrance, and molds for shaping the soap. Once the rendered fat is melted and cooled to the correct temperature, combine it with the lye-water mixture and stir until it reaches trace. Pour the soap into molds and allow it to cure for several weeks before using. The resulting soap will be gentle on the skin and have a unique, luxurious feel that commercial soaps often lack.
• To ensure the fat is properly rendered, heat it slowly over low heat until all the impurities are removed.
• Be sure to wear protective gear, such as gloves and goggles, when working with lye to avoid any accidents.
• Experiment with different essential oils to create a custom scent for your soap that suits your preferences.
• Allow the soap to cure in a cool, dry place for at least four weeks before using it to ensure a long-lasting bar.
Ingredients Needed for Soapmaking
For soapmaking, you will need a few key ingredients to create your own homemade soap. The primary components include rendered animal fat, which acts as the base for the soap, providing it with moisturizing properties. Other essential ingredients are water, which is necessary for the process of saponification, and lye (sodium hydroxide), a caustic substance that helps in turning the fats into soap. Additionally, you may want to incorporate scents, colors, or exfoliants into your soap, which can be achieved by adding essential oils, natural colorants, or ingredients like oatmeal or dried herbs.
Apart from the basic components, you may also consider including additives such as honey, milk, or coconut oil to customize your soap further. These ingredients can provide additional benefits like extra moisture, a rich lather, or a luxurious feel to the finished product. Before getting started, it’s crucial to gather all the necessary materials and ingredients so that the soapmaking process can proceed smoothly and efficiently.
• Rendered animal fat
• Water
• Lye (sodium hydroxide)
• Essential oils
• Natural colorants
• Oatmeal or dried herbs
In addition to the basic ingredients, consider adding:
• Honey
• Milk
• Coconut oil
Gathering all necessary materials and ingredients before starting is crucial for a smooth soapmaking process.
Steps for Making Soap with Rendered Animal Fat
First, gather all your ingredients and equipment in one place before you begin making soap with rendered animal fat. Make sure you have your rendered fat, lye, water, essential oils (if desired), a digital scale, a thermometer, a stick blender, and a mold for shaping your soap.
Next, carefully measure out your lye and water, following safety precautions as lye can be caustic. Stir the lye into the water until completely dissolved and set the mixture aside to cool. While the lye solution is cooling, warm up your rendered animal fat until it reaches a liquid state. Once both your lye solution and fat are at the right temperature, slowly pour the lye mixture into the fat, blending as you go until you reach trace, which is when the soap mixture thickens to a pudding-like consistency. Finally, pour the soap mixture into your mold, cover it with a towel, and let it sit for 24-48 hours to harden before unmolding and cutting into bars.
• Gather all ingredients and equipment in one place
• Have rendered fat, lye, water, essential oils (if desired), digital scale, thermometer, stick blender, and soap mold ready
• Carefully measure out lye and water following safety precautions
• Stir lye into water until completely dissolved and set aside to cool
• Warm up rendered animal fat until liquid state is reached
• Slowly pour lye mixture into fat while blending until trace is achieved
• Pour soap mixture into mold, cover with towel, let sit for 24-48 hours to harden before unmolding and cutting bars
Curing and Storing Homemade Soap
Once your homemade soap has been molded and shaped, it is essential to ensure proper curing and storing to maintain its quality. Curing allows the soap to harden and mellow, enhancing its lather and longevity. To cure homemade soap, place the bars on a flat surface with good air circulation, away from direct sunlight and moisture. Let the soap cure for 4-6 weeks, turning the bars every few days to ensure even drying.
Storing cured homemade soap is crucial for preserving its fragrance and texture. Keep the soap in a cool, dry place with adequate ventilation to prevent it from becoming soft or overly moist. Store the soap in a breathable container, such as a muslin bag or wrapped in wax paper, to protect it from dust and humidity. Properly cured and stored homemade soap can last for several months, providing you with a luxurious and nourishing bathing experience.
• Once your homemade soap has been molded and shaped, it is essential to ensure proper curing and storing to maintain its quality.
• Curing allows the soap to harden and mellow, enhancing its lather and longevity.
• To cure homemade soap, place the bars on a flat surface with good air circulation, away from direct sunlight and moisture.
• Let the soap cure for 4-6 weeks, turning the bars every few days to ensure even drying.
Storing cured homemade soap is crucial for preserving its fragrance and texture.
Keep the soap in a cool, dry place with adequate ventilation to prevent it from becoming soft or overly moist.
Store the soap in a breathable container, such as a muslin bag or wrapped in wax paper, to protect it from dust and humidity.
Properly cured and stored homemade soap can last for several months, providing you with a luxurious and nourishing bathing experience.
Troubleshooting Common Issues with Rendering and Soapmaking
If you encounter issues with rendering animal fat, such as the fat not melting properly, ensure that you are using the appropriate heat level. Adjust the heat to a low setting and allow the fat to melt slowly to prevent burning. Additionally, make sure that you are cutting the fat into uniform pieces to promote even melting.
When making soap with rendered animal fat, if you find that your soap is not setting properly or has a lumpy texture, it may be due to inaccurate measurements of ingredients. Double-check your recipe and proportions to ensure accuracy. Furthermore, if your soap is too soft or too hard after curing, consider adjusting the curing time or temperature to achieve the desired consistency.
• If animal fat is not melting properly, adjust heat to low setting
• Cut fat into uniform pieces for even melting
• Double-check recipe and ingredient measurements if soap is not setting properly
• Adjust curing time or temperature if soap is too soft or hard