

How to Sharpen and Maintain Your Gardening Tools
Why Sharpening Your Gardening Tools is Important
Sharpening your gardening tools is crucial for ensuring the effectiveness and efficiency of your work in the garden. Tools like pruning shears, shovels, and lawn mower blades are used frequently and can become dull over time, making them less effective in cutting and shaping plants. By regularly sharpening your tools, you can maintain their sharp edges, allowing for cleaner cuts that promote plant health and growth.
Dull tools not only make gardening tasks more challenging and time-consuming but can also cause damage to your plants. When using blunt tools, you may end up with ragged cuts that can leave plants vulnerable to diseases and pests. By keeping your gardening tools sharp, you not only make your work easier but also help to protect the overall health and well-being of your garden.
– Sharpening your gardening tools is crucial for ensuring effectiveness and efficiency
– Dull tools can make gardening tasks more challenging and time-consuming
– Regularly sharpened tools allow for cleaner cuts that promote plant health and growth
– Blunt tools can cause damage to plants, leaving them vulnerable to diseases and pests
– Keeping gardening tools sharp not only makes work easier but also protects the overall health of the garden.
The Essential Tools for Sharpening
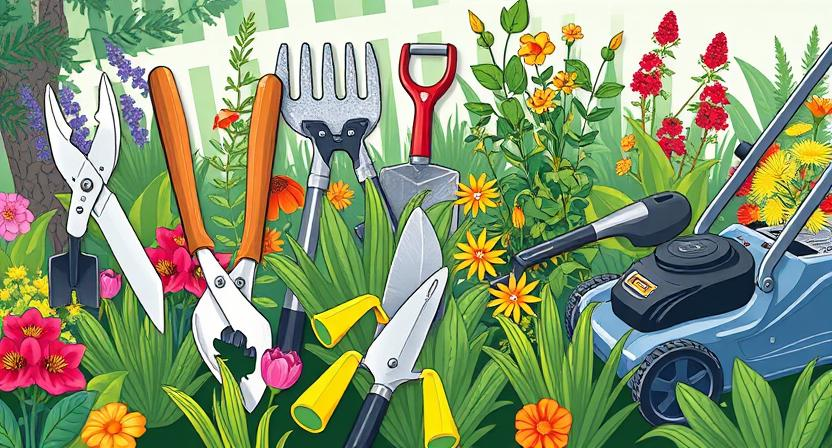
To effectively sharpen your gardening tools, you will need a few essential tools. A sharpening stone is a must-have item for maintaining sharp edges on your tools. Choose a stone with a coarse grit for initial sharpening and a finer grit for fine-tuning the edge. Additionally, a hand file or metal file can be useful for sharpening larger garden tools such as shovels and hoes.
A honing guide is another handy tool that can help maintain consistent angles while sharpening blades. This tool is especially useful for beginners to ensure the correct angle is maintained throughout the sharpening process. Finally, a lubricant such as honing oil or water can be helpful in preventing the tool from overheating during sharpening and prolonging the life of your sharpening tools.
• Sharpening stone with coarse and fine grit
• Hand file or metal file for larger garden tools
• Honing guide for maintaining consistent angles
• Lubricant such as honing oil or water to prevent overheating
Step-by-Step Guide to Sharpening Pruning Shears
To begin sharpening your pruning shears, start by dismantling the tool to expose the blades. Using a clean cloth, wipe off any dirt or debris from the blades. Then, securely hold the shear in place and carefully run a whetstone along the beveled edge of the blade, maintaining a consistent angle. Remember to use smooth, even strokes to achieve a sharp edge. Repeat the process on the other blade to ensure both sides are evenly sharpened.
Next, inspect the blades for any nicks or rough spots that may need extra attention. If necessary, gently file these imperfections away using a metal file. Be cautious not to apply too much pressure, as this could damage the blade. Once you have achieved a sharp edge on both blades, reassemble the pruning shears and test the sharpness by making a few cuts on a small branch. If the shears easily cut through the branch with a clean slice, then your pruning shears are ready for use in the garden.
• Dismantle the pruning shears to expose the blades
• Wipe off any dirt or debris from the blades using a clean cloth
• Hold the shear securely in place and run a whetstone along the beveled edge of the blade
• Maintain a consistent angle and use smooth, even strokes for sharpening
• Repeat the process on both blades to ensure even sharpening
• Inspect the blades for nicks or rough spots that may need extra attention
• Gently file away any imperfections using a metal file if necessary
• Be cautious not to apply too much pressure to avoid damaging the blade
• Reassemble the pruning shears once both blades are sharp
• Test sharpness by making cuts on a small branch – should cut easily with a clean slice
Tips for Sharpening Garden Hoes
When sharpening garden hoes, it’s crucial to start with the right tools. A flat file or a grinder can be used to sharpen the edge of the hoe. Hold the tool securely in place and apply the file across the blade in smooth, even strokes. It’s important to maintain a consistent angle to ensure an even sharpening. Once the edge is sharpened, check for any burrs or rough spots that should be smoothed out with a honing stone to achieve a sharp edge.
After sharpening your garden hoe, it’s recommended to regularly maintain the sharpness by touching up the edge after each use. This will prevent the blade from dulling too quickly and make your gardening tasks more efficient. Additionally, storing the hoe in a dry place away from moisture will help prolong the sharpness of the blade. Remember to always wear gloves when sharpening garden tools to protect your hands from sharp edges.
• Start with the right tools such as a flat file or grinder
• Hold the tool securely and apply the file in smooth, even strokes
• Maintain a consistent angle for even sharpening
• Check for burrs and rough spots to smooth out with honing stone
• Regularly touch up the edge after each use to maintain sharpness
• Store hoe in dry place away from moisture to prolong blade sharpness
• Wear gloves when sharpening garden tools to protect hands from sharp edges
How to Sharpen a Garden Knife
To sharpen a garden knife, start by securing the blade in a vice or holding it steady on a flat surface. Using a sharpening stone, hold the knife at a 20-degree angle and make long, smooth strokes along the blade, ensuring consistent pressure. Repeat this process on both sides of the blade until you achieve a sharp edge. It’s important to maintain the same angle throughout to ensure an even and effective sharpening.
After sharpening, test the knife’s sharpness by gently running your thumb along the edge. Be cautious to avoid any accidents. If the blade easily catches on your thumbnail, it is sharp. Remember to always clean the knife after sharpening to remove any metal shavings and prevent rusting. By regularly sharpening your garden knife, you will ensure precise cuts and a longer lifespan for the tool.
• To sharpen a garden knife, secure the blade in a vice or on a flat surface
• Use a sharpening stone at a 20-degree angle and make long, smooth strokes along the blade
• Maintain consistent pressure and repeat on both sides of the blade for an even edge
• Test sharpness by running your thumb along the edge carefully
• Clean the knife after sharpening to remove metal shavings and prevent rusting
By following these steps regularly, you can ensure precise cuts with your garden knife and prolong its lifespan.
Maintaining the Sharpness of Your Shovels
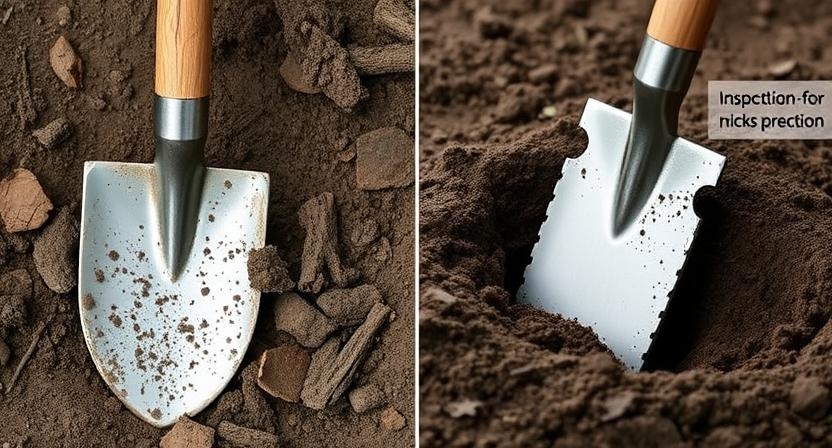
Ensuring your shovels remain sharp is essential to their effectiveness in your gardening tasks. Dull shovels can make digging harder work than it needs to be and can cause unnecessary strain on your muscles. To maintain the sharpness of your shovels, it’s important to regularly inspect the blade for any nicks, chips, or signs of wear.
If you notice any damage, it’s crucial to address it promptly to prevent further deterioration of the blade. One way to keep your shovels sharp is by regularly sharpening them using a file or a sharpening stone. By maintaining sharp edges on your shovels, you’ll not only make your gardening tasks easier but also extend the lifespan of your tools.
• Regularly inspect the blade for nicks, chips, or signs of wear
• Address any damage promptly to prevent further deterioration
• Sharpen your shovels using a file or sharpening stone
• Maintain sharp edges to make gardening tasks easier and extend tool lifespan
The Benefits of Sharpening Your Hedge Trimmers
Regular maintenance of your hedge trimmers, including sharpening the blades, offers several advantages. Firstly, sharp blades ensure cleaner and more precise cuts, promoting the health and growth of your hedges. Dull blades can crush and damage the plant tissue, making it susceptible to diseases and pests. By keeping your hedge trimmers sharp, you can achieve a professional-looking finish that enhances the overall aesthetics of your garden.
Additionally, sharpened hedge trimmers require less effort to use, reducing strain on your hands and wrists during trimming sessions. This increased efficiency not only saves you time but also enhances the effectiveness of your gardening tasks. By investing the time to sharpen your hedge trimmers regularly, you can maintain a beautiful and healthy outdoor space with ease.
• Sharp blades ensure cleaner and more precise cuts
• Promotes the health and growth of hedges
• Prevents damage to plant tissue, reducing susceptibility to diseases and pests
• Achieve a professional-looking finish for your garden
• Requires less effort to use, reducing strain on hands and wrists
• Increases efficiency during trimming sessions
• Saves time and enhances effectiveness of gardening tasks
• Maintains a beautiful and healthy outdoor space with ease
Cleaning and Sharpening Your Lawn Mower Blades
To keep your lawn looking its best, it’s crucial to clean and sharpen your lawn mower blades regularly. Over time, blades can become dull, leading to ragged cuts that damage the grass instead of providing a clean, healthy trim. To clean your lawn mower blades, first, disconnect the spark plug to prevent any accidental starts. Then, using a stiff brush or scraper, remove any grass clippings, dirt, and debris from the blades. This step is essential to ensure that your blades can be sharpened effectively and efficiently.
Once your lawn mower blades are clean, it’s time to sharpen them for optimal cutting performance. You can use a bench grinder, hand file, or a professional blade sharpener for this task. Remember to follow the manufacturer’s guidelines for the correct angle and be mindful of not removing too much material. A sharp blade will make your lawn mower more efficient, resulting in a neater cut and healthier grass. Regular maintenance of your lawn mower blades will not only save you time and effort but will also extend the life of your equipment.
• Disconnect the spark plug before cleaning
• Use a stiff brush or scraper to remove grass clippings and debris
• Cleaning blades is essential for effective sharpening
• Sharpen blades using a bench grinder, hand file, or professional blade sharpener
• Follow manufacturer’s guidelines for correct angle
• Be careful not to remove too much material while sharpening
Regular maintenance of lawn mower blades:
– Saves time and effort
– Extends the life of equipment
Sharpening Tips for Hand Saws
To effectively sharpen your hand saw, start by securing the blade firmly in a vise or clamp to prevent any movement during the sharpening process. Use a flat file with a fine tooth pattern to maintain the original tooth shape while removing any dull edges. Position the file at the same angle as the existing tooth bevel and gently push it across the tooth in a smooth, consistent motion. Repeat this process for each tooth along the edge of the saw blade, ensuring even sharpening throughout. Take care not to apply too much pressure, as this can cause the teeth to become uneven and affect the saw’s cutting ability.
Once you have sharpened all the teeth on the hand saw blade, use a triangular file to set the rakers or depth gauges between the teeth. These rakers help control the depth of the cut and should be filed down to the same height to ensure a smooth cutting action. Gently file each raker to the correct height without removing too much material, as this can alter the saw’s performance. After sharpening both the teeth and the rakers, test the hand saw’s sharpness by making a few cuts on a scrap piece of wood. If the saw cuts smoothly and efficiently, you have successfully sharpened your hand saw for continued use in your gardening projects.
• Secure the blade firmly in a vise or clamp
• Use a flat file with fine tooth pattern
• Position file at same angle as existing tooth bevel
• Gently push file across tooth in smooth, consistent motion
• Repeat process for each tooth along edge of saw blade
Once all teeth are sharpened:
• Use triangular file to set rakers between teeth
• File down rakers to same height for smooth cutting action
• Test sharpness by making cuts on scrap piece of wood
If saw cuts smoothly and efficiently, sharpening is successful
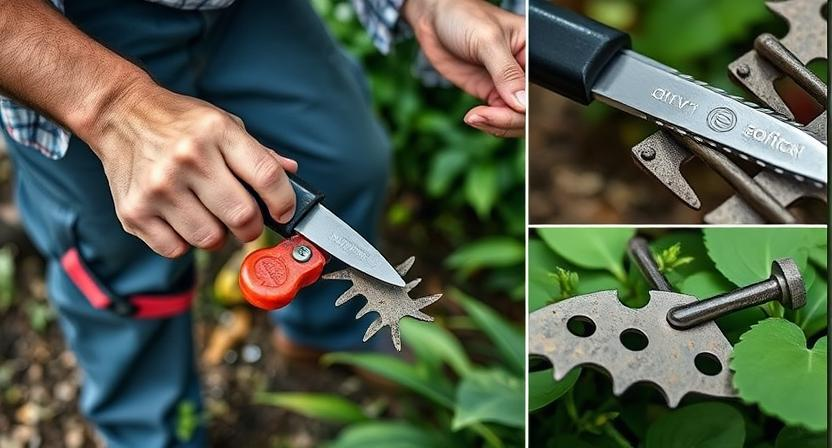
How to Properly Sharpen a Trowel
To keep your trowel in top condition for digging in the garden, it is essential to sharpen its edges regularly. Start by cleaning any dirt or debris off the trowel with a brush or damp cloth. Once the trowel is clean, use a file or sharpening stone to carefully sharpen the blade. Hold the file at a consistent angle against the edge of the trowel and push it away from you in smooth strokes. Repeat this process until you achieve a sharp edge that can effortlessly cut through soil and roots.
After sharpening, remember to wipe the blade clean with a dry cloth to remove any metal filings. Inspect the edge to ensure it is uniformly sharp before testing it on a soft material or soil. A well-sharpened trowel will not only make gardening tasks easier and more efficient but also reduce strain on your hands and wrists. Properly sharpened tools not only last longer but also provide better results when working in the garden.
• Clean any dirt or debris off the trowel with a brush or damp cloth
• Use a file or sharpening stone to carefully sharpen the blade
• Hold the file at a consistent angle against the edge of the trowel and push it away from you in smooth strokes
• Repeat until you achieve a sharp edge that can effortlessly cut through soil and roots
After sharpening, remember to wipe the blade clean with a dry cloth to remove any metal filings. Inspect the edge to ensure it is uniformly sharp before testing it on soft material or soil. A well-sharpened trowel will not only make gardening tasks easier and more efficient but also reduce strain on your hands and wrists. Properly sharpened tools not only last longer but also provide better results when working in the garden.
Maintaining the Edges of Your Weed Eater Blades
To ensure optimal performance of your weed eater, it is essential to regularly maintain the edges of the blades. Over time, the blades can become dull from cutting through tough vegetation, such as thick weeds and grass. To keep them sharp, use a file or grinder specifically designed for sharpening metal blades. Carefully run the file along the edge of the blade in a consistent motion, making sure to maintain the original angle of the cutting edge.
Additionally, it is important to inspect the blades for any signs of damage, such as chips or cracks. If you notice any imperfections, it is crucial to address them promptly to prevent further deterioration and ensure safe operation. Regularly cleaning the blades after each use can also help maintain their sharpness and extend their lifespan. By incorporating these simple maintenance tasks into your routine, you can keep your weed eater blades in top condition for efficient and effective cutting operations in your garden.
• Regularly maintain the edges of the blades to ensure optimal performance
• Use a file or grinder specifically designed for sharpening metal blades
• Carefully run the file along the edge in a consistent motion, maintaining the original angle
• Inspect blades for any signs of damage like chips or cracks
• Address any imperfections promptly to prevent further deterioration and ensure safe operation
• Clean blades after each use to maintain sharpness and extend lifespan.
Sharpening Techniques for Garden Scissors
When it comes to sharpening garden scissors, it’s crucial to ensure they are in optimal condition to make clean and precise cuts. Begin by assessing the blade’s condition and determining if it needs sharpening. One effective technique is to use a sharpening stone or a fine-grit file to hone the blade’s edge at the same angle as the existing bevel, taking care to maintain a consistent angle throughout the process. Continue sharpening until the blade is sharp enough to effortlessly slice through paper or thin cardboard with minimal resistance.
After sharpening the blade, it’s essential to remove any burrs that may have developed during the sharpening process. A quick way to do this is by gently running the backside of the blade along a leather strop or a fine-grit sandpaper. This will help ensure that the blade is not only sharp but also smooth, allowing for clean cuts without unnecessary snagging or tearing of the plant material. Regular maintenance and sharpening of your garden scissors will not only prolong their lifespan but also improve their cutting performance, making gardening tasks more efficient and enjoyable.
• Assess the blade’s condition before sharpening
• Use a sharpening stone or fine-grit file to hone the blade’s edge
• Maintain a consistent angle throughout the sharpening process
• Continue sharpening until the blade can effortlessly slice through paper or thin cardboard
• Remove any burrs by running the backside of the blade along a leather strop or fine-grit sandpaper
• Regular maintenance and sharpening will prolong lifespan and improve cutting performance
Preventing Rust on Your Garden Tools
To prevent rust on your garden tools, it’s essential to keep them clean and dry after each use. Moisture is one of the main culprits of rust formation, so making sure your tools are not left damp is crucial. A simple wipe down with a dry cloth or a quick spray of oil can go a long way in protecting the metal surfaces from oxidation. Additionally, storing your tools in a dry area, away from humid conditions, can also help prevent rust from developing.
Regular maintenance is key in keeping rust at bay. Inspect your garden tools regularly for any signs of rust or corrosion. If you spot any, address it immediately by removing the rust with a wire brush or sandpaper. Applying a protective coating of oil or a rust inhibitor can help create a barrier between the metal and moisture, further preventing rust from spreading. By taking these preventative measures, you can prolong the lifespan of your garden tools and ensure they remain in top condition for years to come.
• Clean and dry your garden tools after each use
• Store them in a dry area away from humid conditions
• Regularly inspect for signs of rust or corrosion
• Remove any rust with a wire brush or sandpaper immediately
• Apply a protective coating of oil or rust inhibitor to prevent further rust formation
Proper Storage for Sharpened Tools
Proper storage is crucial for maintaining the sharpness of your gardening tools. After sharpening your tools, it is important to store them in a dry and clean environment to prevent them from rusting or dulling quickly. Consider investing in a tool storage rack or container to keep your sharpened tools organized and easily accessible.
Avoid storing your sharpened tools in damp or humid areas, as moisture can lead to rusting and corrosion. Additionally, make sure to store your tools away from any harsh chemicals or solvents that could damage the sharp edges. Proper storage not only prolongs the life of your sharpened tools but also ensures that they are ready for use whenever you need them in the garden.
• Store sharpened tools in a dry and clean environment
• Invest in a tool storage rack or container for organization
• Avoid damp or humid areas to prevent rusting
• Keep tools away from harsh chemicals or solvents to protect sharp edges
The Best Time to Sharpen Your Tools
Spring is generally considered the best time to sharpen your gardening tools. A sharp edge on your tools will ensure clean cuts on plants, promoting healthy growth. Sharpening your tools at the start of the gardening season will set you up for success and make your work easier throughout the year.
It is recommended to sharpen your tools before they become excessively dull. Regular maintenance of your tools will prolong their lifespan and save you time and effort in the long run. Keeping your tools sharp will also prevent damage to your plants, as dull blades can cause tearing and bruising instead of clean cuts. Remember, a little upkeep goes a long way in maintaining the efficiency and effectiveness of your gardening tools.
• Sharpen your gardening tools in the spring for the best results
• A sharp edge promotes healthy growth in plants
• Regular maintenance of tools prolongs their lifespan
• Prevent damage to plants with sharp blades
• Upkeep of tools is key to efficiency and effectiveness
Sharpening Safety Precautions
When sharpening your gardening tools, it’s crucial to prioritize safety to prevent accidents and injuries. Always wear protective gear such as gloves and safety goggles to shield yourself from any potential harm. Additionally, work in a well-lit and spacious area to ensure you have enough room to move around and handle the tools safely.
Another important safety precaution is to make sure your tools are properly secured before sharpening them. This prevents any accidental slips or movements that could lead to injuries. Always handle sharp tools with care and attention, keeping your hands and fingers away from the cutting edges during the sharpening process. By following these safety precautions, you can maintain a safe sharpening environment and keep yourself protected while enhancing the efficiency of your gardening tools.
• Always wear protective gear such as gloves and safety goggles
• Work in a well-lit and spacious area
• Make sure your tools are properly secured before sharpening them
• Handle sharp tools with care and attention
• Keep hands and fingers away from cutting edges during the sharpening process.
Common Mistakes to Avoid When Sharpening
One common mistake to avoid when sharpening your gardening tools is using the wrong sharpening tool for the job. Each tool requires a specific type of sharpener, such as a file, sharpening stone, or grinder. Using the wrong tool can damage the blade or make it less effective in the long run.
Another mistake to avoid is applying too much pressure while sharpening. It can be tempting to use force to speed up the process, but this can lead to uneven sharpening and potentially damage the blade. Instead, use a steady hand and let the sharpening tool do the work for you. Remember, it’s better to take your time and sharpen correctly than rush and risk ruining your tools.
• Using the wrong sharpening tool for the job can damage the blade
• Applying too much pressure while sharpening can lead to uneven sharpening and potential damage
• It’s better to take your time and sharpen correctly than rush and risk ruining your tools
How to Test the Sharpness of Your Tools
To test the sharpness of your tools, run your finger lightly along the edge of the blade. Be cautious to avoid pressing too hard to prevent injury. A sharp blade will feel smooth and will easily catch on your skin, whereas a dull blade will glide over without catching.
Another method to test the sharpness of your tools is to gently slice through a piece of paper. A sharp tool will effortlessly cut through the paper with clean edges, while a dull tool will tear or leave jagged edges. Regularly checking the sharpness of your tools will help ensure they are in optimal condition for efficient and effective use in your gardening endeavors.
• To test the sharpness of your tools, run your finger lightly along the edge of the blade
• Be cautious to avoid pressing too hard to prevent injury
• A sharp blade will feel smooth and easily catch on your skin
• A dull blade will glide over without catching
• Another method is to gently slice through a piece of paper
• A sharp tool will effortlessly cut through with clean edges
• A dull tool will tear or leave jagged edges
Regularly checking the sharpness of your tools will help ensure they are in optimal condition for efficient and effective use in your gardening endeavors.
Professional Sharpening Services vs DIY
When it comes to sharpening your gardening tools, you may be faced with the decision of whether to invest in professional sharpening services or tackle the task yourself. Professional sharpening services offer the expertise and specialized equipment needed to ensure your tools are sharpened to precision. They can provide a level of sharpness that may be challenging to achieve with DIY methods, especially for complex tools like hedge trimmers or lawn mower blades. Additionally, professional services can help extend the overall lifespan of your tools by ensuring they are sharpened correctly and uniformly.
On the other hand, opting for a do-it-yourself approach to sharpening your gardening tools can offer cost savings and convenience, especially for simpler tools like hand saws or trowels. DIY sharpening allows you to maintain your tools at your own pace and customize the sharpness to your specific preferences. With the right tools and techniques, you can effectively sharpen your gardening tools at home, saving time and money in the long run. However, it is essential to educate yourself on proper sharpening methods to avoid damaging your tools in the process.
• Professional sharpening services offer expertise and specialized equipment
• They can provide a level of sharpness that may be challenging to achieve with DIY methods
• Professional services can help extend the overall lifespan of your tools
• DIY sharpening offers cost savings and convenience
• Especially useful for simpler tools like hand saws or trowels
• Allows you to maintain your tools at your own pace and customize the sharpness to your preferences
It is important to weigh the pros and cons of each option before deciding how to sharpen your gardening tools. Consider factors such as the complexity of the tool, your skill level, time constraints, and budget when making this decision. Ultimately, choosing between professional sharpening services and a do-it-yourself approach will depend on what works best for you and ensures that your gardening tools are kept in top condition for years to come.
Resources for Sharpening and Maintaining Your Gardening Tools
For those who prefer to leave the sharpening and maintenance of their gardening tools to professionals, there are a variety of resources available. Local hardware stores often offer sharpening services for a nominal fee, providing convenience for those who prefer not to tackle the task themselves. Additionally, many garden centers and equipment rental shops also provide sharpening services for a range of gardening tools, ensuring that your tools are kept in top condition without the hassle of DIY sharpening.
If you are interested in sharpening your gardening tools yourself, there are numerous resources available to guide you through the process. Online tutorials and videos can offer step-by-step instructions for sharpening specific tools, while gardening books and magazines often feature articles on tool maintenance. Investing in a quality sharpening stone and honing oil can also be beneficial for those looking to sharpen their tools at home, providing the necessary tools for keeping blades sharp and ensuring a job well done.
• Local hardware stores offer sharpening services for a fee
• Garden centers and equipment rental shops also provide sharpening services
• Online tutorials and videos offer step-by-step instructions for DIY sharpening
• Gardening books and magazines feature articles on tool maintenance
• Investing in a quality sharpening stone and honing oil can be beneficial